Secrets to Wireworking Video 8: Wire-Wrapped Bails Single-Strand Necklace with Black Onyx Gemstone Focal, Crystal Passions® Beads and Drops and Wirework

The next project in our wirework series is a classic wire-wrapped donut necklace. Go along with Patti as she teaches you how to embellish this favored gemstone shape with wire-weaving and crystal bicones. Then attach the finished pendant to the chain of your choice with the featured technique--a wire-wrapped bail.


Hover over to zoom.
Design Idea MH30
-- Designer --
Patti, Jewelry Designer, Exclusively for Fire Mountain Gems and Beads®
To learn more about Patti Miller, read her jewelry artist success story here.
: : : Materials : : :
Click here to view a full list of materials used in this design.
Please take the creative opportunity to select the products of your choice for this design, offered here at Fire Mountain Gems and Beads. Some materials may not be available or listed.
- Bead, Crystal Passions®, crystal light chrome, 3mm bicone (5328)
- Bead, Crystal Passions®, crystal light chrome, 4mm bicone (5328)
- Bead, Crystal Passions®, crystal light chrome, 5mm bicone (5328)
- Drop, Crystal Passions®, jet, 11x5.5mm faceted briolette pendant (6010)
- Drop, Crystal Passions®, jet, 17x8.5mm faceted briolette pendant (6010)
- Focal, black onyx (dyed), 40mm round donut, B grade, Mohs hardness 6-1/2 to 7
- Chain, antique copper-plated brass, 4x3.5mm curb, 36 inches
- Jump ring, clear-coated copper, 5x4.5mm oval, 3.8x3.2mm inside diameter, 22 gauge
- Jump ring, sterling silver, 4mm round, 2.4mm inside diameter, 20 gauge
- Wire, ParaWire™, copper, round, 20 gauge
- Wire, ParaWire™, copper, round, 26 gauge
- Wire, sterling silver, dead-soft, round, 26 gauge
- Pliers, wire-wrapping, stainless steel and PVC plastic, black, 6 inches
Instructions
Step 1
Cut a 36-inch chain in half, keeping the clasps attached.
Cut the following lengths of wire:
- 20-gauge copper - two 14-inch
- 26-gauge sterling silver - one 14-inch, one 10-inch, three 5-inch
- 26-gauge copper - two 8-inch
Wrapping the Donut
Step 2
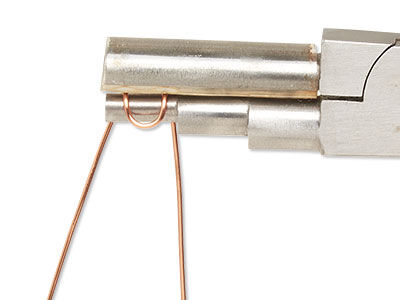
Using the smallest barrel of stepped wire-wrapping pliers, create a U-shaped bend four inches from the end of a 14-inch length of 20-gauge copper wire. Create a hook 2mm from the U-shaped bend then bend the wires outward 90 degrees.
Step 3
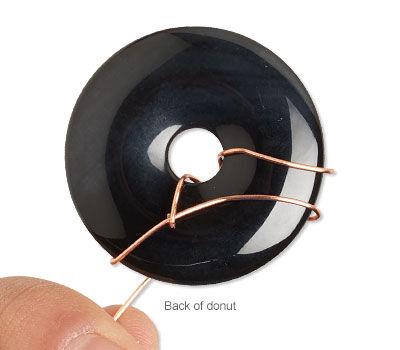
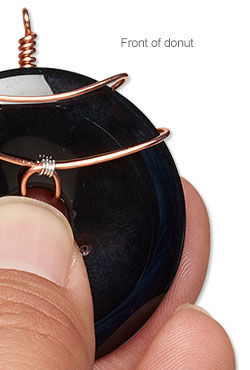
Place the donut on the hook and hold securely. Bend the long wire tail around and across the front, creating an arc along the hole.
Bring the wire around and across the back. Tightly wrap the short wire tail around the long tail twice. Trim excess from the short tail.
Step 4
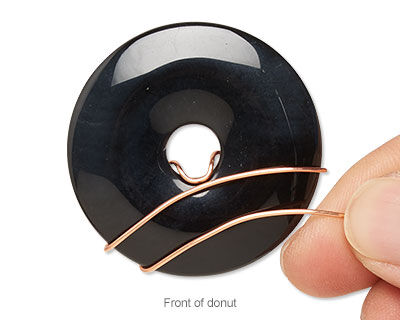
Wrap the wire across the front of the donut, creating a parallel arc 6mm from the first.
Step 5
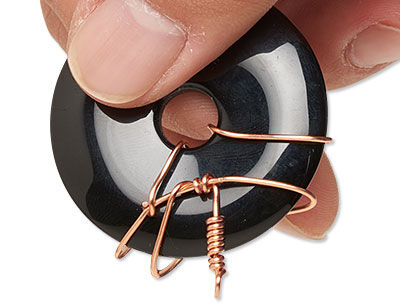
Bring the wire to the back of the dount then wrap tightly around the center wire twice to secure. Move the wire out and perpendicular to the hole, then create a wrapped loop that slightly extends past the edge of the donut.
Note: If needed, temporarily bend the stem of the loop away from the donut for more room while wrapping.
Step 6
Use a 5-inch length of wire to tightly wrap the hook and closest arc together four times. Trim any excess wrapping wire.
Step 7
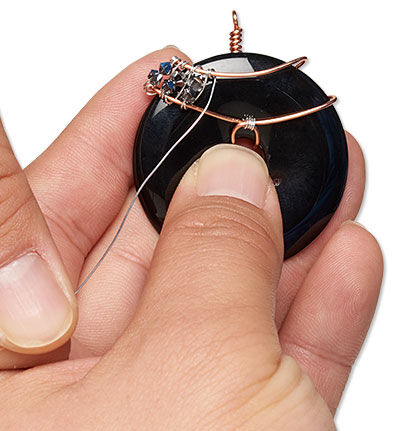
Tightly wrap the end of a 14-inch length of silver wire at the edge of an arc.
String on two 3mm bicones then tightly wrap twice around the opposite arc. Cross the wire back to the first arc and tightly wrap twice. Repeat until the arc has been filled with bead embellished wire weaving, then tightly wrap around an arc three times to secure. Trim any excess wrapping wire.
Note: This pendant needed ten rows of bicones to fill the arcs, but this can vary with each piece.
Creating the Bail
Step 8

Using the smallest barrel of stepped pliers, create a U-shaped bend 1-1/2 inches from the end of a 14-inch length of 20-gauge copper wire. Create a hook that is the same length as the radius of the donut.
Step 9
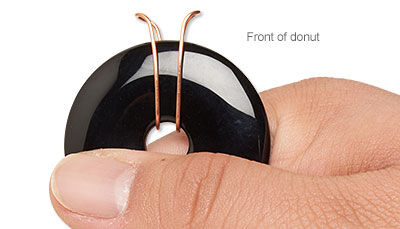
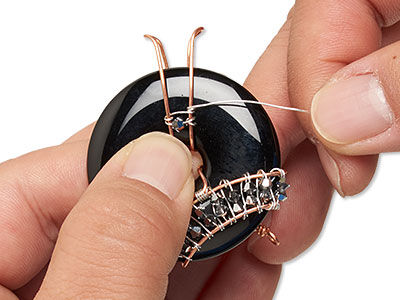
Place the bail on the donut opposite the wirework and hold securely in place. Approximately 12mm from the donut edge, create U-shaped bends so each wire is brought to the end of the hook on the back. Gently flare the top of the bail out with stepped pliers and then move the wire to create a taper from 4mm to 8mm from the hole to the top of the bail.

Remove the donut from the bail. Create a simple loop on each end of the wire, just above the hook, then replace the donut.
Step 10
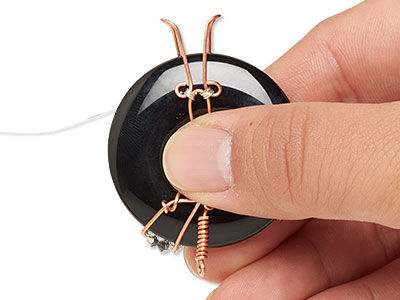
Use a 5-inch length of wire to securely wrap the simple loops on the back of the bail to the hook.
Step 11
Use the wire weaving technique from Step 7 to embellish the bail with a row with one 3mm bicone, a row with one 4mm bicone and a row with one 5mm bicone. After the last bicone, wrap tightly around the opposite side of the bail to secure. Do not trim the wrapping wire at this time.
Step 12
Bring the wire up toward the top of the bail. Wrap tightly around one “post” of the bail three times, directly next to the edge of the donut. Repeat to wrap around the three remaining posts. Trim any excess wrapping wire.
Assembly
Step 13
String a 17mm briolette onto an 8-inch length of wire, leaving 2 inches on one side. Bring both ends up and cross just over the top of the drop. Create a simple loop with the short end of the wire then wrap down the stem with the long end, creating a cone. Repeat to wrap an 11mm drop.
Step 14
Use 4mm round jump rings to attach the drops to the wrapped loop at the bottom of the donut.
Use oval jump rings to attach each half of the chain to opposite sides of the bail.
Have a question regarding this project? Email Customer Service.
Copyright Permissions
The pieces featured in the Gallery of Designs are copyrighted designs and are provided for inspiration only. We encourage you to substitute different colors, products and techniques to make the design your own.
All works of authorship (articles, videos, tutorials and other creative works) are from the Fire Mountain Gems and Beads® Collection, and permission to copy is granted for non-commercial educational purposes only. All other reproduction requires written permission. For more information, please email copyrightpermission@firemtn.com.