Secrets to Wireworking Video 6: Planishing (Hammering) Earrings with Crystal Passions® Beads and Wirework
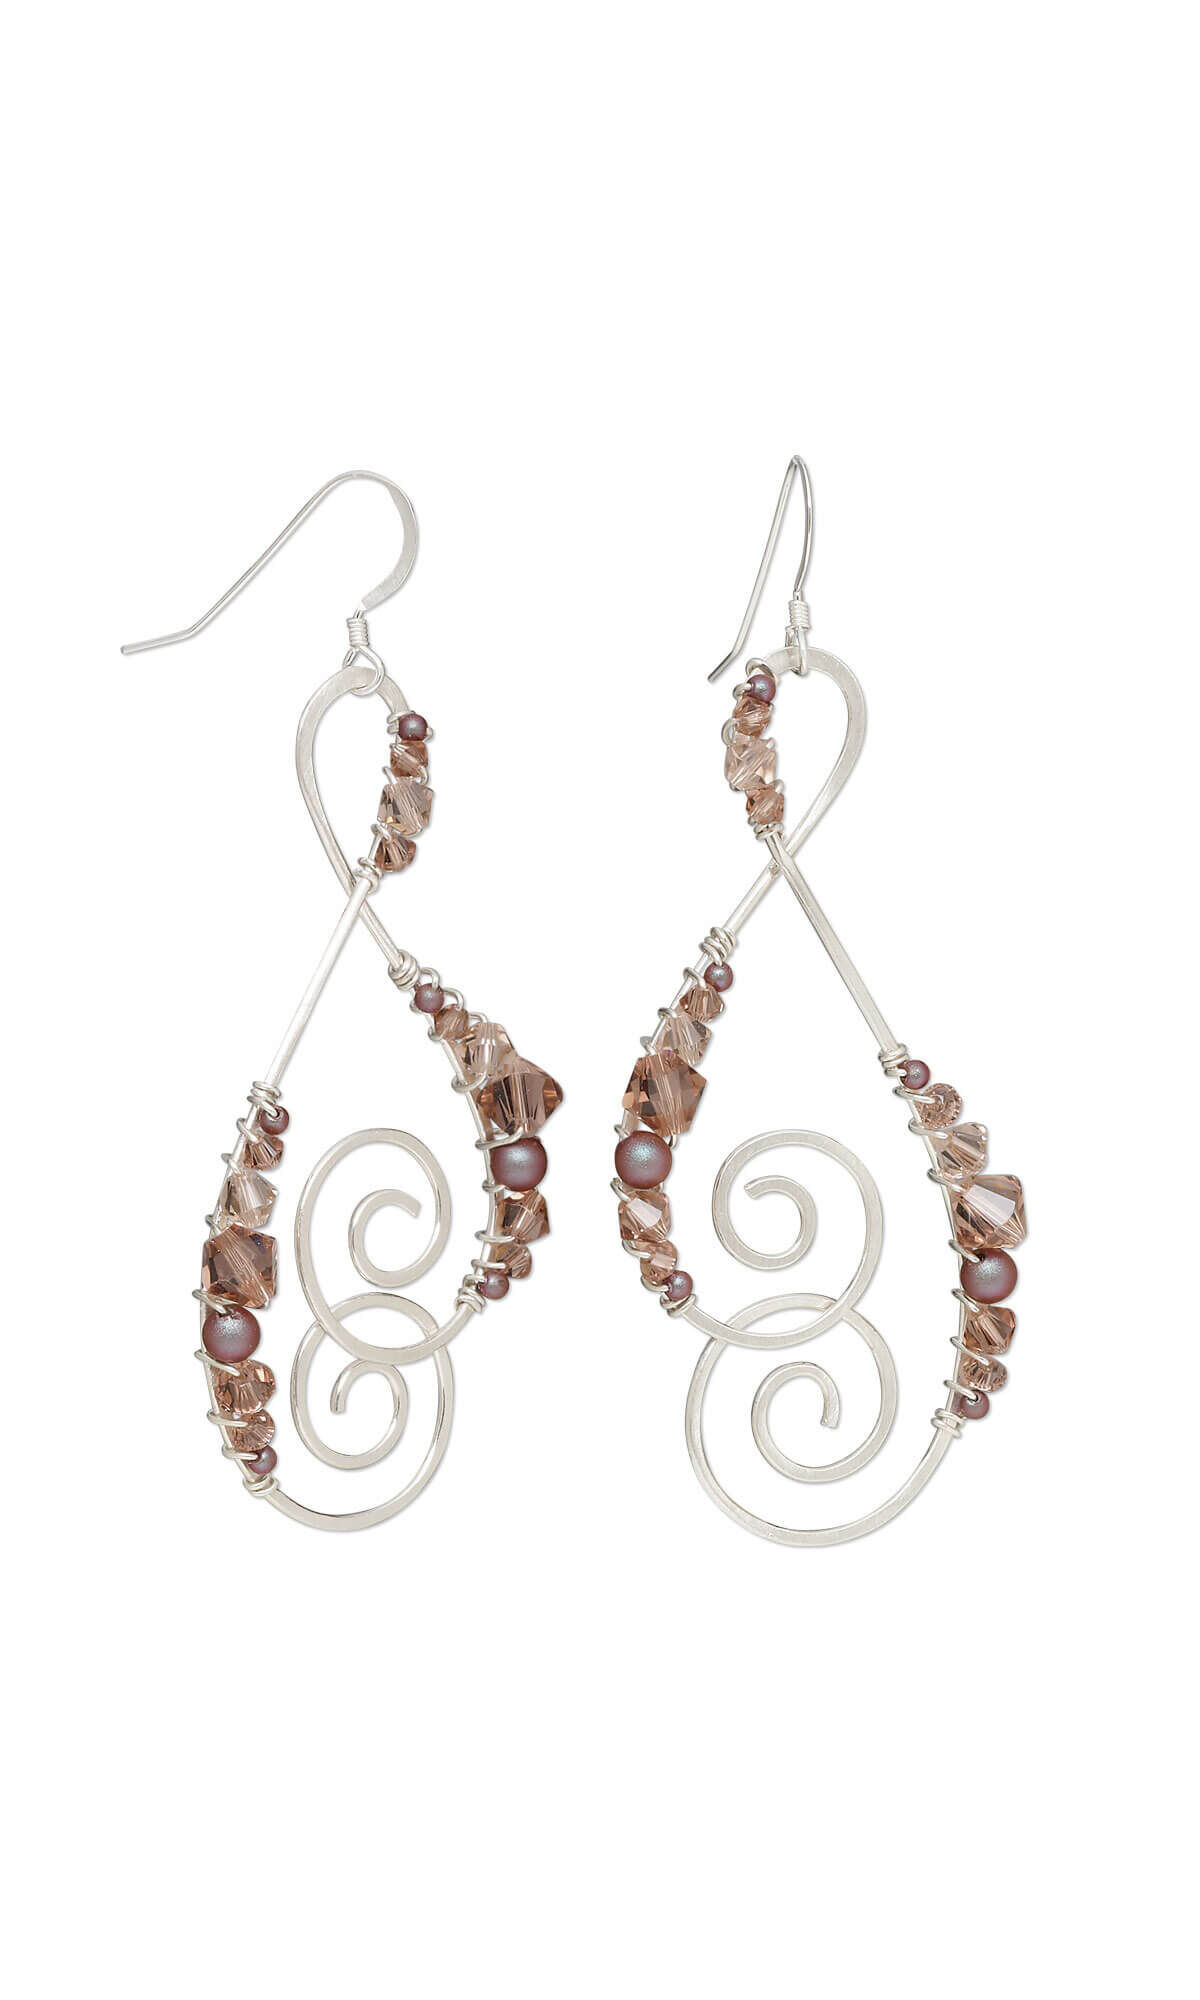


Design Idea MH28
-- Designer --
Patti, Jewelry Designer, Exclusively for Fire Mountain Gems and Beads®
To learn more about Patti Miller, read her jewelry artist success story here.
: : : Materials : : :
Click here to view a full list of materials used in this design.
Please take the creative opportunity to select the products of your choice for this design, offered here at Fire Mountain Gems and Beads. Some materials may not be available or listed.
- Bead, Crystal Passions®, blush rose, 3mm bicone (5328)
- Bead, Crystal Passions®, blush rose, 4mm bicone (5328)
- Bead, Crystal Passions®, blush rose, 6mm bicone (5328)
- Bead, Crystal Passions®, vintage rose, 4mm bicone (5328)
- Pearl, Crystal Passions®, iridescent red, 2mm round (5810).
- Pearl, Crystal Passions®, iridescent red, 4mm round (5810)
- Ear wire, sterling silver, 15mm flat fishhook with 2mm coil and open loop, 22 gauge
- Wire, sterling silver, dead-soft, round, 18 gauge
- Wire, sterling silver, dead-soft, round, 24 gauge
- Sanding pad, micro-mesh, 2-inch square, 1500-12000 grit
- Chasing hammer, steel and rubberwood, natural, 28mm convex head and 14mm ball head, 10 inches

The next project in our wirework series shows how to hammer out--or planish--the details of your wirework designs. Patti shows you how to play with line-weight by flattening specific parts of your wire shapes. The effect is a ribbon-like look that’s elevated even more when you incorporate the shimmering crystals.
Instructions
Cut the following:
- Two 8-inch and two 12-inch lengths of 24-gauge wire
- Two 11-inch lengths of 18-gauge wire
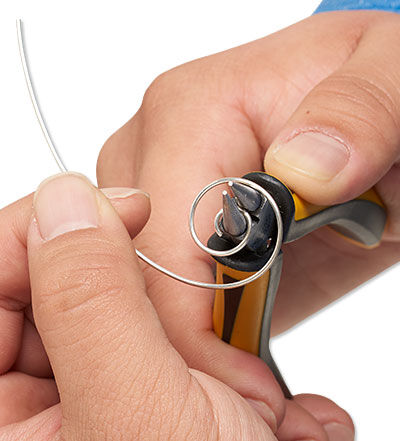
Using an 11-inch length of wire and round-nose pliers, form one end into a spiral approximately 1 inch in diameter with 5mm of spacing.
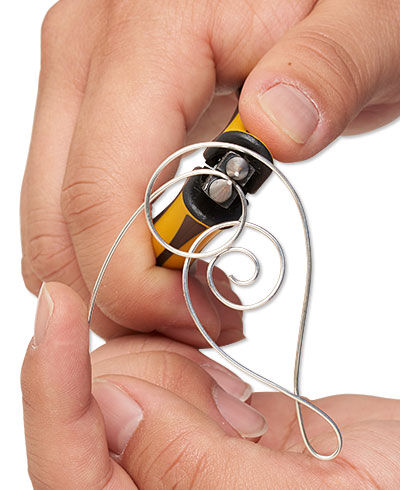
Measuring approximately 1-1/4 inches from the top of the spiral, bring the tail above the spiral then use round-nose pliers to form a loop in the opposite direction and bring the wire back down around the outside of the spiral on the opposite side.
Note: The wire shape should resemble a treble clef music note.
Continue to bring the wire down below the spiral then form a loop, approximately the same diameter of the spiral.
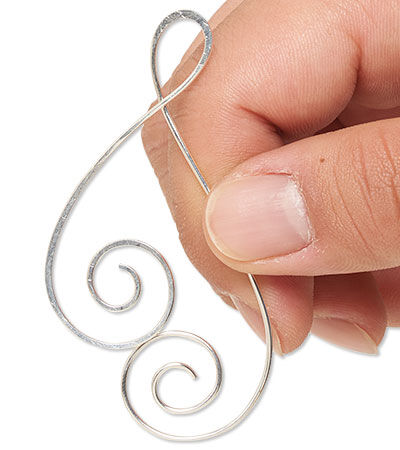
Form the tail of the wire into a spiral of equal dimension to the first spiral but in the opposite direction.
Trim excess wire.
Using a hammer and a bench block, flatten the wire component throughout the design. Use sanding paper to smooth any rough edges.
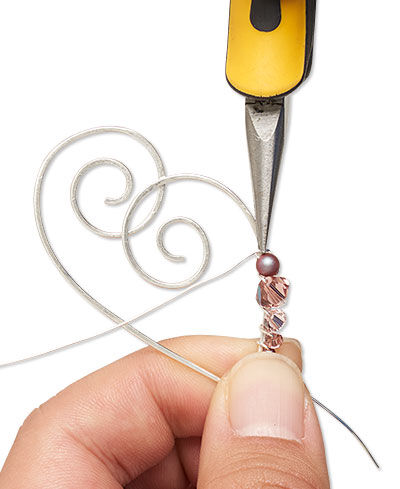
Wrap one end of a 12-inch length of 24-gauge wire twice around the flattened wire, near the top loop but on the top spiral side of the wire, leaving a shorter tail approximately 1-1/4 inches long.
String one 2mm pearl onto the wire then wrap once around the base wire.
Continue adding beads and pearls to the wire in the following pattern, wrapping the working wire around the base once between each:
- One 2mm pearl
- One 3mm bicone
- One 4mm bicone
- One 6mm bicone
- One 4mm pearl
- One 4mm bicone
- One 3mm bicone
- One 2mm pearl
Wrap the tail twice around the base then trim excess wire to secure.
Bring the short tail of wire around the back of the base then follow the base of the wire until you cross over the top loop. Wrap once around the loop of the base wire then string the following onto the wire, wrapping once around the base between each:
- One 3mm bicone
- One 4mm bicone
- One 3mm bicone
- One 2mm pearl
Wrap once around the base wire to secure then trim excess.
Repeat Step 5 along the outside of the opposite side of the base wire, just above the bottom spiral.
Attach an ear wire to the top loop.
Repeat Steps 2 - 8, mirroring the spiral design, to create a second earring.
Have a question regarding this project? Email Customer Service.
Copyright Permissions
The pieces featured in the Gallery of Designs are copyrighted designs and are provided for inspiration only. We encourage you to substitute different colors, products and techniques to make the design your own.
All works of authorship (articles, videos, tutorials and other creative works) are from the Fire Mountain Gems and Beads® Collection, and permission to copy is granted for non-commercial educational purposes only. All other reproduction requires written permission. For more information, please email copyrightpermission@firemtn.com.