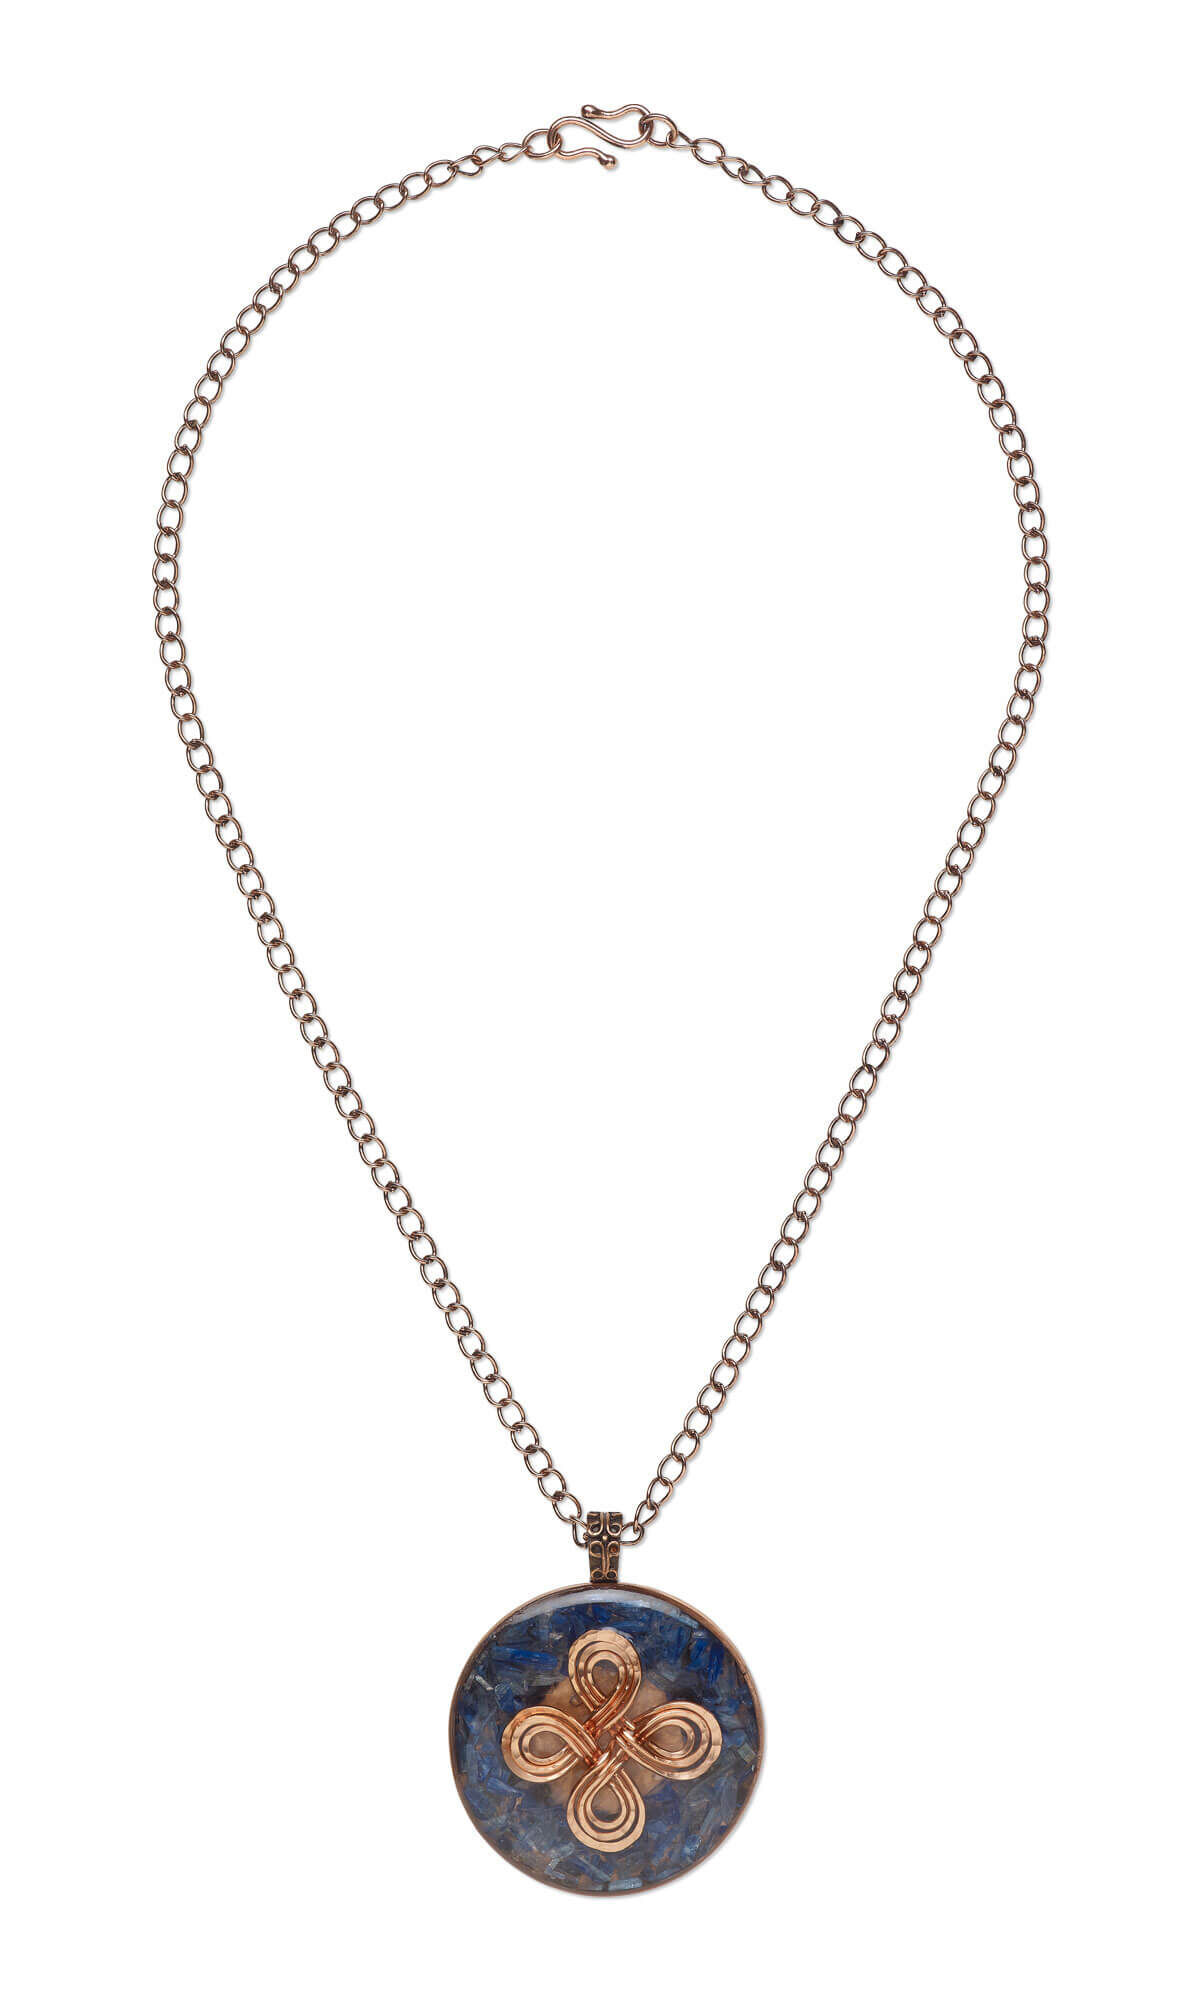
Single-Strand Necklace with Crushed Gemstone Chips, Wirework and Metalwork


Design Idea NF2G
-- Designer --
Patti, Jewelry Designer, Exclusively for Fire Mountain Gems and Beads®
To learn more about Patti Miller, read her jewelry artist success story here.
: : : Materials : : :
Click here to view a full list of materials used in this design.
Please take the creative opportunity to select the products of your choice for this design, offered here at Fire Mountain Gems and Beads. Some materials may not be available or listed.
- Inlay chip, white moonstone (natural), mini undrilled chip, Mohs hardness 6 to 6-1/2
- Inlay chip, kyanite (natural), mini undrilled chip, Mohs hardness 4 to 7-1/2
- Chasing hammer, steel and rubberwood, natural, 28mm convex head and 14mm ball head, 10 inches
- Saw blade mix, steel and plastic, white / red / black, 1/0 to 6/0, 5 inches
- Ball peen hammer, plastic and brass, black and yellow, 6-1/4 inches with 1-inch flat head and 1-inch ball head
- Sheet, copper, half-hard, 6x6-inch square, 28 gauge
- Solder paste, copper and phosphorus
- Sharpening and polishing system, Jooltool™, aluminum / plastic / steel, black and red, 100-240v / 50-60 HZ, 12 x 5-1/2 x 7 inches
- Chain, antique copper-plated brass, 4x3.5mm curb, 18 inches
- Pickle compound, Sparex®, sodium acid sulfate / nitre cake / sodium hydrogen sulfate, for non-ferrous metals
- Top coat, Signature Series Magic-Glos® by Lisa Pavelka, non-toxic dimensional gloss
- Beeswax, acrylic and wax, clear, 2 x 1/2 inch dispenser
- Safety glasses, fits over regular eyeglasses, polycarbonate and nylon, clear and black, anti-fog and scratch-resistant
- Abrasive disc, Ninja™ 3M™ Microfinishing, plastic, multicolored, 200-500 grit, 3-inch replacement abrasive disc for Jooltool™
- Tongs, copper, 8-3/4 inch curved
- Dapping block, steel and wood, 2x2-inch block with (24) doming punches
- Sanding pad, micro-mesh, 2-inch square, 1500-12000 grit
- Scoop, stainless steel, 6 x 1/2 inches with one pointed end and one curved end
- Clay cutter, galvanized steel, 20mm / 30mm / 40mm round
- Jeweler's saw, wood and nickel-plated steel, 12 x 4-1/4 inches with 3-inch frame depth, fits 1- to 7-1/2 inch long blade
- Firing block, compressed vermiculite, white, 6 x 4 x 1 inches
- Torch, Micro Torch, steel and acrylic, black, 6x4 inches. Sold individually.
- Wire, ParaWire™, copper, round, 18 gauge
- Wire, copper, half-hard, square, 16 gauge
- Wire jig, Thing-A-Ma-Jig, aluminum and plastic, clear, 5-1/2 x 4-1/2 inch with 30 pegs and fastener
- Adhesive, epoxy, Devcon® 2 Ton® Clear Epoxy, 30-minute, 2-part
- Bail, glue-on, antique copper-plated pewter (tin-based alloy), 22x8mm with 12x8mm rectangle flat base and decorative design
Instructions
Cut the following:
- One 30-inch length of 18-gauge copper wire
- One 4-1/4 inch length of 16-gauge square copper wire
- One 2-inch square of copper sheet
Creating the Bezel Cup
Use a cylindrical object approximately 1-3/4 inches in diameter to trace a circle onto the copper sheet. Using a jeweler’s saw, cut out the circle then use the JoolTool™ to smooth the edges.
Form the square wire around the same cylindrical object then cut both ends flush. Adjust the wire as needed so it fits flush onto the circle of copper sheet. Remove the wire from the sheet and solder the ends of the wire together.
Place the soldered wire ring back on the sheet. Adjust the wire as needed to ensure that there is no gap between the ring and sheet. Solder the wire ring to the sheet.
Use the JoolTool to sand the outside edge of the sheet circle until the seam between the sheet and the wire disappears. Repeat with the top edge of the wire to conceal the connection where the ends were soldered. Lightly brush the back, inside and top edge of the bezel using coarse sandpaper to apply a brushed finish.
Wire Hannunvaakuna Good Luck Symbol
Place four small pins four spaces apart in the wire jig to create a square. Place the 30-inch length of wire on the inside of two adjacent pegs with one end near one peg. Using the working end, tightly wrap the wire around the first peg so the straight end stays on the inside. Continue to wrap around the remaining three pegs, forming a square with loops as the outside corners.
Remove the wire from the jig. Clamp one loop with nylon-jaw pliers and continue wrapping the wire around the outsides of the existing shape. Move the pliers from loop to loop as needed and weave the wire between existing wraps to match the original path.
Cut the ends of the wire so they are hidden on the back side of the symbol.
Place the wire shape onto a steel block with the cut ends down. Avoiding the overlapping areas, lightly hammer the loops flat. Finish with a ball peen hammer on the flattened loops for a textured finish.
Gemstone and Wire Symbol Inlay
Pour a small amount of white moonstone inlay chips into the largest section of the dapping block. Cover with folded tissue paper then use the dapping block to crush the chips into smaller pieces. Use a sieve to sift the crushed chips from the powder then set aside the chips into a cup and discard the dust. Repeat using the kyanite inlay chips.
Important: Wear safety glasses and a face mask when crushing and handling inlay chips.
Place a 20mm round clay cutter into the center of the bezel. Pour crushed moonstone into the clay cutter, covering the visible copper.
Pour crushed kyanite into the bezel between the clay cutter and the outer edge. Remove the clay cutter by lifting straight up. Gently shift the chips to remove the space left by the cutter.
Place the wire symbol on top of the crushed gemstones so the hammered textured side is facing up. Beginning in the center and going in a tight spiral, apply MagicGlos® to the entire surface, stopping approximately 1/8 of an inch from the bezel edge. Use a toothpick to pull the MagicGlos to the edge.
Continue adding layers of MagicGlos in this fashion until the wire symbol is completely covered.
Place under a UV light to cure.
Mix Devcon® 5-Minute® Epoxy according to manufacturer's instructions. Apply a small bead of epoxy to a glue-on bail then press the bail onto the back of the bezel. Set aside to cure.
Attach a chain to the bail to complete the necklace.
Have a question regarding this project? Email Customer Service.
Copyright Permissions
The pieces featured in the Gallery of Designs are copyrighted designs and are provided for inspiration only. We encourage you to substitute different colors, products and techniques to make the design your own.
All works of authorship (articles, videos, tutorials and other creative works) are from the Fire Mountain Gems and Beads® Collection, and permission to copy is granted for non-commercial educational purposes only. All other reproduction requires written permission. For more information, please email copyrightpermission@firemtn.com.