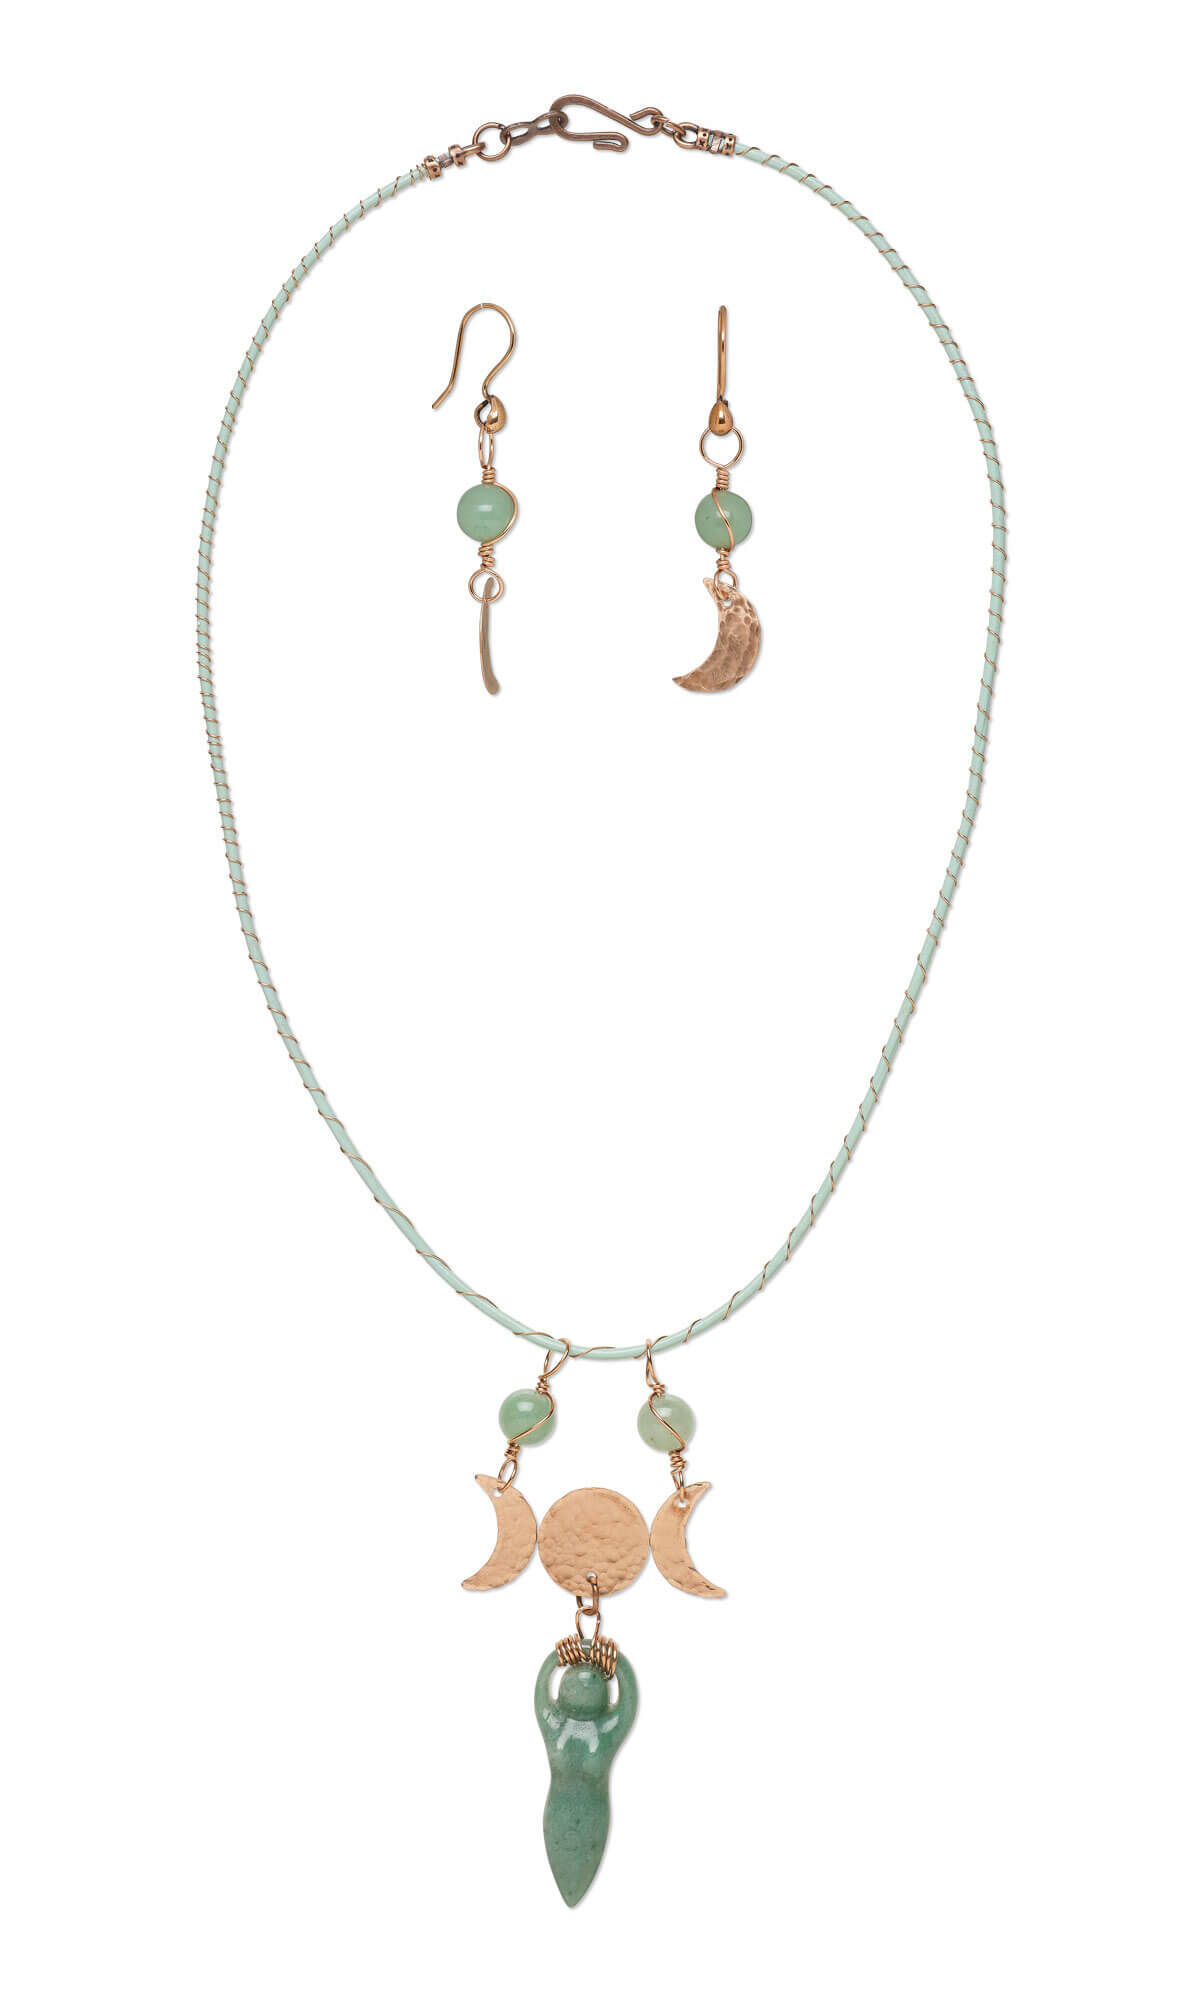
Single-Strand Necklace and Earring Set with Green Aventurine Gemstone Beads and Focal, Copper Sheet and Wire Wrap


Design Idea ME2G
-- Designer --
Patti, Jewelry Designer, Exclusively for Fire Mountain Gems and Beads®
To learn more about Patti Miller, read her jewelry artist success story here.
: : : Materials : : :
Click here to view a full list of materials used in this design.
Please take the creative opportunity to select the products of your choice for this design, offered here at Fire Mountain Gems and Beads. Some materials may not be available or listed.
- Bead, green aventurine (natural), 8mm round, B grade, Mohs hardness 7
- Clasp, hook-and-eye, antique copper-finished brass, 12.5x8.5mm flat
- Cord, leather (dyed), sky blue, 1.4-1.6mm round
- Crimp end, JBB Findings, antique copper-plated pewter (tin-based alloy), 5x3mm tube with loop, 1.7mm inside diameter
- Ear wire, antique copper-plated copper, 18.5mm fishhook with 5x4mm teardrop and open loop, 20 gauge
- Focal, green aventurine (natural), 39x15mm-40x16mm hand-cut undrilled single-sided goddess, B grade, Mohs hardness 7
- Jump ring, antique copper-plated brass, 6mm round, 4.4mm inside diameter, 20 gauge
- Sheet, copper, half-hard, 6x6-inch square, 24 gauge
- Spacer bar, silver-plated brass, 27x3mm 4-strand, fits up to 8mm bead
- Wire, copper, half-hard, round, 22 gauge
- Wire, Zebra Wire™, natural copper, round, 28 gauge
- Adhesive, Devcon® 5 Minute® Epoxy, 2-part
- Sanding pad, micro-mesh, 2-inch square, 1500-12000 grit
- Ball peen hammer, plastic and brass, black and yellow, 6-1/4 inches with 1-inch flat head and 1-inch ball head
- Torch, Micro Torch, steel and acrylic, black, 6x4 inches
- Firing block, compressed vermiculite, white, 6 x 4 x 1 inches
- Rotary tool, steel, grinding and polishing set with case
- Disc cutter, steel, black, 2-1/2 x 2-1/2 x 1-inch base for cutting 6.4-15.9mm rounds
- Drill bit, steel, 1-1/4 to 3 inches with 1-4mm twisted bit
- Drill press stand, MILESCRAFT® 1097 ToolStand™, steel / aluminum / plastic, black and white, 16 x 11 x 7 inches with 6x6-inch base plate
- Chasing hammer, steel and rubberwood, natural, 28mm convex head and 14mm ball head, 10 inches
- Embellishment positioner, Embellie Gellie™, plastic / silicone rubber / wood, clear, 2-1/8 x 1-1/4 inches with 4-1/2 inch wand
- Lubricant, PRO-CUT™, wax
Instructions
Necklace Instructions
Use a disc cutter to cut three 15mm circles from 25-gauge copper sheet.
Position one of the copper circles off center of the 15mm slot of the disc cutter, then cut to create a crescent. Repeat with a second copper circle to create a second crescent.
Gently hammer the remaining copper circle and the two crescents with a ball peen hammer to add texture. Be sure to hammer opposite sides of the crescents.
Use a hole punch tool to add a hole to the top of each crescent and the circle.
Mix a small amount of Devcon 2-part Epoxy according to the manufacturer directions.
Position one crescent, the circle and the second crescent snug against each other, texture down, and horizontal on your work surface. The holes of the crescents should be opposite the hole of the circle.
Apply a small amount of adhesive across the center of all three copper shapes then gently press a 4-strand spacer bar onto the adhesive. Allow the epoxy to cure.
Wire-Wrapped Components
Cut three 8-inch lengths of 22-gauge copper wire.
Create a loop approximately two inches from the end of a length of copper wire. String the hole of a crescent onto the loop. Continue by completing a wrapped loop with two wraps.
String an 8mm aventurine round onto the wire. Create a large wrapped loop with three wraps, leaving the space of approximately three wraps until the 8mm round.
Bring the wire around the bead in a slight curve then wrap around the stem of the first wrapped loop. Trim any excess wire.
Repeat to add a second wrapped link to the hole of the second crescent.
Pass the end of the third length of wire back between the arm and the head of an aventurine goddess focal.
Holding the end of the wire securely against the focal, wrap tightly up and around the arm four times. Bring the wire up the front of the arms, wrap halfway around the jaw of round-nose pliers then down the back of the arms.
Wrap tightly around the opposite arm in the opposite direction four times then trim any excess wire.
Gently move the coiled bail as needed to center the focal.
Wrapped Leather Cord
Cut an 18-inch length of leather cord.
Insert one end of the leather cord and the end of 30-gauge copper wire (working off the spool) into a crimp end then flatten with chain-nose pliers.
Tightly wrap the wire along the length of the cord. Trim the wire to match the length of the cord, then repeat Step 10 to secure the ends.
Assembly
String the two large loops of the wrapped beaded links onto the wrapped cord.
Use a 6mm jump ring to attach the bail of the goddess pendant to the hole of copper circle.
Use jump rings to attach each half of the clasp to the loops of the crimp ends.
Earring Instructions
Use a disc cutter to cut two 15mm circles from 25-gauge copper sheet.
Position one of the copper circles off center of the 15mm slot of the disc cutter then cut to create a crescent. Repeat with a second copper circle to create a second crescent.
Gently hammer crescents with a ball peen hammer to add texture. Be sure to hammer opposite sides of the crescents.
Use a hole punch tool to add a hole to the top of each crescent.
Cut two 8-inch lengths of 22-gauge copper wire.
Create a loop approximately two inches from the end of a length of copper wire. String the hole of a crescent onto the loop. Continue by completing a wrapped loop with two wraps.
String an 8mm aventurine round onto the wire. Create a large wrapped loop with three wraps, leaving the space of approximately three wraps until the 8mm round.
Bring the wire around the bead in a slight curve then wrap around the stem of the first wrapped loop. Trim any excess wire.
Repeat to add a second wrapped link to the hole of the second crescent.
Attach the unconnected loop of each component to an ear wire.
Have a question regarding this project? Email Customer Service.
Copyright Permissions
The pieces featured in the Gallery of Designs are copyrighted designs and are provided for inspiration only. We encourage you to substitute different colors, products and techniques to make the design your own.
All works of authorship (articles, videos, tutorials and other creative works) are from the Fire Mountain Gems and Beads® Collection, and permission to copy is granted for non-commercial educational purposes only. All other reproduction requires written permission. For more information, please email copyrightpermission@firemtn.com.