How to Make a Wire Hook-and-Eye Clasp

by Tammy Honaman, Author, Jewelry-Making Expert and Educator, Exclusively for Fire Mountain Gems and Beads®
Instructions
The Hook
Step 1
Cut a 6-inch length of wire.
Tip: You can use less or more wire; the length will determine the scale of your clasp.
Using the nylon-jaw pliers, run the length of wire through the pliers to straighten the wire.
Step 2
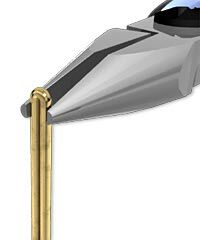
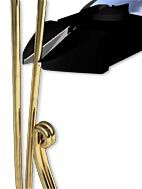
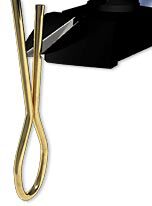
Using a pair of chain-nose pliers, working 2-inches from one end of the wire, make a 90-degree bend then push the wire so it is folded onto itself. By bending it first you make a sharp bend rather than a loop. Compress the bend so it is a clean seam.
Step 3
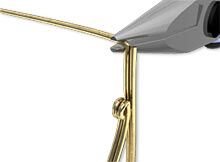
Using round-nose pliers, with the tip of the pliers placed at the top of the bend in the wire, rotate the pliers away from you to form a loop.
Step 4
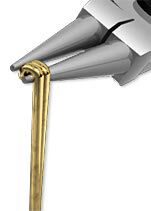
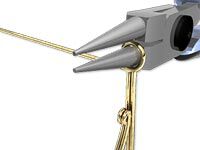
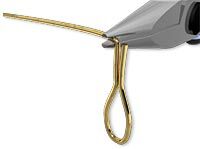
Rotate the wire so the loop is facing you. Place the larger portion of the barrel of the round-nose pliers about 1/4 inch down from the loop made in Step 3.
Rotate the pliers away from you to form another loop in the wire. This loop will be the hook portion of the clasp.
Step 5
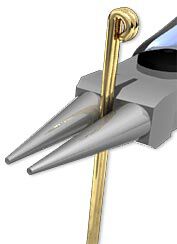
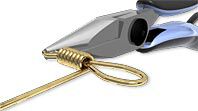
With the hook now formed, trim the shorter length of the wire to about 3/8 inch from the bottom of the hook. The shorter end will be tucked inside the wrapped loop formed next so can be cut shorter or left longer.
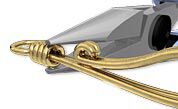
Using the tip of the chain-nose pliers, placed on the longer length of wire where it meets the shorter length, make a 90-degree bend away from the shorter length and out to the side.
Using the round-nose pliers, begin to form a wrapped loop, forming the loop so it is positioned at the base of the clasp.
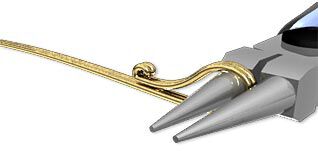
Tip: Depending on how you will connect this clasp to your stringing material and how you want the clasp to lie, you can form this loop so it is perpendicular or parallel to the hook of the clasp.
Finish the wrapped loop. Using flush-cutters, trim the excess wire then use the tip of the chain-nose pliers to tuck the end of the last wrap down toward the clasp so it doesn't catch on anything.
The Eye
Step 1
Cut the same length of wire you used to create the hook portion of the clasp.
Using the nylon-jaw pliers, run the length of wire through the pliers to straighten the wire.
Step 2
Place the large portion of the barrel of the round-nose pliers about 1/2 inch down from one end of the wire. Rotate the pliers away from you to form a loop. Using chain-nose pliers, bring the wires together so they are parallel to each other and form nice crisp bends below the loop. Using flush-cutters, trim the shorter end to about 1/4 inch below the loop. The shorter end will be tucked inside the wrapped loop formed next so can be cut shorter or left longer.
Step 3
Using the tip of the chain-nose pliers, placed on the longer length of wire where it meets the shorter length, make a 90-degree bend away from the shorter length and out to the side.
Using the round-nose pliers form a wrapped loop, capturing the shorter length of wire inside so it is hidden. Using flush-cutters, trim the excess wire then use the tip of the chain-nose pliers to tuck the end of the last wrap down toward the clasp so it doesn't catch on anything.
Have a question regarding this tutorial? Email Customer Service.
Copyright Permissions
All works of authorship (articles, videos, tutorials and other creative works) are from the Fire Mountain Gems and Beads® Collection, and permission to copy is granted for non-commercial educational purposes only. All other reproduction requires written permission. For more information, please email copyrightpermission@firemtn.com.