How to Use a Wire Jig
Create consistent loops, shapes, and custom wire designs with ease! In this quick tutorial, we’ll show you how to use a wire jig to bring your jewelry ideas to life

Instructions
Step 1

On a piece of graph or plain white paper, draw the placement of your pegs. Once you're familiar with the jig, you can skip this step and just place the pegs into your jig.
Step 2
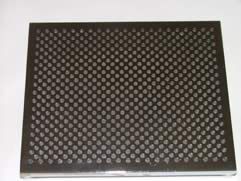
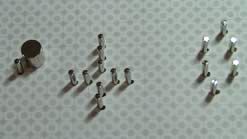
The top diagram is the wire jig without the paper pattern. Place the paper over the jig and insert the pegs into the holes as illustrated in the bottom diagram. Note the different size peg used in the design on the left-hand side.
Step 3
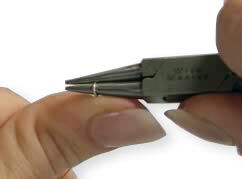
Make a loop on the end of your wire. Place the loop over the first peg.
Step 4
Wrap the wire around the pegs.
Step 5
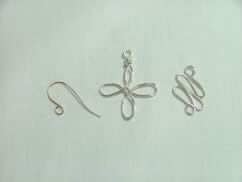
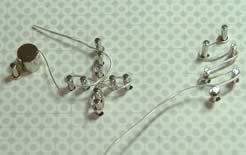
Remove the shapes from the pegs and adjust as needed. Note how the end of the earring finding is bent slightly at the tip, how the end of the wire is wrapped twice under the first loop in the center shape and how the waves were compressed to make a tighter shape—these are just suggestions; let your creativity shape your wire designs!
Shop for Your Materials Here:


Copyright Permissions
All works of authorship (articles, videos, tutorials and other creative works) are from the Fire Mountain Gems and Beads® Collection, and permission to copy is granted for non-commercial educational purposes only. All other reproduction requires written permission. For more information, please email copyrightpermission@firemtn.com.