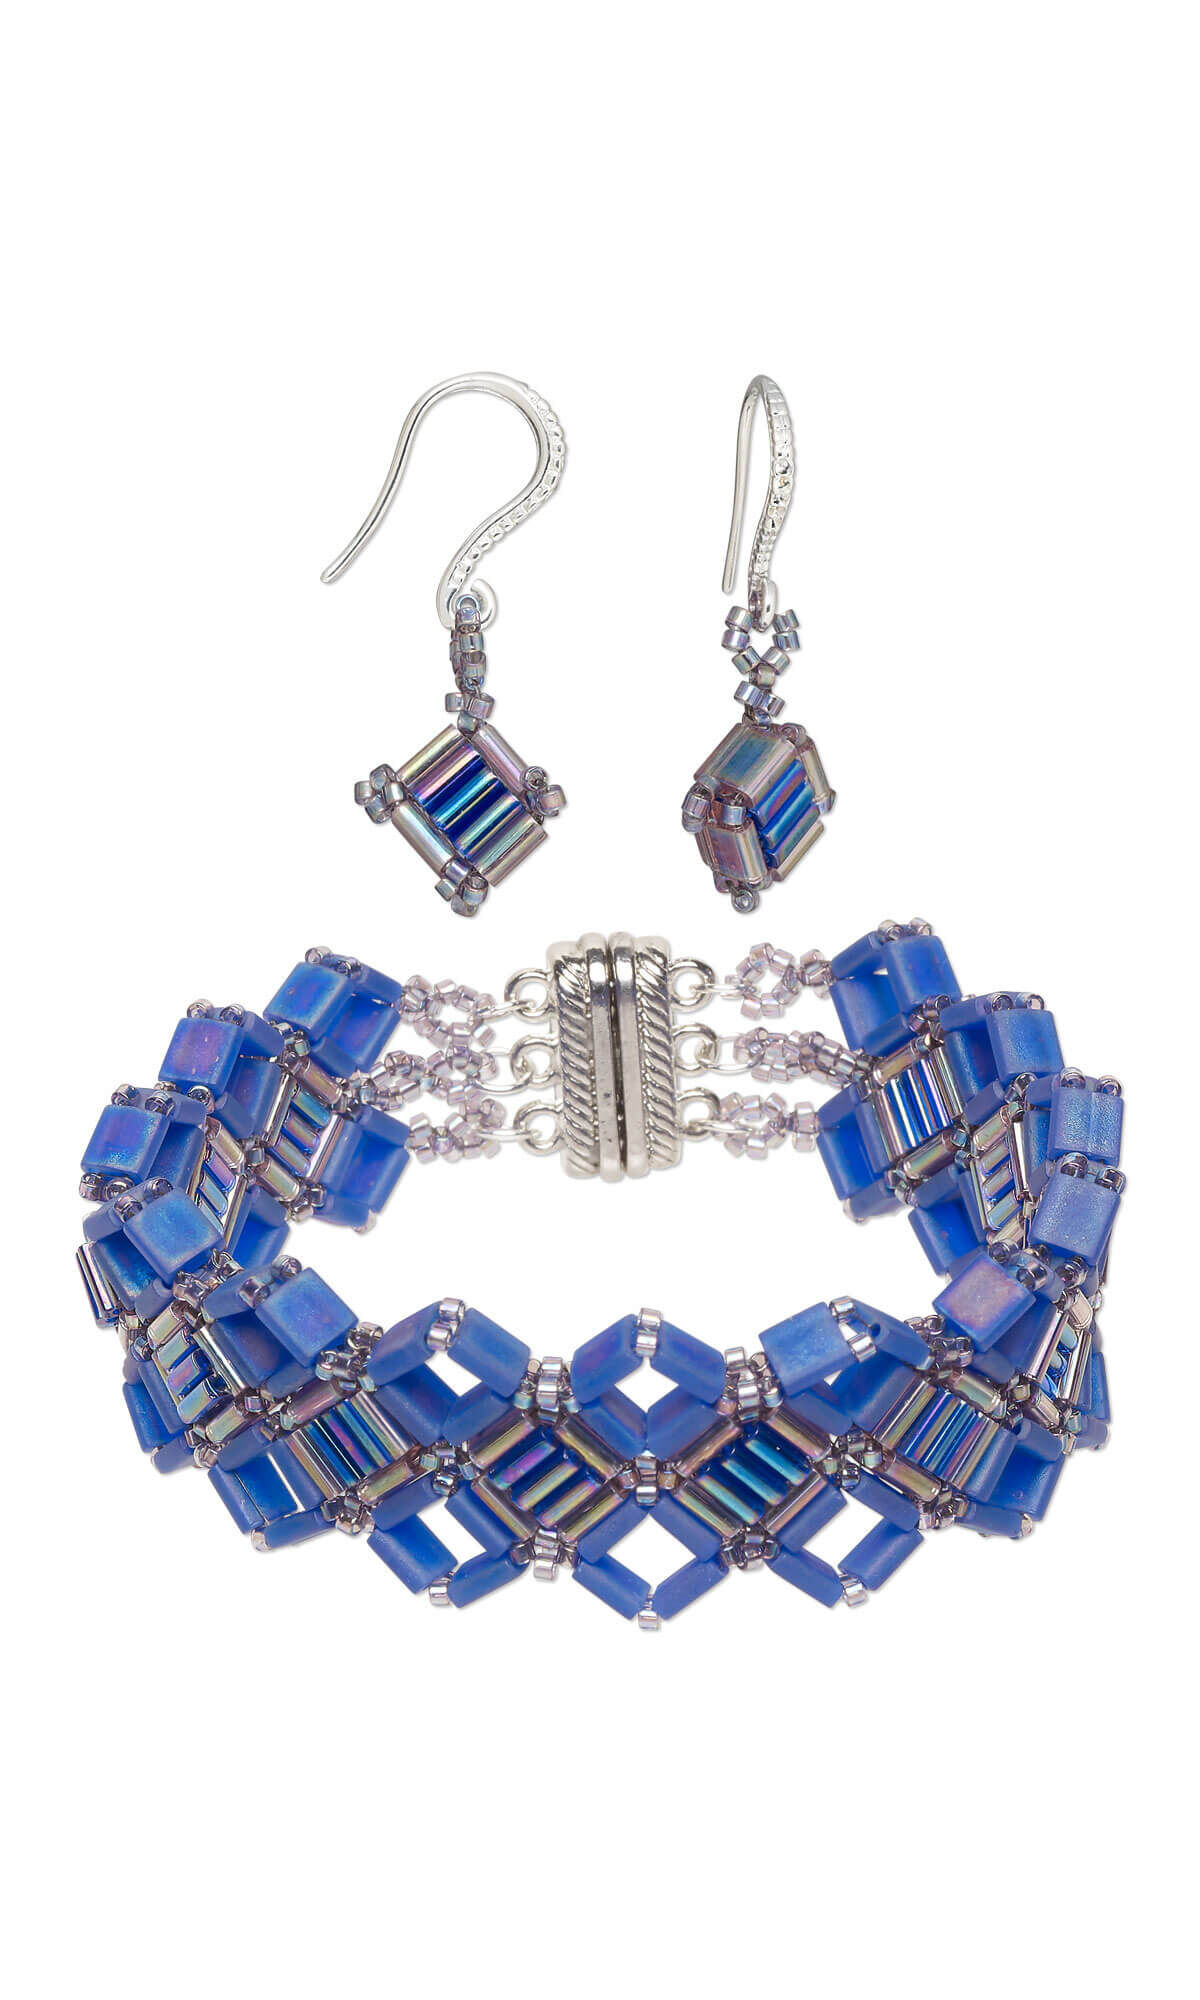
Bracelet and Earring Set with Miyuki TILA® Beads and Delica® Seed Beads


Design Idea MJ2J
-- Designer --
LauraLynn, Jewelry Designer, Exclusively for Fire Mountain Gems and Beads®
To learn more about LauraLynn, read her jewelry artist success story here.
: : : Materials : : :
Click here to view a full list of materials used in this design.
Please take the creative opportunity to select the products of your choice for this design, offered here at Fire Mountain Gems and Beads. Some materials may not be available or listed.
- Bead, Miyuki, TILA®, glass, transparent matte rainbow blueberry, (TL151FR), 5mm square with (2) 0.8mm holes, fits up to 3mm beads
- Bead, Miyuki, TILA®, glass, transparent rainbow dark cobalt, (TL177), 5mm square with (2) 0.8mm holes, fits up to 3mm beads
- Bead, Miyuki, TILA®, glass, transparent rainbow light amethyst, (TL256), 5mm square with (2) 0.8mm holes, fits up to 3mm beads
- Seed bead, Delica®, glass, translucent rainbow light amethyst, (DB1245), #11 round
- Clasp, 3-strand magnetic, silver-finished "pewter" (zinc-based alloy), 18x8mm double-sided rectangle with rope design
- Ear wire, silver-plated brass, 16mm textured fishhook with open loop, 20 gauge
- Jump ring, silver-plated brass, 5mm round, 3.6mm inside diameter, 22 gauge
- Thread, Berkley® FireLine®, gel-spun polyethylene, smoke, 0.08mm diameter, 2-pound test
Instructions
Bracelet Instructions
Cut a 3-foot length of Berkley® Fireline® thread. Thread a needle.
Working with only one hole of each bead and leaving a 12-inch tail, pick up a transparent rainbow light amethyst (color A) Tila bead and a transparent rainbow dark cobalt (color B) Tila bead. Pass back through the A and pull tight to stack the two Tila beads next to each other. Pass through the B again.
Pick up a B then pass back through the previous B. Pass through the picked-up B then pick up a B. Repeat to add another B and an A.
Pick up a seed bead, an A, and a seed bead then pass through the previously used hole of the first A of the ladder-stitched beads.
Repeat to add a seed bead, an A bead, and a seed bead on the opposite side of the ladder-stitched beads.
Using the same thread path and skipping the seed beads, pass through the A beads again and pull tight to form a square. Exit through an A bead.
Pass through the unused hole of an A bead then pick up four seed beads. Pass through the seed beads again and continue through the next A bead. Repeat to add a picot to three corners and a single seed bead to the fourth corner.
Using the same thread path and skipping the seed beads, pass through the A beads. Tie a knot in the working thread then pass through a seed bead, an A bead and a seed bead. Trim the thread, leaving an approximately 12-inch tail.
Repeat Steps 1 - 5 to create a total of twelve filled diamond components.
Using the tail of one filled diamond component, pick up four transparent matte rainbow blueberry (color C) Tila beads. Pass through the first C again. Pass back through the second hole of the same bead. Continue through the unused holes of the other three C beads then exit through the same hole of the first bead. This should form a loose diamond shape.
Pass through the next C then pick up a seed bead. Continue to add a seed bead between each C bead. When you reach the first C, pass back through the opposite holes to add seed beads to the other side. When necessary, pass through a single seed bead of the small picot stitch on one side of the filled diamond component.
Pass through beads until you reach the next side of the filled diamond component.
Repeat Steps 11 and 12 to add an empty diamond to the next side of the filled diamond component.
Tip: If you run out of thread, cut an extra length. Tie the extra length to the original with a square knot then use a thread burner on the tails to create a tiny "bead" at the end of the thread. Tug on the thread until the tails connect with the knot. The "bead" helps prevent the thread from coming apart.
Pick up a new filled diamond component. Pass the thread of the original through one side of the new and end the original thread.
Repeat Steps 7 - 9 until all filled diamond components have been added.
Attach a needle to a tail of an end component. Pick up three seed beads then pass through the seed bead the thread originally exited from. Pass through the four seed beads again then exit the top of the loop.
Pick up seven seed beads then pass through the exit seed bead. Pass through the eight seed beads again then exit the top of the loop. Repeat to create a second 7-bead loop then tie a knot and finish the thread.
Repeat twice more, so there is a loop on one corner of each empty diamond and the middle filled diamond.
Use a jump ring to attach each loop to one half of a clasp.
Repeat on the other end of the bracelet.
Earring Instructions
Cut a 3-foot length of Berkley Fireline thread. Thread a needle.
Pass through one side of a transparent rainbow light amethyst (color A) Tila bead then through one side of a transparent rainbow dark cobalt (color B) Tila bead, leaving a 12-inch tail. Pass back through the same hole in bead A to stack the two Tila beads next to each other. Pass through the same hole in bead B.
Pass through one side of a new color B bead then back up through the same hole of the previous B bead. Continue through the same hole of the second B bead then pass through one side of a third color B bead.
Go back through the second B bead and exit through the third B bead. Continue up through one side of a new color A bead, down through the previous B bead and exit up through the A bead. Tie a knot.
Pick up a seed bead and pass through one side of a new A bead. Pick up a new seed bead then pass through the top hole of the original A bead.
Repeat on the opposite side to add a seed bead, an A bead and a seed bead.
Pass through the A beads again using the same thread path, being sure to skip the seed beads to pull the A beads into a tight square. Exit through an A bead.
Pass through the unused hole of an A bead then pick up four seed beads. Pass through the seed beads again and continue through the next A bead. Repeat to add a picot to each corner. Pass through the outside A beads using the same thread path to secure the filled diamond, skipping the seed beads. Tie a knot in the working thread then pass through the top of a picot on one corner.
Pick up seven seed beads then pass through the top of the picot and the seven seed beads again. Pass back through the filled diamond to secure the design then tie a knot and finish the thread.
Attach an ear wire to the loop created in Step 6.
Repeat to create a second earring.
Have a question regarding this project? Email Customer Service.
Copyright Permissions
The pieces featured in the Gallery of Designs are copyrighted designs and are provided for inspiration only. We encourage you to substitute different colors, products and techniques to make the design your own.
All works of authorship (articles, videos, tutorials and other creative works) are from the Fire Mountain Gems and Beads® Collection, and permission to copy is granted for non-commercial educational purposes only. All other reproduction requires written permission. For more information, please email copyrightpermission@firemtn.com.