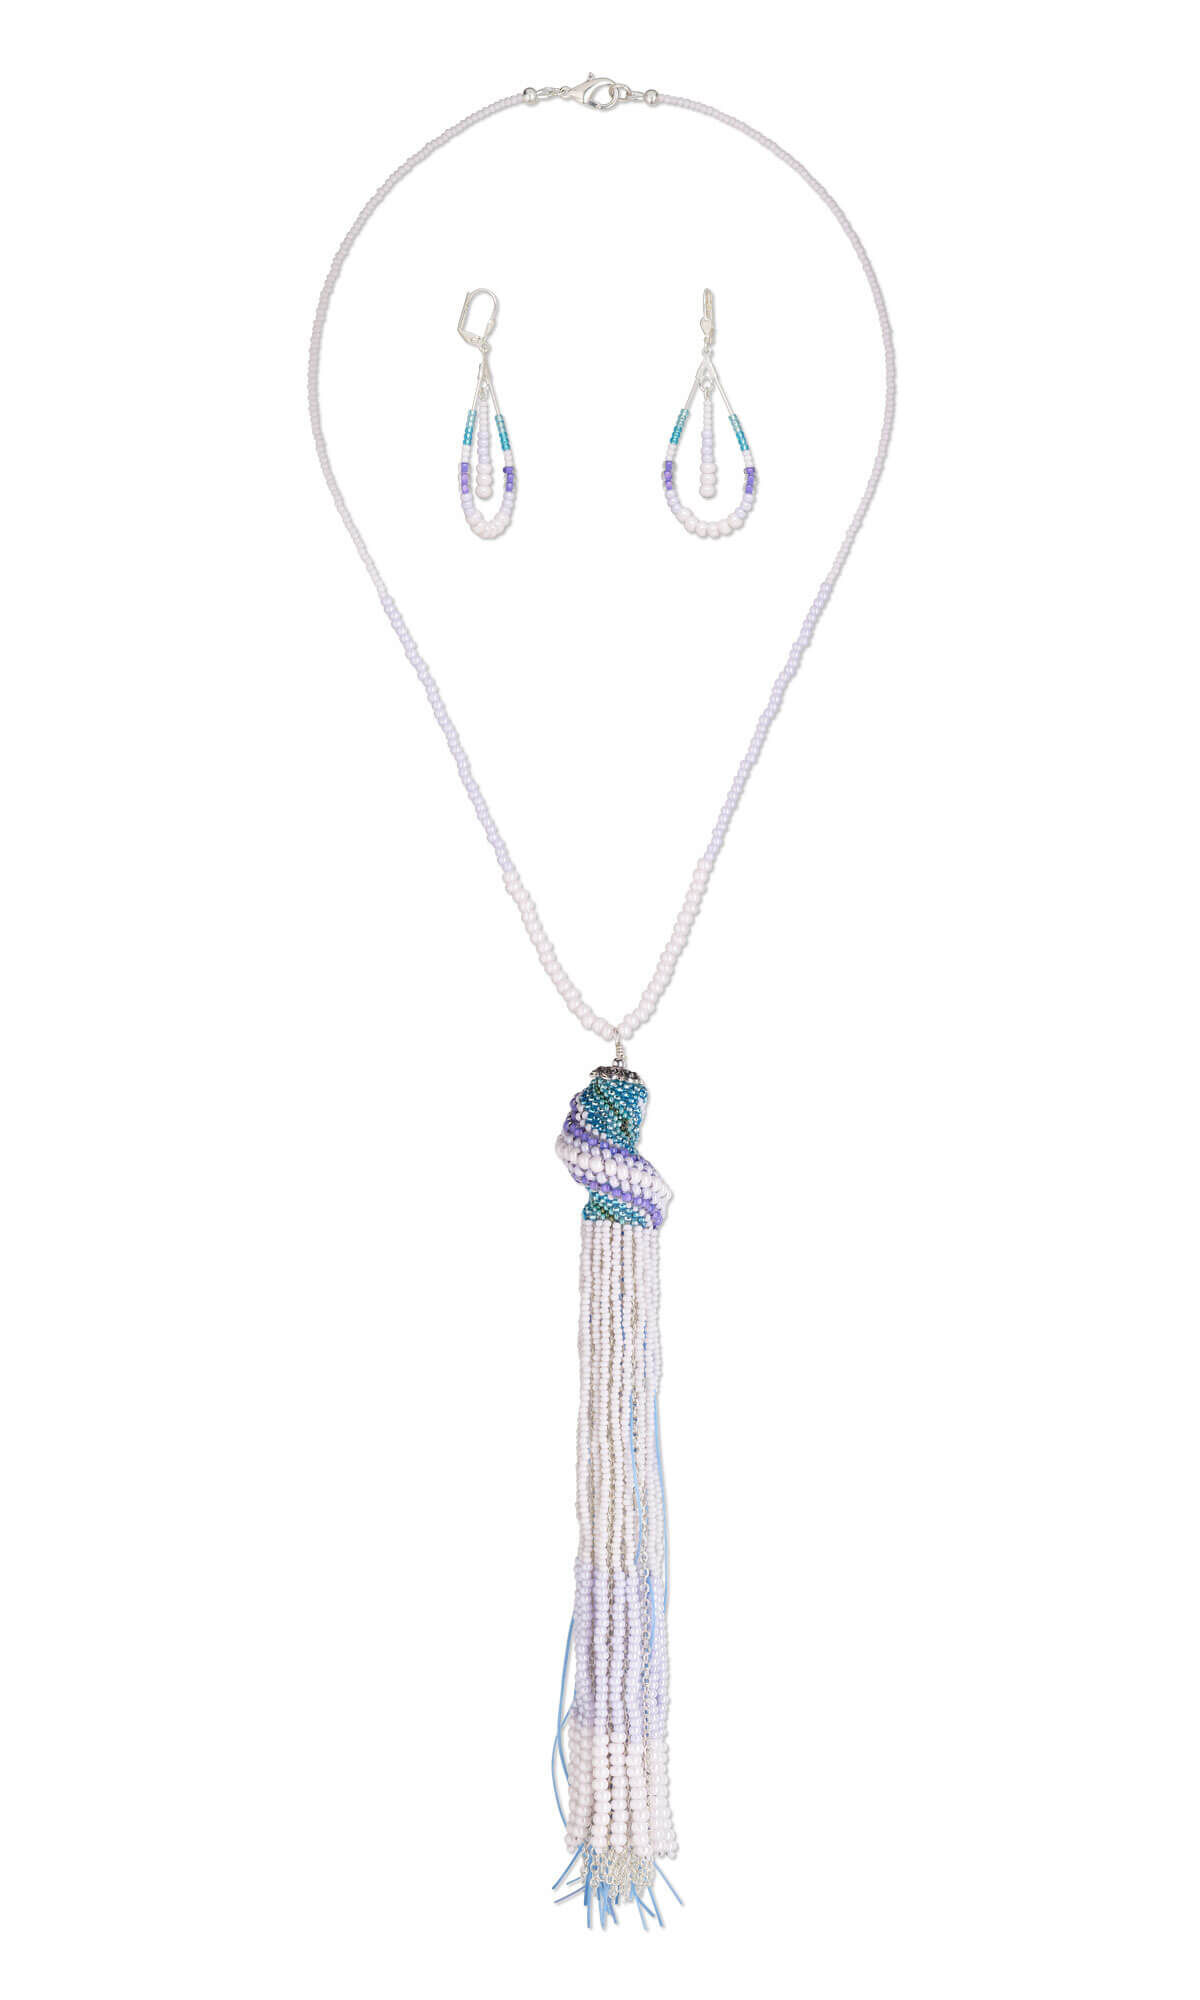
Single-Strand Necklace and Earring Set with Preciosa Ornela Czech Glass Seed Beads


Design Idea L92Z
Beaded Waterfall
-- Designer --
Rose, Jewelry Designer, Exclusively for Fire Mountain Gems and Beads®
To learn more about Rose Wingenbach, read her jewelry artist success story here.
: : : Materials : : :
Click here to view a full list of materials used in this design.
Please take the creative opportunity to select the products of your choice for this design, offered here at Fire Mountain Gems and Beads. Some materials may not be available or listed.
- Ear wire, silver-plated brass, 15mm leverback with 6x3mm shell and open loop
- Beading hoop, silver-plated brass, 40x22mm teardrop with closed loop
- Wire protector, Accu-Guard™, silver-plated brass, 4mm tube, 0.5mm inside diameter
- Jump ring, silver-plated brass, 6mm round, 4.2mm inside diameter, 18 gauge
- Seed bead, Preciosa, Czech glass, opaque lavender luster, #8 round
- Seed bead, Preciosa, Czech glass, opaque pink luster, #6 round
- Seed bead, Preciosa Ornela, Czech glass, opaque pink, #11 round
- Seed bead, TOHO BEADS®, glass, transparent silver-lined dark aqua, (TR-11-23B), #11 round
- Seed bead, TOHO BEADS®, glass, silver-lined transparent aquamarine, (TR-11-23), #11 round
- Bead cap, antique silver-plated "pewter" (zinc-based alloy), 13x3mm flower, fits 18-20mm bead
- Seed bead, Dyna-Mites™, glass, translucent inside color dark lilac, #8 round
- Bead, silver-plated brass, 3mm round
- Clasp, lobster claw, silver-plated brass, 13x8mm
- Thread, Berkley® FireLine®, gel-spun polyethylene, smoke, 0.15mm diameter 4-fiber braid, 6-pound test
- Crimp cover, silver-plated brass, 4mm round
- Beading wire, Accu-Flex®, nylon and stainless steel, pearl, 49 strand, 0.014-inch diameter
- Seed bead, Miyuki, glass, opaque metallic iris dark green, (RR465), #15 rocaille
- Seed bead, Miyuki, glass, opaque luster teal, (RR435), #15 rocaille
- Cord, stretch, elastic floss, blue, 0.5mm diameter, 3-pound test
- Crimp, sterling silver, 2mm cut tube, 1.4mm inside diameter
- Eye pin, silver-plated brass, 3 inches, 21 gauge
- Head pin, silver-plated brass, 2 inches, 21 gauge
- Jump ring, silver-plated brass, 4mm round, 2.4mm inside diameter, 20 gauge
- Chain, silver-plated steel, 2.2mm cable
- Thread, Nymo®, nylon, white, size D
Instructions
Necklace Instructions
Cut the following:
- Ten 15-inch lengths of 2.2mm cable chain
- Ten 18-inch lengths of 0.5mm stretch cord
- One 24-inch length of Accu-Flex® professional quality beading wire
- One 6-foot length of smoke FireLine® thread
- One 6-inch length of white Nymo® thread
Jellyfish Focal
Thread a needle onto the length of smoke FireLine thread, almost doubling the thread but leaving a tail so you are only working with one thread.
Note: It may be necessary to cut additional lengths of thread later in the design. If there are 6 inches or less of thread remaining in the previous length, simply weave the remainder length of thread looping through adjacent beads and start a new length of thread.
Row 1
Pick up:
- Two metallic rainbow green #15 rocailles (A)
- Two luster teal #15 rocailles (B)
- Two aquamarine #11 rounds (C)
- Two silver-lined dark aqua #11 rounds (D)
- Two pink #11 rounds (E)
- Two dark lilac #8 rounds (F)
- Two lavender luster #8 rounds (G)
- Two pink luster #6 rounds (H)
Continue to string: two G, two F, two E, two D, two C and two B.
Pass the needle through all of the seed beads again, exiting the second A bead.
Row 2
Pick up one A then skip the next bead and pass through the second B bead.
Note: Whichever bead the thread is exiting will be the next bead to be picked up. Once you pick up a new bead, skip the next bead from the previous row then pass through the bead after.
Rows 3+
Continue the pattern in Step 5 to create a Cellini spiral that is approximately 1 inch long.
Closing the Top
To close up the top and finish the top part of the jellyfish, continue to follow the pattern in Step 5 but reduce the number and size of seed beads for each new row. Once closed, pass the needle through a few adjacent seed beads. Pull tight then trim excess thread.
Cut a new 6-foot length of smoke FireLine and add a needle.
Pass the needle through a few seed beads from Row 1 then pick up:
- 3-1/2 inches of pink #11 rounds
- 1-1/2 inches of lavender luster #8 rounds
- One inch of pink luster #6 rounds
Pick up one pink #11 round then pass back through all of the previous seed beads in the opposite direction.
Pass through the next seed bead in Row 1 then repeat Step 8 to create a new "arm" of the jellyfish.
Repeat Steps 8 and 9 to create "arms" of the jellyfish that hang from each bead in the first row of the spiral. Pass the needle through a few adjacent seed beads then trim.
Add the needle to the tail end of the first length of thread then pass the needle through a few adjacent seed beads. Trim excess thread.
Fold the ten lengths of chain in half then connect the center of the chains to the eye of an eye pin using a 6mm jump ring.
Create a tassel using the ten lengths of stretch cord.
Note: See our ''How to Create Tassels Using the Beadalon® Tassel Maker'' how-to video and illustrated instructions for more information.
Connect the tassel to the center of the chains using a 6mm jump ring.
String one bead cap (concave side first) onto the straight end of the eye pin then pass the eye pin through the middle of the jellyfish body (from the arm side) and up through the center of the top part of the jellyfish. String a bead cap (concave side first) and a 3mm smooth round onto the eye pin then form a wrapped loop.
String onto the length of beading wire: one crimp and one Accu-Guard™ wire protector. Pass the beading wire back through the crimp. Pull the beading wire so the crimp rests snug against the Accu-Guard leaving approximately 1/4 inch of beading wire on the end. Crimp then trim the excess from the short end of the beading wire. Finish with a crimp cover.
String onto the beading wire:
- Six inches of pink #11 rounds
- Three inches of lavender luster #8 rounds
- Two inches of pink luster #6 rounds
String the wrapped loop of the jellyfish component onto the beading wire then repeat Step 14 in the opposite direction.
Repeat Step 13 to secure the strand.
Attach a 6mm jump ring to one Accu-Guard then, using a 4mm jump ring, attach a lobster claw clasp to the opposite Accu-Guard to complete the necklace.
Earring Instructions
String onto a beading hoop:
- Three aquamarine #11 rounds
- Three dark aqua #11 rounds
- Three pink #11 rounds
- Three dark lilac #8 rounds
- Three lavender luster #8 rounds
String six pink luster #6 rounds then string the above pattern in the opposite direction. Close the beading hoop.
String onto a head pin: Three pink luster #6 rounds, three lavender luster #8 rounds and five pink #11 rounds then form a simple loop. Connect the drop to the inner loop of the beading hoop.
Attach an ear wire to the top loop of the beading hoop.
Repeat Steps 1 - 3 to create a second earring.
Have a question regarding this project? Email Customer Service.
Copyright Permissions
The pieces featured in the Gallery of Designs are copyrighted designs and are provided for inspiration only. We encourage you to substitute different colors, products and techniques to make the design your own.
All works of authorship (articles, videos, tutorials and other creative works) are from the Fire Mountain Gems and Beads® Collection, and permission to copy is granted for non-commercial educational purposes only. All other reproduction requires written permission. For more information, please email copyrightpermission@firemtn.com.