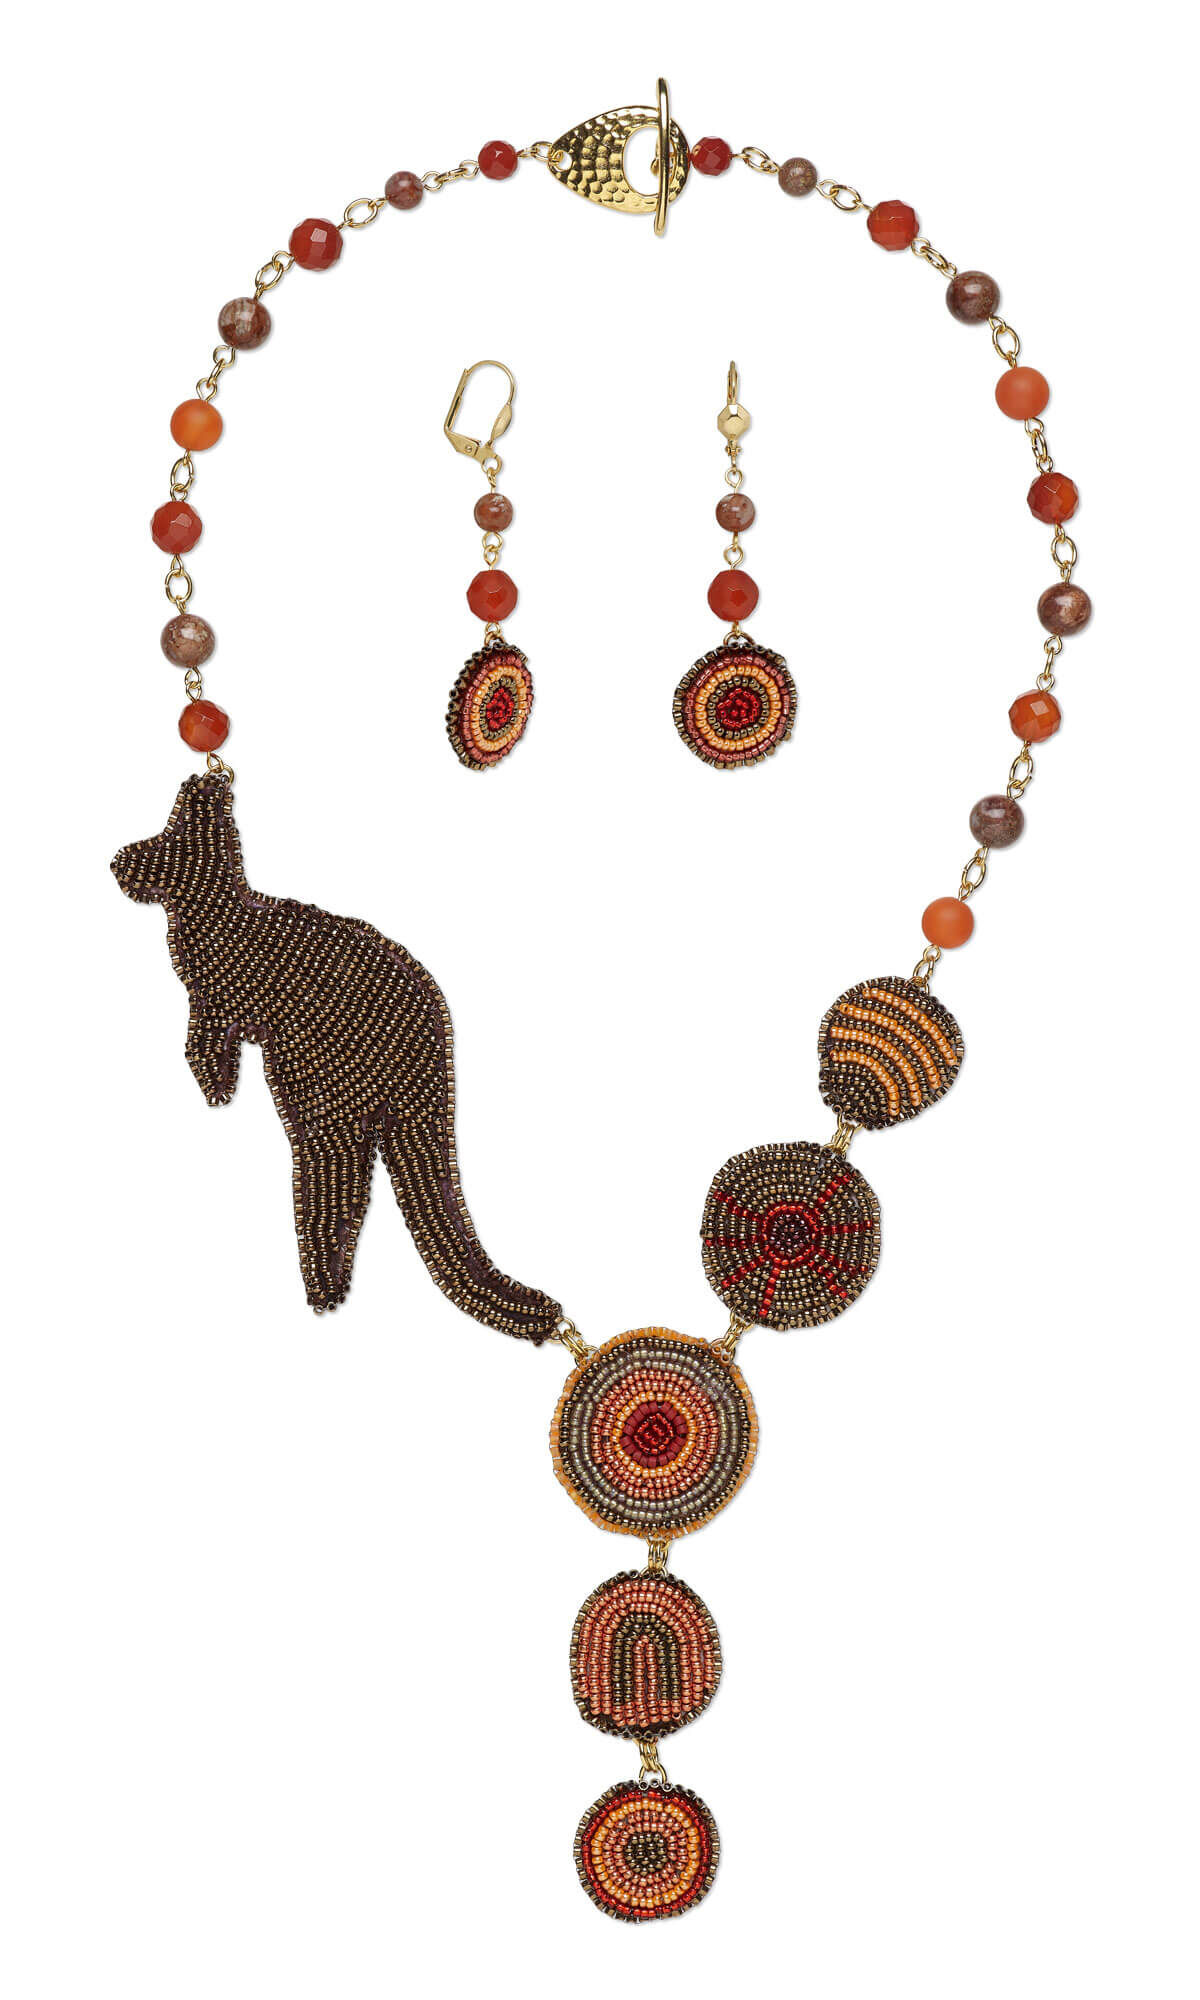
Single-Strand Necklace and Earring Set with Seed Beads, Carnelian Gemstone Beads and Pomegranate Jasper Gemstone Beads


Design Idea K40J
Australian Outback
-- Designer --
Esther, Jewelry Designer, Exclusively for Fire Mountain Gems and Beads®
To learn more about Esther Pollock, read her jewelry artist success story here.
: : : Materials : : :
Click here to view a full list of materials used in this design.
Please take the creative opportunity to select the products of your choice for this design, offered here at Fire Mountain Gems and Beads. Some materials may not be available or listed.
- Seed bead, Delica®, glass, translucent matte rainbow orange, (DB0855), #11 round
- Seed bead, Delica®, glass, opaque matte glazed luster brick red, (DB0378), #11 round
- Seed bead, Delica®, glass, opaque metallic dark bronze, (DB0022), #11 round
- Seed bead, Miyuki, glass, Duracoat® transparent silver-lined dusty red, (RR4270), #15 rocaille
- Seed bead, Miyuki, glass, Duracoat® opaque galvanized copper, (RR4207), #15 rocaille
- Ear wire, gold-plated brass, 17mm leverback with 6x5mm octagon and open loop
- Clasp, TierraCast®, toggle, gold-plated pewter (tin-based alloy), 22x16mm hammered teardrop
- Bead, carnelian (dyed / heated), 6mm faceted round, C grade, Mohs hardness 6-1/2 to 7
- Sheet, faux suede, brown, 8-1/2 inch square, 0.6-0.7mm thick
- Bead, carnelian (dyed / heated), 8mm faceted round, C grade, Mohs hardness 6-1/2 to 7
- Thread, Berkley® FireLine®, gel-spun polyethylene, smoke, 0.15mm diameter 4-fiber braid, 6-pound test
- Adhesive, G-S Hypo Fabric Cement®
- Bead, carnelian (dyed / heated), matte, 8mm round, B grade, Mohs hardness 6-1/2 to 7
- Bead, pomegranate jasper (natural), 8mm round, B grade, Mohs hardness 6-1/2 to 7
- Bead, pomegranate jasper (natural), 6mm round, B grade, Mohs hardness 6-1/2 to 7
- Seed bead, Miyuki, glass, translucent taupe-lined luster smoky amethyst, (RR1837), #15 rocaille
- Seed bead, Miyuki, glass, opaque metallic dark raspberry, (RR460), #15 rocaille
- Seed bead, Miyuki, glass, opaque metallic dark bronze, (RR457), #15 rocaille
- Seed bead, Miyuki, glass, transparent silver-lined ruby red, (RR11), #15 rocaille
- Seed bead, Miyuki, glass, opaque luster mandarin, (RR423), #15 rocaille
- Adhesive, E6000® Jewelry and Craft Adhesive, clear
- Eye pin, gold-plated brass, 1 inch, 21 gauge
- Lacy's Stiff Stuff™, beading foundation, white, 11x8-1/2 inch sheet
- Jump ring, gold-plated brass, 6x4mm oval, 4.1x2mm inside diameter, 18 gauge
Instructions
Necklace Instructions
Beaded Chains
String an 8mm faceted carnelian round onto an eye pin then create a simple loop.
Repeat to create the following:
- Five additional 8mm faceted carnelian links
- Five 8mm pomegranate jasper links
- Three 8mm matte carnelian round links
- Two 6mm pomegranate jasper round links
- Two 6mm faceted carnelian round links
Connect the following to create a beaded chain:
- One 8mm faceted link
- One 8mm jasper link
- One 8mm faceted link
- One matte link
- One 8mm jasper link
- One 8mm faceted link
- One 6mm jasper link
- One 6mm faceted link
Connect the following to create a second beaded chain:
- One matte link
- One 8mm jasper link
- One 8mm faceted link
- One 8mm jasper link
- One 8mm faceted link
- One matte link
- One 8mm jasper link
- One 8mm faceted link
- One 6mm jasper link
- One 6mm faceted link
Embroidered Kangaroo Component
Cut the following sections of Lacy's Stiff Stuff backing material:
- Three 1-1/2 circles
- Two 2-inch circles
- One 6x2-inch rectangle
Sketch or print a kangaroo outline on the 6x2-inch section of backing. Repeat to duplicate the outline on a piece of leather.
Cut an arm-length of FireLine® thread and add a sharp needle. Make a small knot at the end of the thread.
Pass the needle up through the backing, half a seed bead's width from the edge of the outline at the tip of the nose. Pull gently to bring the knot flush to the back of the material.
Pick up two metallic dark gold #15 seed beads then pass back down through the backing, pulling the beads tight. Pass up through the backing behind the first bead then pass through both beads and down through the backing again.
Note: For additional details view the ''Beaded Backstitch'' illustrated how-to.
Pass up through the material next to the first row of stitched beads. Continue to use the beaded backstitch technique to add a second row directly next to the first.
Repeat to fill the outline with rows of metallic dark gold seed beads.
Secure the thread with a small knot flush to the back of the backing.
Carefully trim the backing material as close to the beading as possible without cutting the threads.
Prepare a needle with a new length of thread then stitch a 6x4mm jump ring to the backing material at the tip of the tail with half the jump ring extending past the edge beads. Secure the thread.
Repeat to add a jump ring to the tip of the ears.
Cut the kangaroo outline out of the piece of leather approximately 2mm outside of the drawn line.
Prepare a needle with a new length of thread. Knot the end of the working thread.
Pass the needle up through the backing near the edge of the component. Pull to bring the knot flush to the back of the material.
Hold the leather to the back of the embroidered component with your non-dominate hand.
Pick up two metallic bronze #11 Delica® seed beads then pass down through the backing and the leather, near the edge. Pull to tighten the beads to the edge of the component.
Pass out through the last bead added. Pick up a new metallic bronze #11 seed bead then pass down through the backing the leather. Pull to tighten the beads on the edge of the component.
Repeat to add beads around the entire edge.
Pass through adjacent beads and between the leather and backing to secure the thread, then trim.
Round Beaded Components
Prepare another length of thread and needle. Add a knot to the end of the thread.
Pass up through the center of a large circle of backing, pulling the knot flush to the back of the material.
Pick up two seed beads of your choice then pass back down through the backing, pulling the beads tight. Pass back up through the backing behind the first seed bead then through the beads again. Pass down through the material.
Pass back up through the backing just next to the first row of beads. Add a second row of two seed beads next to the first using the beaded backstitch technique.
Pass up through the backing outside of the square of seed beads. Pick up two seed beads of your choice then pass down through the backing, next to the square of seed beads.
Continue to use the beaded backstitch technique to bead a circle of seed beads around the square. Repeat to add six additional concentric circles of seed beads.
Trim the backing as close to the beading as possible without cutting the threads.
Prepare a needle with a new length of thread then stitch a 6x4mm jump ring to the backing material at the 11:00 position. Repeat to add one jump ring to the 2:00 position and one at the 6:00 position.
Trim leather to match the shape of the component, approximately 2mm larger in diameter.
Using the seed beads of your choice, repeat Steps 12 - 15 to add edging to the component.
Repeat Steps 16 - 22 to embroider four additional components in the pattern of your choice with the following jump ring positions:
- One larger circle with jump rings at the 3:00 and 9:00 positions
- Two smaller circles with jump rings at the 3:00 and 9:00 positions
- One smaller circle with one jump ring at the 12:00 position
Assembling the Necklace
Use a 6x4mm jump ring to attach the embroidered drop to a small embroidered link. Add a second jump ring parallel to the first to create a double jump ring connection.
Use a double jump ring connection to attach the opposite side of the embroidered link to the jump ring at the 6:00 position of the large embroidered component.
Use double jump ring connections to attach the following into a chain:
- The jump ring at the 11:00 position on the large embroidered component
- The kangaroo component
- The shorter beaded chain
Repeat to attach the following:
- The jump ring at the 2:00 position on the large embroidered component
- A large embroidered link
- A small embroidered link
- The longer beaded chain
Use a jump ring to add half of a toggle clasp to the end of each beaded chain.
Earring Instructions
String an 8mm faceted carnelian round onto an eye pin then create a simple loop.
Repeat to create a second faceted link and two 6mm pomegranate jasper links.
Cut two 1-inch sections of Lacy's Stiff Stuff.
Cut an arm-length of FireLine® thread and add a sharp needle. Make a small knot at the end of the thread.
Pass the needle up through the center of a section of backing. Pull gently to bring the knot flush to the back of the material.
Pick up two seed beads of your choice then pass back down through the backing, pulling the beads tight. Pass back up through the backing behind the first seed bead then through the beads again. Pass down through the material.
Pass back up through the backing just next to the first row of beads. Add a second row of two seed beads next to the first using the beaded backstitch technique.
Pass up through the backing outside of the square of seed beads. Pick up two seed beads of your choice then pass down through the backing, next to the square of seed beads.
Continue to use the beaded backstitch technique to bead a circle of seed beads around the square. Repeat to add three additional concentric circles of seed beads.
Prepare a needle with a new length of thread then stitch a 6x4mm jump ring to the backing material with half of the jump ring extending past the edge beads.
Trim leather to match the shape of the component, approximately 2mm larger in diameter.
Prepare a needle with a new length of thread. Knot the end of the working thread.
Pass the needle up through the backing near the edge of the component. Pull to bring the knot flush to the back of the material.
Hold the leather to the back of the embroidered component with your non-dominate hand.
Pick up two metallic bronze #11 Delica® seed beads then pass down through the backing and the leather, near the edge. Pull to tighten the beads to the edge of the component.
Pass out through the last bead added. Pick up a new metallic bronze #11 seed bead then pass down through the backing and the leather. Pull to tighten the beads on the edge of the component.
Repeat to add beads around the entire edge.
Pass through adjacent beads and between the leather and backing to secure the thread, then trim.
Repeat Steps 3 - 10 to create a second embroidered component.
Attach the following components to complete each earring:
- One ear wire
- One 6mm link
- One 8mm faceted link
- One embroidered component
Copyright Permissions
The pieces featured in the Gallery of Designs are copyrighted designs and are provided for inspiration only. We encourage you to substitute different colors, products and techniques to make the design your own.
All works of authorship (articles, videos, tutorials and other creative works) are from the Fire Mountain Gems and Beads® Collection, and permission to copy is granted for non-commercial educational purposes only. All other reproduction requires written permission. For more information, please email copyrightpermission@firemtn.com.