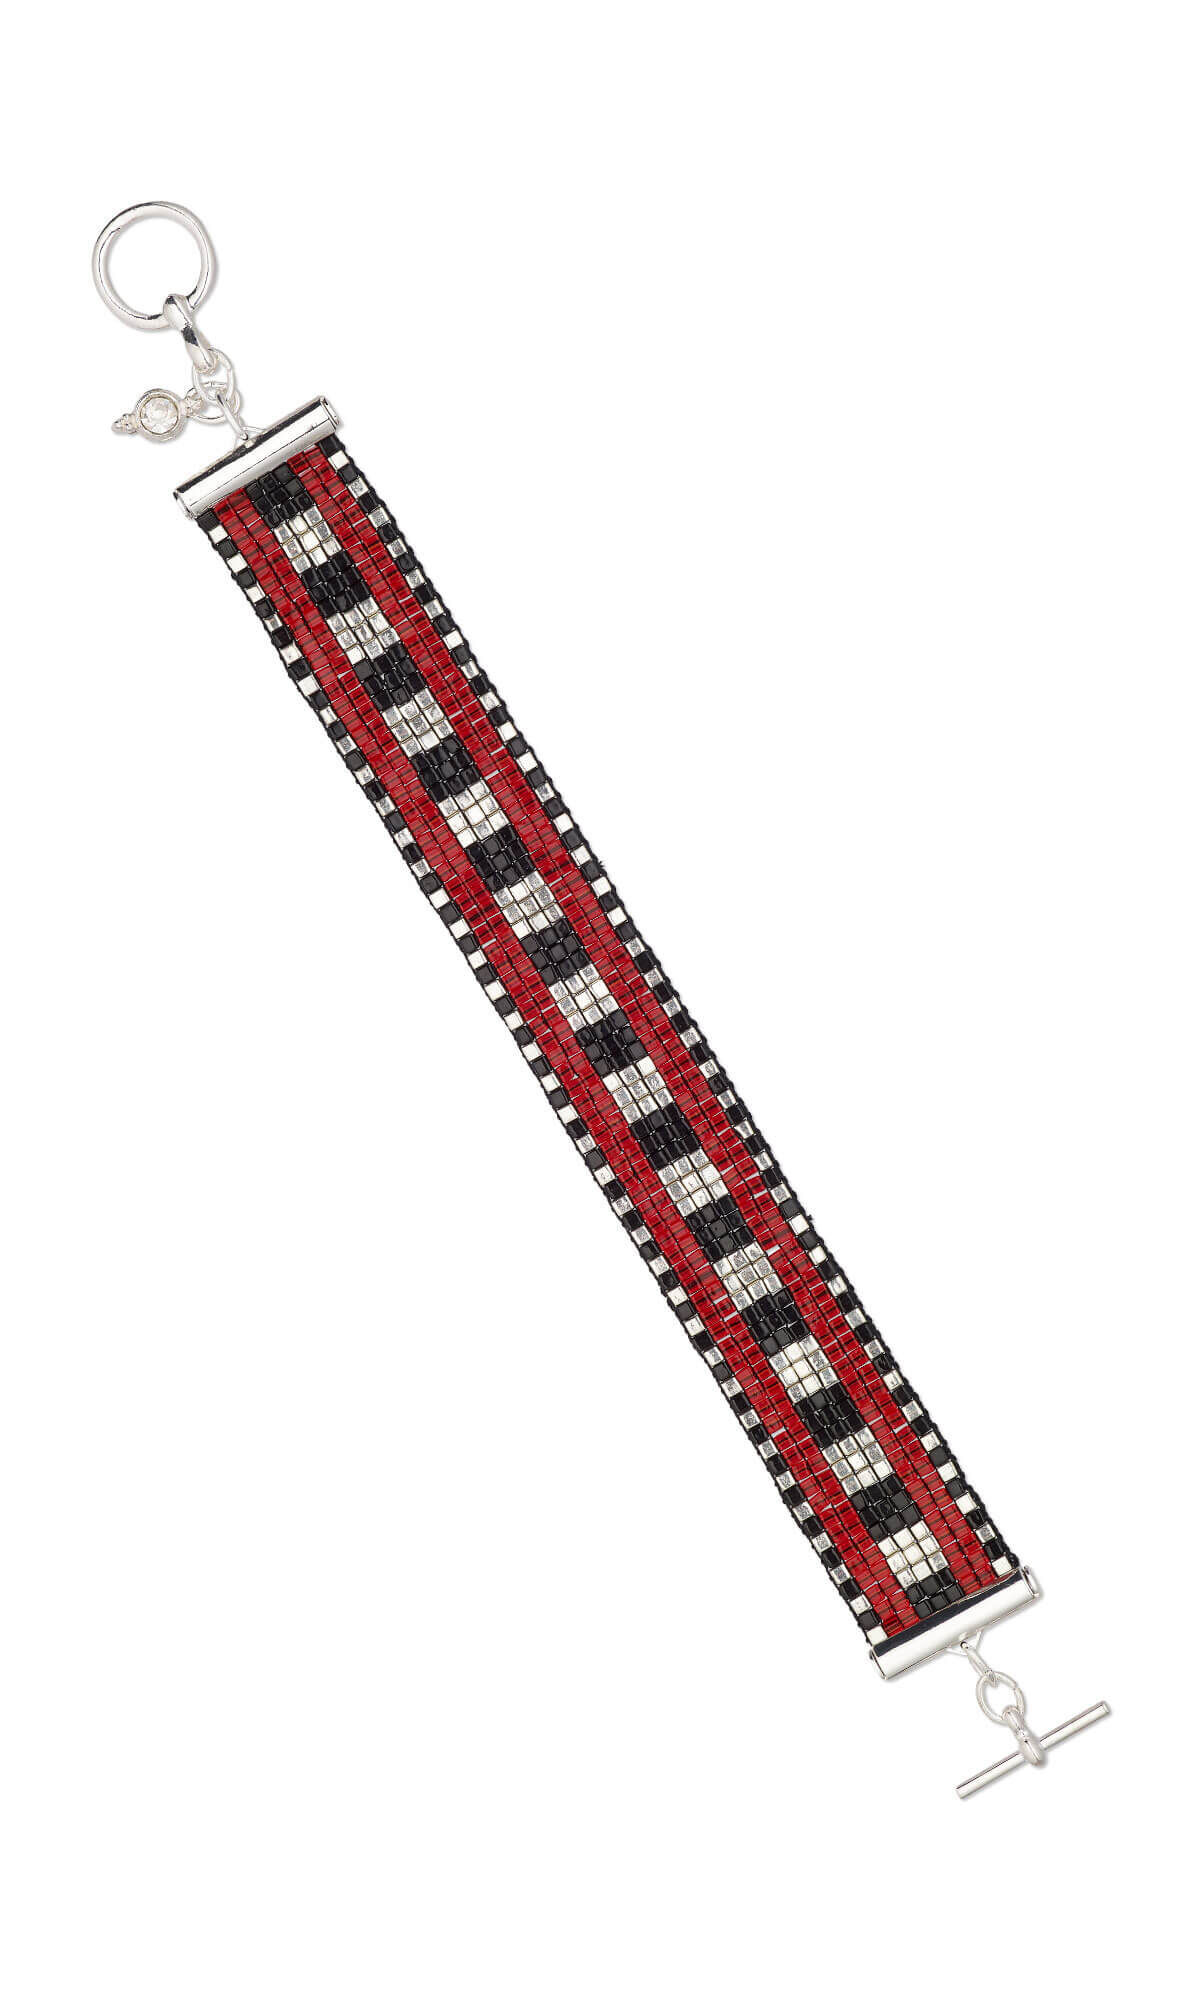
Bracelet with Miyuki Seed Beads and Silver-Plated "Pewter" Spacer


Design Idea HA5F
-- Designer --
Kelly, Customer Service Group, Exclusively for Fire Mountain Gems and Beads®
: : : Materials : : :
Click here to view a full list of materials used in this design.
Please take the creative opportunity to select the products of your choice for this design, offered here at Fire Mountain Gems and Beads. Some materials may not be available or listed.
- End bar, silver-finished brass, 20x4mm round tube with fold-in ends, 2.75-3mm inside diameter
- Spacer, glass rhinestone and silver-plated "pewter" (zinc-based alloy), clear, 11x6mm 2-strand, fits up to 6mm bead
- Seed bead, Miyuki, glass, opaque metallic galvanized silver, (SB1051), 1.8mm square
- Seed bead, Miyuki, glass, opaque black, (SB401), 1.8mm square
- Clasp, toggle, silver-plated "pewter" (zinc-based alloy), 12mm smooth round
- Thread, C-Lon®, nylon, black, size D
- Jump ring, silver-plated brass, 6.5x5mm oval, 4.6x3mm inside diameter, 18 gauge
- Loom starter set, steel / rubber tree wood / glass, 12 x 2-1/2 inches with 7-inch looming length
- Needle, Wide-Eye Needle™, flexible, nickel-plated carbon steel, #14 medium, 4 inches with dual end-points
- Seed bead, Miyuki, glass, transparent red, (SB140), 3.5-3.7mm square
Instructions
Warp the loom with 10 threads. (One more thread than the number of beads used in the design.)
Note: Refer to ''How to Assemble the Beading Loom'' how-to for additional details.
Cut a 3-foot length of black size D C-Lon® thread.
Note: It may be necessary to cut additional lengths of thread later in the design. If there is 6 inches or less of thread remaining in the previous length simply weave the remainder looping through adjacent beads and start a new length of thread.
Thread a beading needle almost doubling the thread (to make it easier to work with) but leaving a tail so you are working with only one thread. Loosely tie the tail to the bar on one side of the loom.

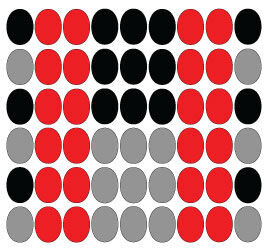
String the beads of Row 1 from the loom pattern pictured onto the needle. Pass the needle around the back side of the warp threads. Use your index finger to press the seed beads so one seed bead sits between each thread. Pull the thread through the seed beads, keeping them in place with your finger.
Position the needle in front of the warp threads, then pass back through the seed beads of Row 1.
Untie the tail from the loom and tie to the working thread, snug to the seed beads to secure.
Repeating Step 4, repeat the loom pattern until the bracelet is the desired length.
Pass through the second to last loomed row, then through adjacent beads to secure the thread. Trim any excess thread.
Thread the needle onto the tail and repeat to secure the beginning of the bracelet.
Remove one warp thread from the loop, keeping the other warp threads tight, then thread through the needle. Pass through adjacent seed beads, then trim. Repeat to secure each warp thread on both ends of the bracelet.
Attach a 6x4mm jumpring to each half of a toggle clasp.
Attach a 6x4mm jumpring to one hole of an 11x6mm glass rhinestone spacer bar.
Insert the first row of the bracelet into a 20x4mm end bar, then close. Repeat with a second end bar on the opposite end of the bracelet.
Use a 6x4mm jumpring to connect one end of the bracelet to the jumpring attached to half of the toggle clasp.
Pass a 6x4mm jumpring through the jumprings attached to the rhinestone spacer bar and the second half of the toggle clasp, then close.
Have a question regarding this project? Email Customer Service.
Copyright Permissions
All works of authorship (articles, videos, tutorials and other creative works) are from the Fire Mountain Gems and Beads® Collection, and permission to copy is granted for non-commercial educational purposes only. All other reproduction requires written permission. For more information, please email copyrightpermission@firemtn.com.