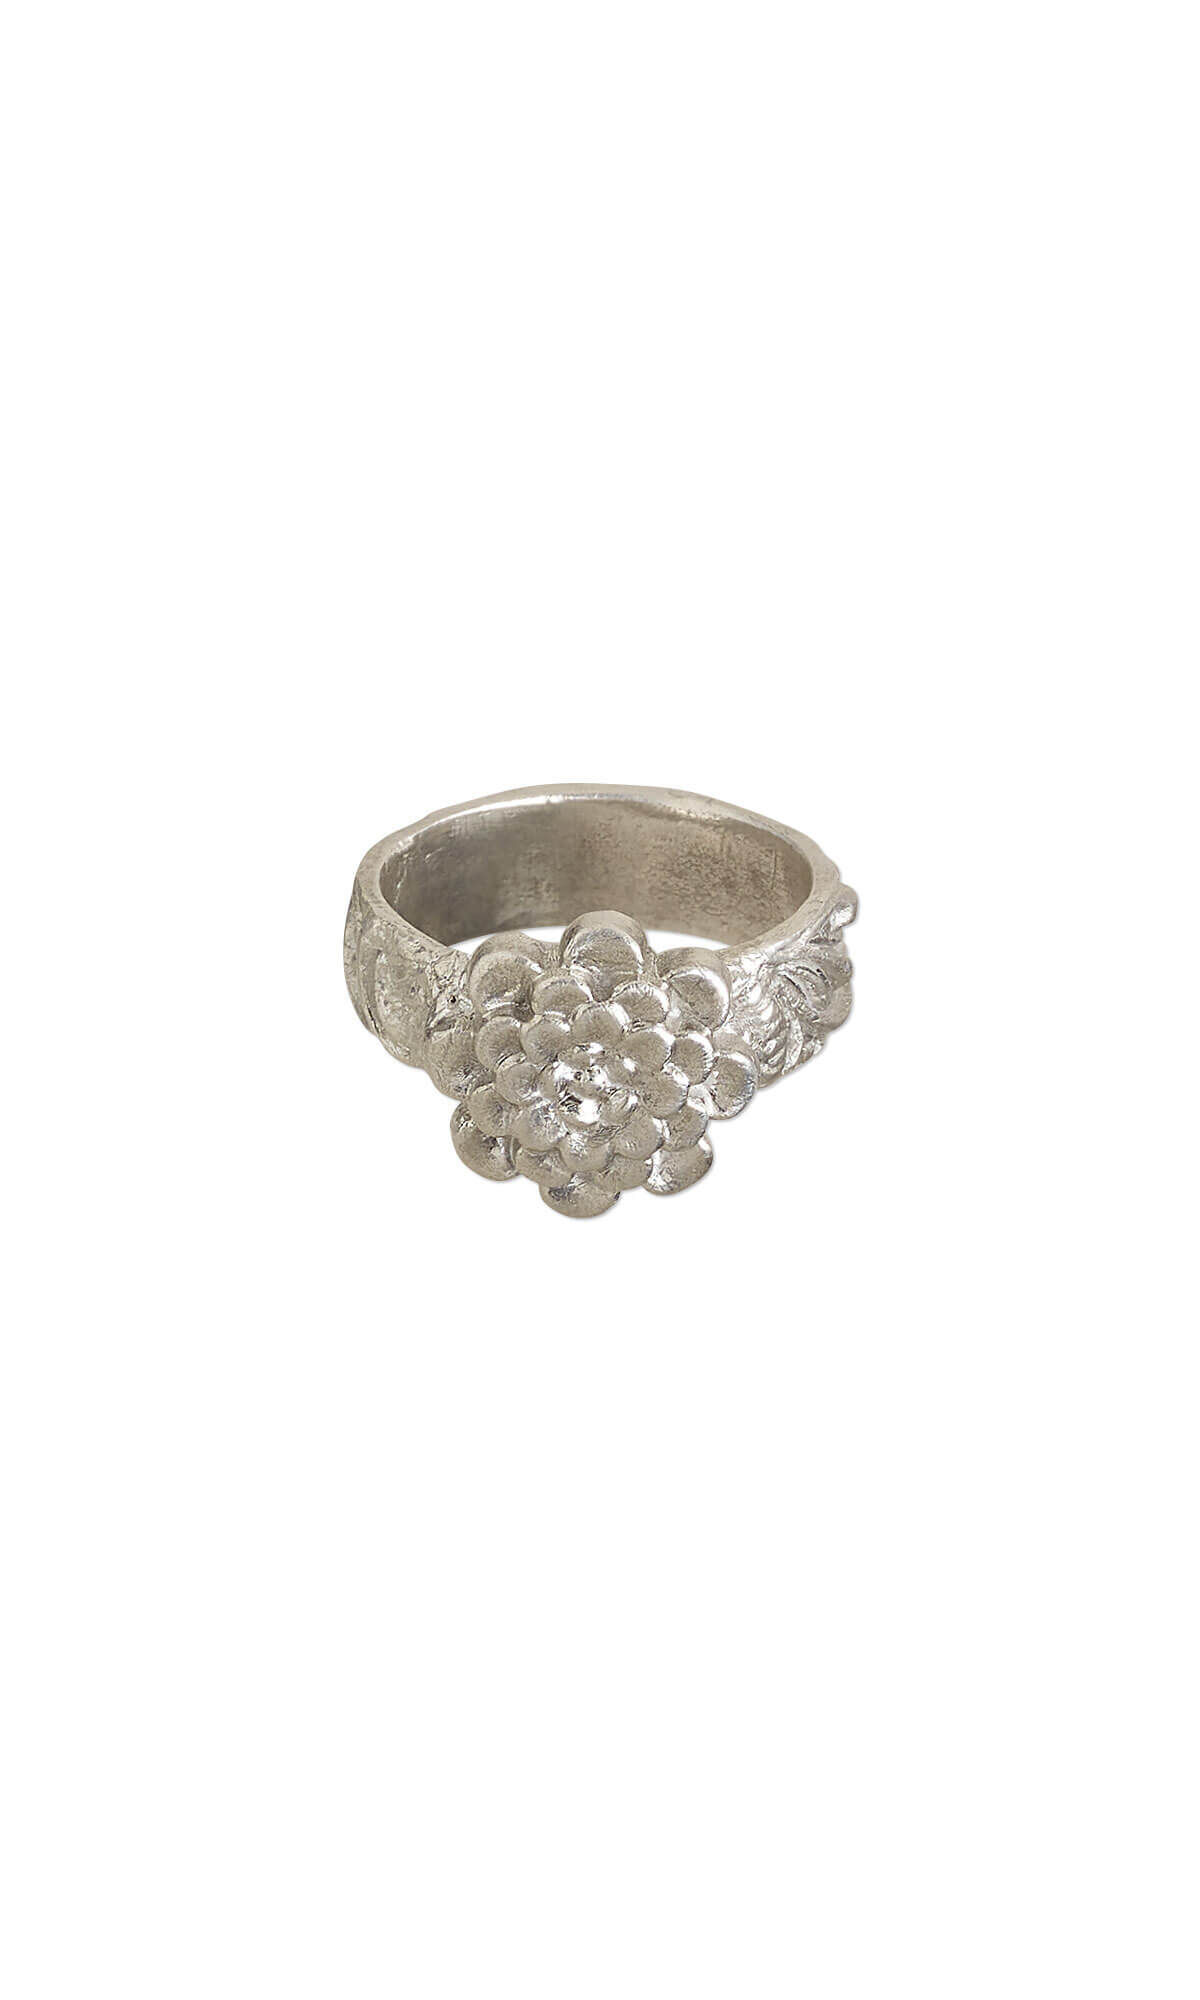
Ring with Precious Metal Clay


Design Idea NA5H
-- Designer --
Rose, Jewelry Designer, Exclusively for Fire Mountain Gems and Beads®
To learn more about Rose Wingenbach, read her jewelry artist success story here.
: : : Materials : : :
Click here to view a full list of materials used in this design.
Please take the creative opportunity to select the products of your choice for this design, offered here at Fire Mountain Gems and Beads. Some materials may not be available or listed.
- Burnisher, agate / wood (natural) / stainless steel, 9 inches with 2-inch tip
- Fine steel wire brush, 8-1/4x5/8 inches
- Block, rubber, black, 4 x 4 x 1 inches
- Ring mandrel, aluminum, 10 inches
- Non-stick sheet, Teflon®, white, 6-inch square
- Slats, acrylic, assorted colors, 6 inches
- Snake roller, acrylic, clear, 5x2-1/2 inches
- Blades, steel and rubber, black, 140 x 18.5 x 0.5mm / 140 x 18 x 0.15mm smooth / 120 x 18 x 1.5mm serrated with hand guard
- Roller set, acrylic, clear, (1) 7-3/4 x 1-1/4 inch round and (1) 7-3/4 x 1-inch round
- PMC3™ Precious Metal Clay, silver, syringe with nozzle tip
- Stamp, Lisa Pavelka, rubber, 5-1/2 x 4-1/4 inch rectangle with shanks a lot texture
- Awl, Tulip, steel / silicone / acrylic, pink and clear, 5-1/2 inches
- Metal clay conditioner and release, slikbaby
- Ring sizer, Redy Pellets, ceramic and plastic, white, 22.5x18.5mm, size 8
- Sandpaper, silicon carbide, grey, 600 / 1200 / 2000 grit, 11x9-inch rectangle
- OneFire Sterling PMC™ Precious Metal Clay, sterling silver
Instructions
Shank
Coat a roller, a border mold and a Teflon® sheet with Slik.
Roll 10 grams of metal clay into a snake approximately 4mm in diameter. Place the snake between two red slats then use the roller to flatten.
Place green slats on either side and roll over the clay, pressing gently to add the pattern. Remove the clay and place on a Teflon sheet.
Cut and refine the edges with a craft knife.
Cut a strip of Teflon sheet slightly wider than the ring shank. Tape the strip around a ring mandrel two sizes larger than the desired finished size.
Gently wrap the clay around the Teflon. Cut the clay to meet as seamlessly as possible.
Use a paintbrush to wet the ends of the clay and seal them together.
Set aside to dry completely.
Flower Focal
Gather all the excess clay cut from the shank and recondition. If needed, mist lightly with water.
Coat a small flower mold with Slik then press the clay into the mold. Keep the clay in the mold and set aside to dry completely.
Assembly
Remove the clay from the flower mold. Sand any imperfections on the flower and the ring shank.
Apply syringe metal clay to the shank, approximately the same width as the flower.
Gently press the flower onto the wet clay. Apply more syringe metal clay around the flower to create a secure connection. Use a wet paintbrush to smooth the seams.
Use an awl and/or texture tools to make the wet clay areas cohesive to the design.
Set aside to dry completely.
Sand all imperfections from the dried ring.
Firing
Place a ring pellet of the desired finished size in the ring. Set the ring and pellet on a bed of vermiculite and kiln fire according to metal clay package directions. Remove the ring once the kiln has completely cooled.
Soak the ring and pellet in water to release.
Note: Do not empty water with dissolved Redy Pellets down a drain, as mixture will harden and lead to clogged drains. Pour most of the water onto the ground and allow remainder to evaporate. When dry, knock dried material out of the container into a trash can.
Sand the ring.
Use a wire brush to apply a slight satin finish then burnish.
Have a question regarding this project? Email Customer Service.
Copyright Permissions
The pieces featured in the Gallery of Designs are copyrighted designs and are provided for inspiration only. We encourage you to substitute different colors, products and techniques to make the design your own.
All works of authorship (articles, videos, tutorials and other creative works) are from the Fire Mountain Gems and Beads® Collection, and permission to copy is granted for non-commercial educational purposes only. All other reproduction requires written permission. For more information, please email copyrightpermission@firemtn.com.