Ring with Precious Metal Clay and Resin

Hover over to zoom.
Design Idea B50P
Create a fine-silver ring with precious metal clay. Attach metal-clay bezels to the ring to create an organic cocktail ring design. The challenge will be deciding if you want to leave the bezels empty or fill them with color. If you want to go with color, choose your favorite or mix a range of different colors of resin and fill the bezels up.
-- Designer --
Tammy Honaman, Author, Jewelry-Making Expert and Educator, Exclusively for Fire Mountain Gems and Beads®
To learn more about Tammy Honaman, read her jewelry artist success story here.
: : : Materials : : :
Please take the creative opportunity to select the products of your choice for this design, offered here at Fire Mountain Gems and Beads.
Instructions
Step 1
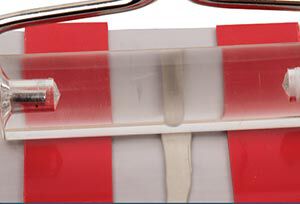
Using the ring sizer, size the finger you will wear the ring on. Increase this size by 1-1/2 ring sizes to allow for shrinkage of the ring during firing. Place the new size onto the ring mandrel and, using a ballpoint pen or a pencil, make a mark on the ring mandrel above and below the ring sizer.
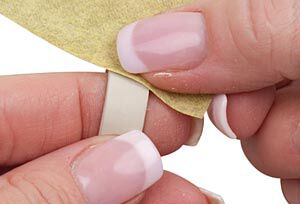
Using scissors, cut a strip of non-stick art sheet and wrap it around the ring mandrel over the mark. Trim the non-stick art sheet so the ends slightly overlap. Tape the non-stick art sheet seam and burnish the tape so it stays in place.
Step 2
Lightly oil your hands, roller, work surface and, using care, a clay-cutting blade. Open the package of clay and remove about 10 grams. Compress it between your fingers a few times then place it between two slats 6-cards high. Using the acrylic roller, roll over the clay 1-2 times. Flip the clay over and roll again. Repeat until the clay is level with the slats and has a nice long rectangular shape.
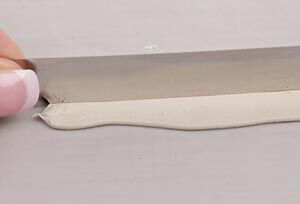
Using the clay-cutting blade, trim the rectangle of clay so the sides are straight.
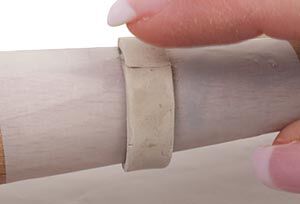
Step 3
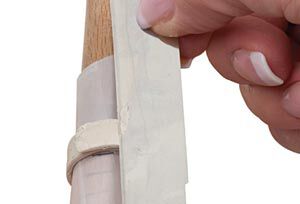
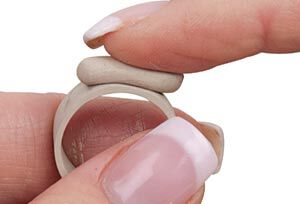
Place the strip of clay at the mark on the ring mandrel.
Step 4
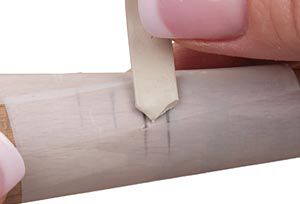
Overlap the ends of the clay. While holding the clay-cutting blade on an angle, trim the clay.
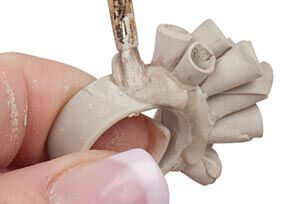
Remove the excess clay. Bring the ends of the clay together, seaming them so the angled cuts meet and create a flush connection. Using a paintbrush, apply water to the seam so the clay bonds together. Smooth the seam so it is invisible.
Let the ring dry on the mandrel for a short time. Once the ring can hold its shape, carefully remove the art-sheet cone. Let the ring dry further. Once the ring seems dry, carefully remove the art sheet. Usually the ring needs a little more time to dry; if so, let the ring dry fully before moving on.
Step 5
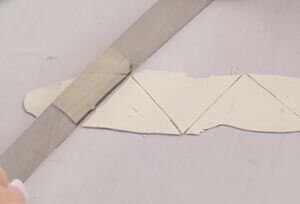
While the ring is drying, cut a strip of copy paper. Roll the strip to form a cone with a pointy tip. Tape the cone so it holds its shape.
Pinch off about 3 grams of clay and roll it out to 2-cards thick. Using the clay-cutting blade, cut triangles from the clay.
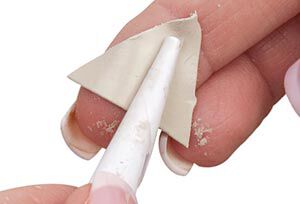
Lightly oil the tip of the paper cone then apply a triangle so it forms to the tip of the cone.
Wet the seams so the clay "sticks" to itself. Neaten up the clay cone then set it aside to dry.
Step 6
Repeat Step 5 to make about 10 clay cones.
Step 7
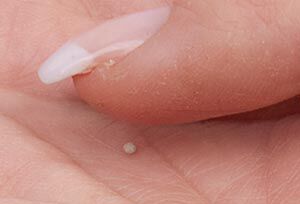
Pinch off a tiny piece of clay. Roll this piece into a ball. Repeat to make a lot of little balls of clay, varying the size.
The amount you make will depend on your design. Inevitably, I always need to go back and make more!
Step 8
Using a progression of polishing papers, refine the surface of the ring until it is smooth inside and outside.
Repeat to refine the cones.
Step 9
Wet the "top" of the band. Pinch off about 2 grams of clay and press it onto the surface of the ring so it covers about 3/4 inch or 20mm.
You can make this section bigger or smaller. This is the area where you will place the clay cones and they need to rest between your fingers. If you go too wide it may become uncomfortable when you wear the ring.
Step 10
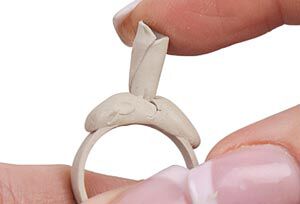
Working while the clay is still wet, press the largest cone into the center of the wet clay.
The ring is fragile at this stage so work and apply pressure carefully. You need the bond between the two elements to be secure but you do not want to crush the ring shank.
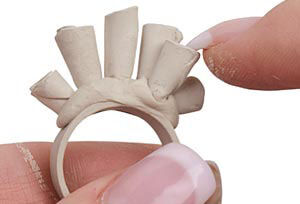
Continue pressing the cones into the wet clay, arranging them in any pattern you wish.
Apply water to the entire area to connect the dry clay to the wet clay, to neaten the clay up and to help keep the wet clay pliable.
Step 11
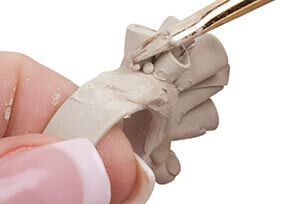
Using the paintbrush or tool of your choice, pick up the clay balls and begin to place them along the seam between the clay cones and the ring.
Carefully push the balls of clay into the wet clay, keeping in mind the ring itself may be pliable again given all the moisture that is present. If needed, slide the ring onto the ring mandrel to offer support.
Using the paintbrush or an oiled finger, neaten up the wet clay around the ring shank so you have little clean up to do after the clay has dried.
Step 12
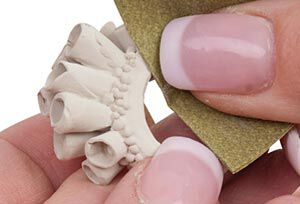
When dry, use a progression of polishing papers to refine all areas of the ring.
Remove any clay dust to prep the ring for firing.
Step 13
While wearing a mask, break off a few small pieces of fiber blanket. Place a piece of fiber blanket into the ring shank. Form and place pieces of fiber blanket into the bezels. The fiber blanket will help to maintain the form and control shrinkage during firing.
Step 14
Place the remaining fiber blanket into the kiln, then place the ring onto the fiber blanket. Fire the kiln full speed, to 1290-degrees F, and hold for one hour. Let the kiln and contents cool to room temperature.
You can choose to fire for a shorter period of time, I prefer to hold the temperature for one hour.
Step 15
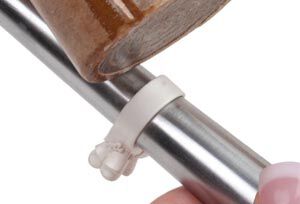
Remove the ring from the kiln. Assess the shape of the ring. If needed, place the ring onto a steel mandrel and apply gentle strikes from a rawhide mallet to shape the ring into proper form. Flip the ring over on the mandrel and repeat the process.
Step 16
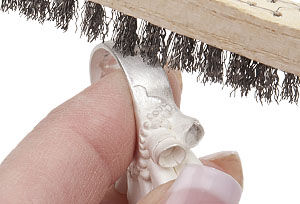
Burnish the surface of the ring using a fine steel wire brush.
This will leave a bright but satiny finish. If you would like a higher polish on the ring, place the ring into the tumbler along with one pound of stainless steel shot and a bit of dish detergent. Fill the container with water until the water reaches to just above the surface of the contents. Tumble the ring for 20 minutes. Check the finish. If you would like more polish, continue tumbling until you are pleased with the overall finish.
Rinse and dry the ring.
Step 17

Following the manufacturer’s instructions, prepare a batch of resin. Using a toothpick, add a tiny amount of oil paint, the color of your choice. Fold the color into the resin until well blended.
Stabilize the ring so the bezels are upright. Pour, or drop by toothpick, a small amount of the resin into each bezel. Do not fill to overflowing, only to the top of each bezel.

If you want a domed effect, let the resin cure for a few hours then go back and refill.
Depending on the position of the bezels, you may find you can only fill a few at this time.
Let the resin cure in the filled bezels, then repeat Step 17 until all the bezels are filled.


Copyright Permissions
All works of authorship (articles, videos, tutorials and other creative works) are from the Fire Mountain Gems and Beads® Collection, and permission to copy is granted for non-commercial educational purposes only. All other reproduction requires written permission. For more information, please email copyrightpermission@firemtn.com.