How to Use Bead Cones
Bead cones are the secret weapon of jewelry makers who love a polished, professional finish. These little wonders gather multiple strands into one neat connection, keeping designs tidy and tangle-free. Create bold multi-strand necklaces, add flair to beaded tassels or give your pieces a sleek, structured look. With finishes like silver, brass, gold and more, they match any vibe, from boho-chic to timeless elegance. Easy to use and endlessly versatile, bead cones bring that extra touch of charm to any handmade jewelry design.


Instructions
Step 1
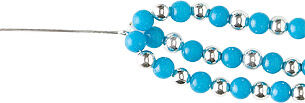
Use chain-nose pliers to open the loop (eye) on one eye pin. String the first link of a length of chain or one end of a strand, repeat for all other lengths or strands, then close the loop.
Thread ends can be knotted directly onto the eye pin, then trim excess thread.
Step 2
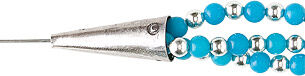
String the wide end of the cone of your choice onto the straight end of the eye pin. Position the cone over the ends of the chain or strands so they are hidden.
Step 3

Using round-nose pliers, grip the eye pin approximately 1/4 inch above the point of the cone, then bend the wire to a 90-degree angle. Bend the wire around the pliers, forming a partial loop.
OPTIONAL: Open the loop slightly and string the loop of a clasp or attach with jump rings at the end.
Use chain-nose pliers to wrap the remainder of the wire around the base of the loop, down to the top of the cone, completing the loop, then trim excess wire. Make sure to keep your wraps tight and close together.
Shop for Your Materials Here:


Copyright Permissions
All works of authorship (articles, videos, tutorials and other creative works) are from the Fire Mountain Gems and Beads® Collection, and permission to copy is granted for non-commercial educational purposes only. All other reproduction requires written permission. For more information, please email copyrightpermission@firemtn.com.