Headband with Satinique™ Cord and Elastic Cord

Hover over to zoom.
Design Idea NE43
-- Designer --
LauraLynn, Jewelry Designer, Exclusively for Fire Mountain Gems and Beads®
To learn more about LauraLynn, read her jewelry artist success story here.
: : : Materials : : :
Click here to view a full list of materials used in this design.
Please take the creative opportunity to select the products of your choice for this design, offered here at Fire Mountain Gems and Beads. Some materials may not be available or listed.
- Cord end, TierraCast®, "Maker's" collection, glue-in, antique brass-plated brass, 15.5x12.5mm pagoda, 10mm inside diameter
- Crimp end, JBB Findings, antiqued brass, 8.5x6mm tube with swivel, loop and rope trim design, 3mm inside diameter
- Cord, Satinique™, satin, tenderness, 2mm regular
- Jump ring, gold-plated brass, 8x5mm oval, 6.5x3.5mm inside diameter, 20 gauge
- Thread, Nymo®, nylon, black, size B
- Adhesive, Devcon® 5 Minute® Epoxy, 2-part
- Bracelet cord, elastic, metallic gold, 1mm
Instructions
Step 1
Cut one 18-foot length of Satinique™ 2mm cord and three 1-foot lengths of metallic gold elastic cord.
Step 2
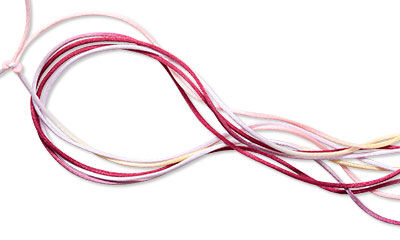
Form the 18-foot length of cord into five equal sized loops then tie the two ends together.
Tip: Use the free-hanging edge of a table or counter to form the loops. Ensure the two ends are tied together tightly before sliding the loops off of the edge.
Step 3
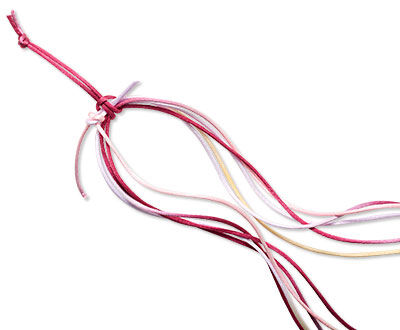
Cut a 1-foot length of cord and tie the two ends together to form a loop. Use that loop of thread to tie a lark's head knot around the five loops of cord at the point where the two ends of cord are tied together.
Secure the loop of thread to a sturdy surface, such as a clamp, a table leg or a doorknob.
Step 4
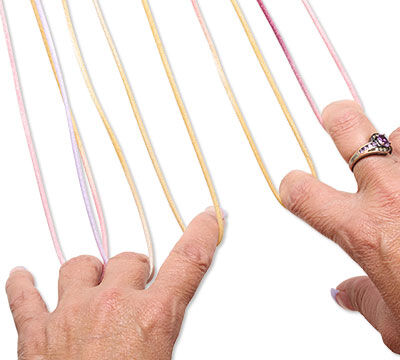
Separate the loops so two loops are on your middle and ring finger of one hand and three loops are on your index, middle and ring fingers of your other hand.
Step 5
Hold the thread taut, fingertips curved down.
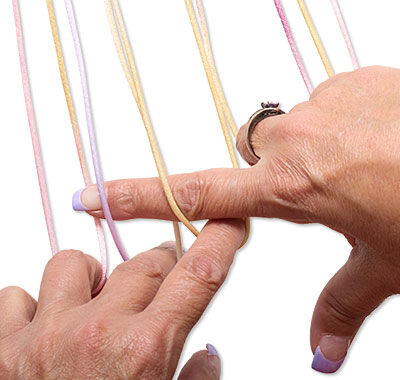
Using your free index finger, go down through the first loop on the opposite hand, up between the loops, down through the second loop, up between the loops then down through the last loop. Pick up the last loop and pull back through the other two loops passed through.
Tighten by spreading both arms, moving the braid down toward the end.
Step 6
Using your hand that now has two loops, walk your fingers down the loops so the outer loop is on your ring finger and the inner loop is on your middle finger, freeing up your index as your new working finger.
Step 7
Repeat Steps 5 and 6, pulling tight between each braid, until you've reached the desired length.
Step 8
The ends of the fingerloop braid may be messy. Locate a spot where the braids are neat then tie multiple tight loops of Nymo thread around the braid to secure.
Mix Devcon® 5 Minute® epoxy according to manufacturer's instructions. Apply epoxy generously to the braid around and on the inside of where the thread is tied. When set, cut the braid on the outside of the threaded area.
Repeat on the other end.
Step 9
Prepare more Devcon epoxy. Apply epoxy to the inside of one cord end then insert one end of the fingerloop braid into the cord end. Repeat on the other side.
Step 10
Take the three lengths of metallic gold elastic cord and insert the ends into a crimp end then crimp.
Step 11
Secure the crimp end to your work surface then use the three lengths of elastic cord to form a simple three-strand braid approximately six inches long. Repeat Step 10 to secure the braid.
For added security, apply epoxy to the base of the braids just above the crimp ends.
Step 12
Pass one oval jump ring through one cord end and one crimp end then close. Repeat on the opposite side to complete the headband.
Have a question regarding this project? Email Customer Service.
Copyright Permissions
The pieces featured in the Gallery of Designs are copyrighted designs and are provided for inspiration only. We encourage you to substitute different colors, products and techniques to make the design your own.
All works of authorship (articles, videos, tutorials and other creative works) are from the Fire Mountain Gems and Beads® Collection, and permission to copy is granted for non-commercial educational purposes only. All other reproduction requires written permission. For more information, please email copyrightpermission@firemtn.com.