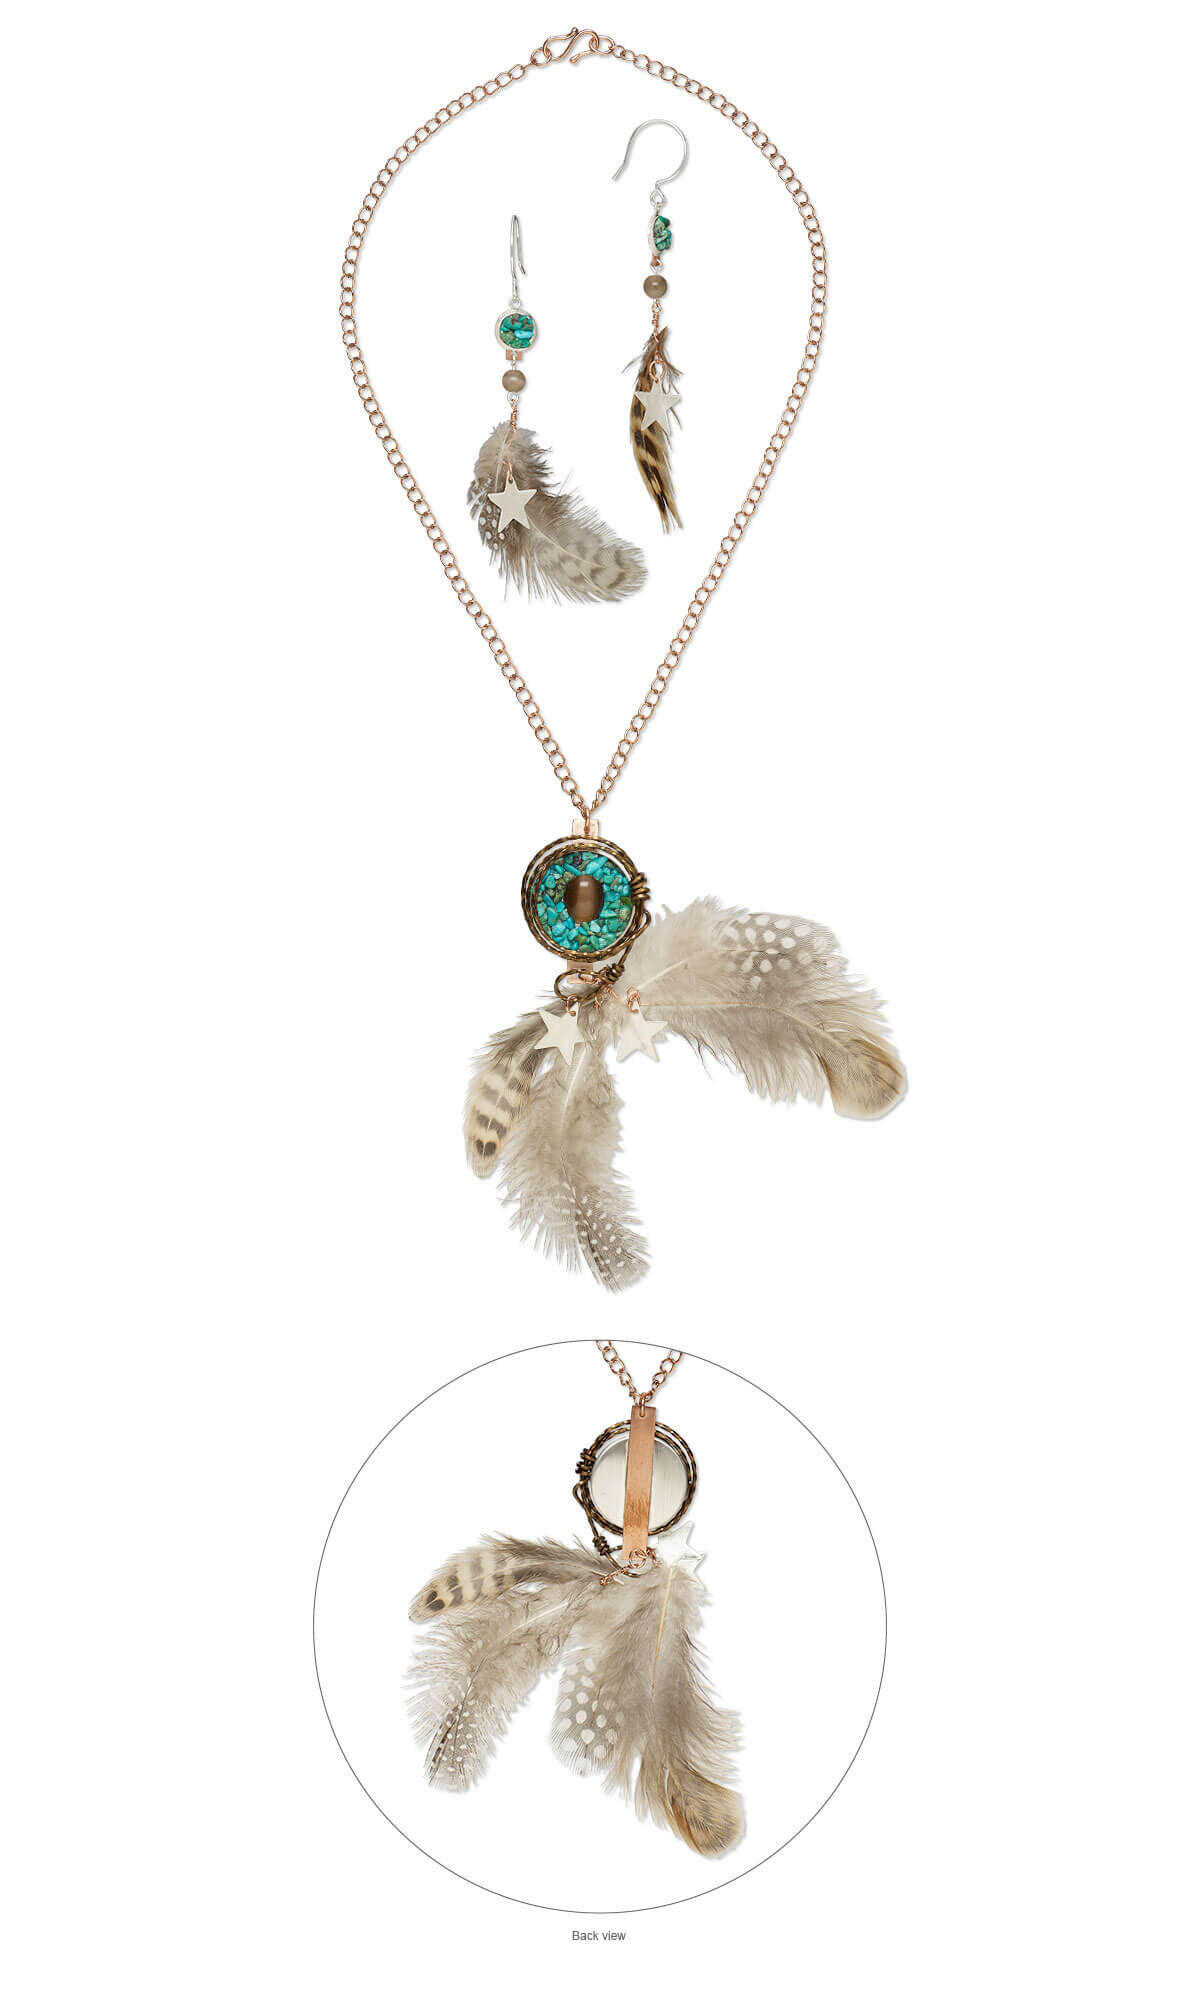
Single-Strand Necklace and Earring Set with Guinea Feathers, Turquoise Inlay Chips and Wirework


Design Idea MD2Y
-- Designer --
Patti, Jewelry Designer, Exclusively for Fire Mountain Gems and Beads®
To learn more about Patti Miller, read her jewelry artist success story here.
: : : Materials : : :
Click here to view a full list of materials used in this design.
Please take the creative opportunity to select the products of your choice for this design, offered here at Fire Mountain Gems and Beads. Some materials may not be available or listed.
- Bead, cat's eye glass (fiber optic glass), brown, 6mm round, quality grade
- Bezel cup, sterling silver, solid back, 25mm unpolished round
- Cabochon, cat's eye glass (fiber optic glass), brown, 12x10mm calibrated oval, quality grade
- Chain, antique copper-plated brass, 4x3.5mm curb, 18 inches
- Drop, sterling silver, 10mm solid back round with 8mm round bezel cup setting
- Ear wire, sterling silver, 20mm French hook with open loop, 21 gauge
- Eye pin, sterling silver, 1 inch, 21 gauge
- Feather, Guinea (natural), 2-4 inches
- Inlay chip, turquoise (dyed / stabilized), blue-green, mini undrilled chip, Mohs hardness 5 to 6
- Jump ring, clear-coated copper, 5x4.5mm oval, 3.8x3.2mm inside diameter, 22 gauge
- Jump ring, clear-coated copper, 7x6mm oval, 4.6x3.6mm inside diameter, 16 gauge
- Sheet, copper, half-hard, 7x1-inch rectangle with rounded corners, 22 gauge
- Sheet, sterling silver, half-hard with mirror finish, 28 gauge, 6x2 inches
- Wire, ParaWire™, silver-plated copper, round, 24 gauge
- Wire, ParaWire™, vintage bronze-finished copper, twisted square, 18 gauge
- Sanding pad, micro-mesh, 2-inch square, 1500-12000 grit
- Adhesive, Devcon® 5 Minute® Epoxy, 2-part
Instructions
Component Preparation
Trace one 1/3 x 2-inch and two 1/4 x 1/2 inch rectangles on the edge of a copper sheet with a thin permanent marker.
After tightening the saw blade in the jeweler's saw frame, apply wax to the serrated edge of the blade. Cut out the rectangles from the copper sheet, reapplying wax to the blade as needed.
Using a hole punch, punch a hole centered approximately 2mm from each end of all the copper bars. Smooth and straighten the edges and round the corners of the copper bars using a file.
Sand all surfaces of each cut metal component using course grit sandpaper to give the copper components a brushed finished.
Lubricate the star die cutter. Stamp out four 13x11mm stars from the sterling silver metal sheet.
Using hole-punch pliers, punch a hole in one corner of each star.
Mix Devcon® 5-Minute® epoxy according to manufacturer's instructions.
Using epoxy at the tips of the feathers, glue a smaller feather to a larger feather with the smaller feather on top and with a slight outward angle. Repeat to create a total of four feather components.
Cut four 6-inch lengths of 24-gauge copper wire. Make a bend in one of the wires approximately four inches from one edge. Make a small, wrapped loop with the shorter tail then continue to pass the shorter tail of the wire between the tips of one feather component. Continue to wrap the shorter tail twice around the longer tail then trim excess from the short end. Make a wrapped loop from the longer end of the wire. Repeat twice.
Repeat once using the last length of wire but without creating a small, wrapped loop using the shorter end.
Pass one 5x4.5mm jump ring through the hole on one star and the small, wrapped loop on one feather component then close. Repeat with the remaining two feather components that have small, wrapped loops.
Necklace Instructions
Mix Devcon 5-Minute epoxy according to manufacturer's instructions.
Apply a thin line of epoxy to one side of the large copper bar then press the copper bar centered onto the back of the 25mm bezel cup. Use only a thin line of epoxy so it does not squeeze out of the sides.
Use epoxy to glue the cat's eye glass cabochon to the center of the front of the bezel cup.
Set aside for two hours to dry.
Spread a thin layer of Signature Series Magic-Glos® top coat between the cabochon and the walls of the bezel cup then fill the bezel cup with turquoise chips. Arrange the chips so the bezel cup is not visible then place under a UV light to cure.
Use a 5x4.5mm jump ring to attach one starred feather component and one unstarred feather component to one hole of the copper bar, with the star of the starred feather component facing the front.
Cut one 20-inch length of 18-gauge twisted wire. Using a cylindrical object approximately 1-1/4 inches in diameter, such as a wooden handle or medicine bottle, wrap the wire three times around, leaving a 2-1/2 inch tail on one end. Space out the wraps so they are staggered in size, with the smallest wrap approximately the diameter of the bezel cup.
Wrap the tail three times around the staggered rings then let the remaining tail down about 1/2 inch. Create a wrapped loop, forming the loop into a teardrop approximately 13x8mm then trim excess wire.
Use Devcon to glue the twisted wire component to the bezel cup, positioning the teardrop wrapped loop over the bottom loop of the copper bar.
Use a 5x4.5mm jump ring to attach a star to the wrapped loop.
Attach a 7x6mm jump ring to the top loop of the copper bar then string the 18-inch chain through the jump ring.
Earring Instructions
Apply a thin strip of Devcon to one small copper bar then press the bar onto the back of one 8mm bezel cup drop, positioning the bar so the hole on one side is hanging down opposite from the loop at the top.
Repeat with the other small copper bar and bezel cup drop.
Set aside to dry for two hours.
Spread a thin layer of Signature Series Magic-Glos® top coat to the bottom of the bezel cup then fill the bezel cup with turquoise chips. Arrange the chips so the bezel cup is not visible then place under a UV light to cure.
Repeat with the other bezel cup drop.
String one 6mm cat's eye glass round onto an eye pin then form a simple loop. Repeat to create a second link.
Attach one end of the link to one starred feather component then attach the opposite end of the link to the hole of the copper bar. Attach an ear wire to the loop on the drop.
Repeat to create a second earring.
Have a question regarding this project? Email Customer Service.
Copyright Permissions
The pieces featured in the Gallery of Designs are copyrighted designs and are provided for inspiration only. We encourage you to substitute different colors, products and techniques to make the design your own.
All works of authorship (articles, videos, tutorials and other creative works) are from the Fire Mountain Gems and Beads® Collection, and permission to copy is granted for non-commercial educational purposes only. All other reproduction requires written permission. For more information, please email copyrightpermission@firemtn.com.