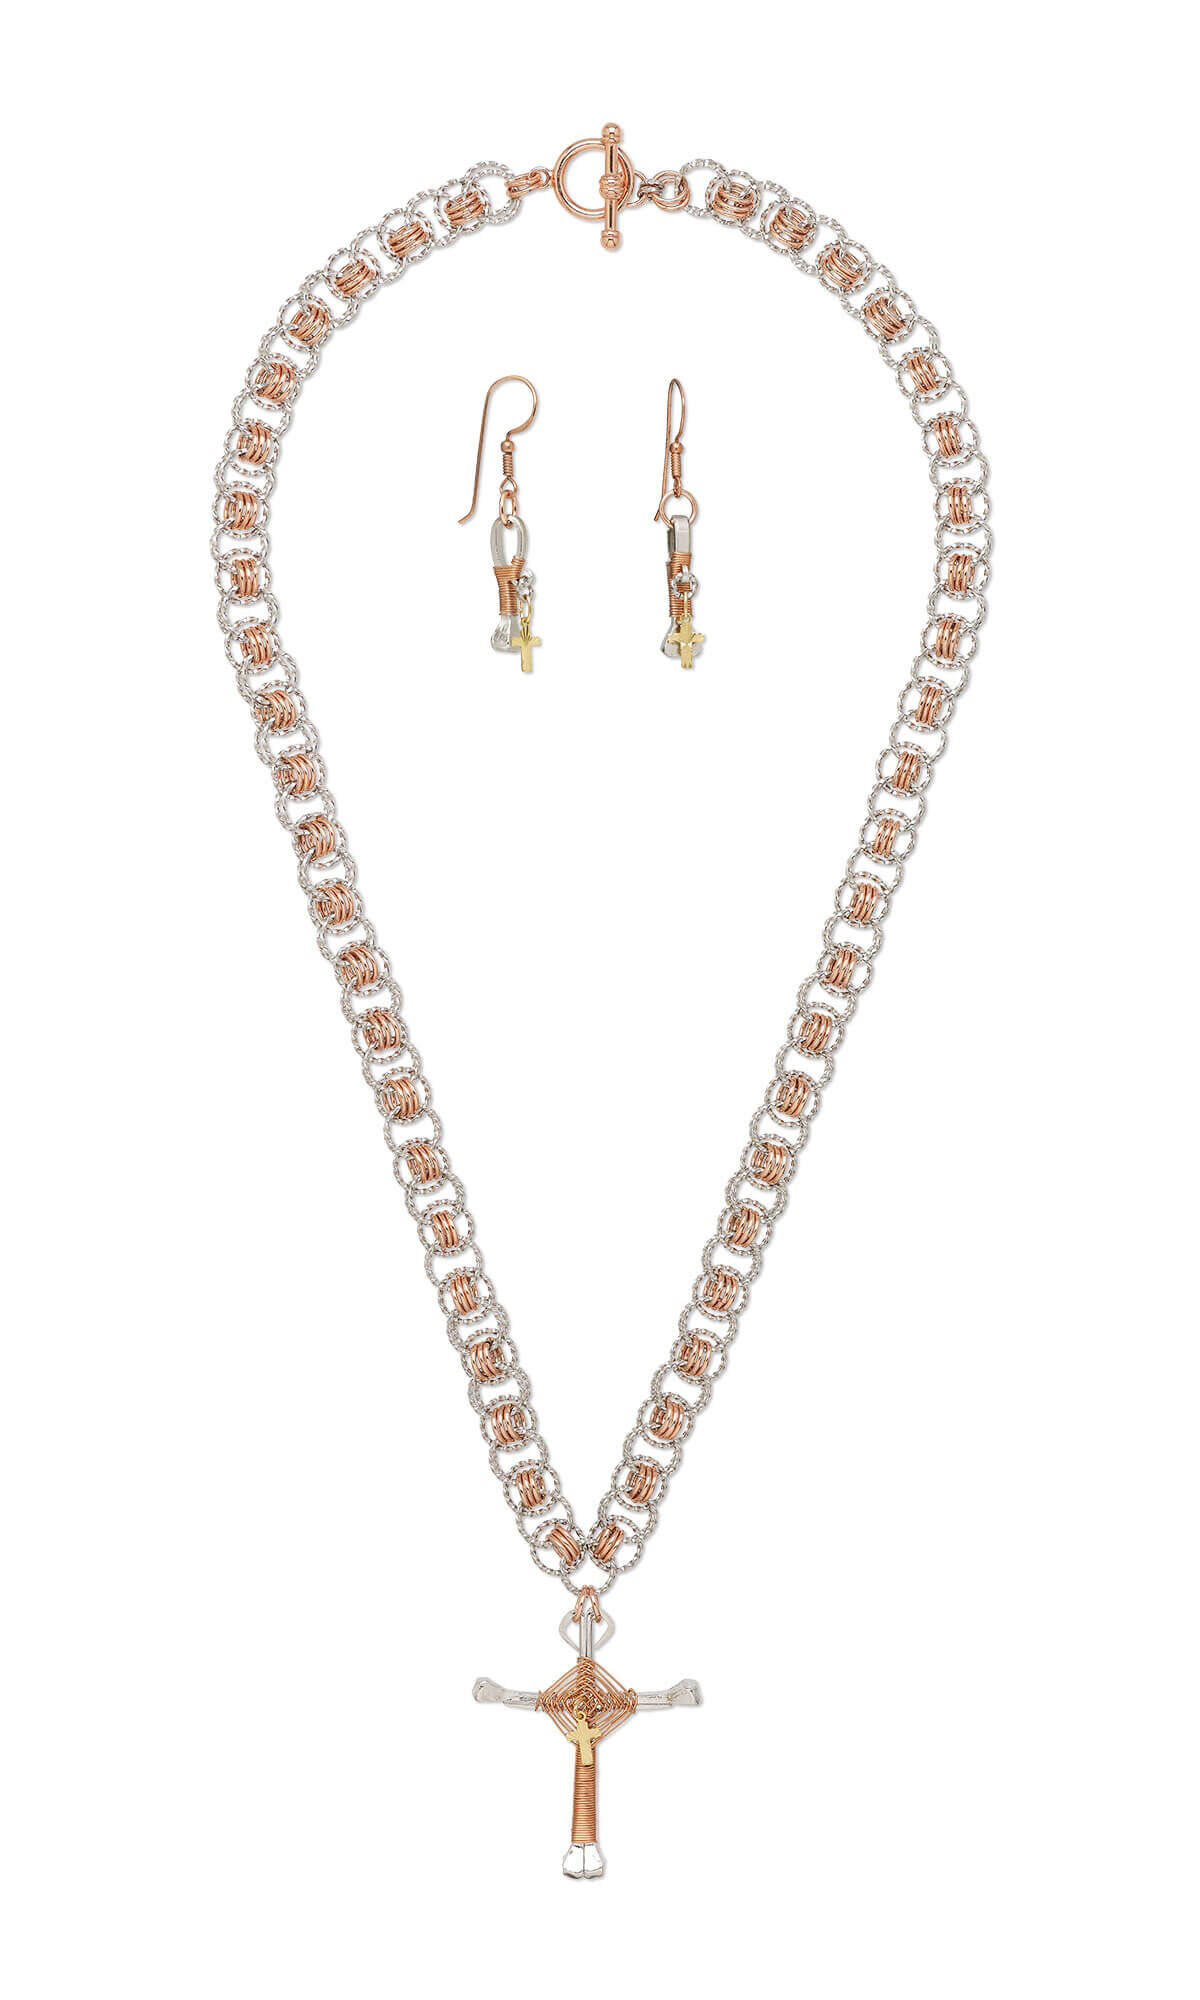
Single-Strand Necklace and Earring Set with Imitation Rhodium-Plated Carbon Steel Drops and Component, Gold-Plated Brass Drops and Chainmaille


Design Idea J709
Bridget's Country Cross
-- Designer --
Rose, Jewelry Designer, Exclusively for Fire Mountain Gems and Beads®
To learn more about Rose Wingenbach, read her jewelry artist success story here.
: : : Materials : : :
Click here to view a full list of materials used in this design.
Please take the creative opportunity to select the products of your choice for this design, offered here at Fire Mountain Gems and Beads. Some materials may not be available or listed.
- Component, imitation rhodium-plated carbon steel, 55x47mm assembled horseshoe nail cross
- Drop, imitation rhodium-plated carbon steel, 27x8mm-29x8mm horseshoe nail with fancy curl
- Jump ring, stainless steel, 12mm twisted round, 9.5mm inside diameter, 16 gauge
- Jump ring, stainless steel, 6mm twisted round, 3.4mm inside diameter, 16 gauge
- Clasp, toggle, copper-plated brass, 16mm round
- Drop, gold-plated brass, 9x7mm diamond-cut cross
- Ear wire, copper-plated copper, 23mm flat fishhook with coil and 2-3mm ball with open loop, 21 gauge
- Jump ring, clear-coated copper, 8mm round, 5.4mm inside diameter, 16 gauge
- Jump ring, gold-plated brass, 6x4mm oval, 4.3x2.5mm inside diameter, 20 gauge
- Wire, Wrapit®, Bright Copper, dead-soft, round, 24 gauge
Instructions
Necklace Instructions
Cross Focal
Position the pieces of one horseshoe nail cross component together. Use small pieces of tape to secure the ends of the pieces together to form the cross.
Pass one 6x4mm oval jumpring through the loop on one 9x7mm diamond cut cross drop then close.
String the jumpring onto the end of the copper Wrapit® wire (uncut from the spool).
Beginning close to the center of the cross component, wrap the end of the wire around one set of the corresponding pieces on one side, leaving an approximately 1/2 inch tail.
Bring the jumpring on the cross drop down, then wrap the wire over the center of the cross component and around to the back side, securing the cross drop. Keeping the wire taught, wrap around the corresponding pieces on the opposite side of the cross. Wrap back over the center, crossing over the previous wrap in the center.
Continue to wrap in the same direction over and around the next unwrapped side of corresponding pieces, wrapping over the 1/2 inch tail of the wire to secure it in place. Continue wrapping in the same direction over and around the next adjacent side of the cross.
Continue in the same direction wrapping around the sides of the cross and moving out, covering approximately 3/4 inch of the center of the cross. (Be sure to keep the wire taught and do not overlap the wraps for consistent wraps.)
End the wire wrap at the longest side of the cross, then continue to wrap down to the opposite end of that side.
Trim excess wire then press the end of the wire flat against the cross. Trim any excess wire from the tail as well.
Helm Chainmaille
Pass one shiny copper 8mm round jumpring through two 12mm twisted jumprings then close. Repeat to attach a total of three copper jumprings to the two twisted jumprings.
Tip: If desired, attach a wire to the first two twisted jumprings to help with handling when the chain is very short.
Pass a large floater jumpring between the two large jumprings and around the three smaller jumprings, without passing through the center of any.
Attach one large jumpring through the three small jumprings on each side of the floater.
Repeat to create an approximately 25-1/2 inch length of Helm chain.
Pass one copper 8mm jumpring through the loop on one portion of the clasp and the first two jumprings on the chain then close. Repeat to attach a second jumpring creating double jumprings.
Use double copper jumprings to attach two 6mm twisted jumprings to the opposite end of the chain. Use one copper 8mm jumpring to attach the second portion of the toggle clasp to the previous two jumprings.
Use double copper jumprings to attach the cross focal to one set of double 12mm twisted jumprings in the center of the chain.
Earring Instructions
Attach a 6x4mm oval jumpring to one 9x7mm diamond cut cross drop.
Begin wrapping one horseshoe nail curl drop at the base of the "head" of the nail, continuing up just past the loop on the opposite end.
Continue to wrap around the nail and inside the looped end of the nail for approximately six wraps, joining the two sides.
Trim excess wire leaving an approximately 2-inch tail then continue to wrap the remainder around the nail, just above the loop.
Pass one 6mm twisted jumpring through one cross drop and the loop on the wrapped nail drop then close. Use one copper 8mm jumpring to attach one fishhook earwire to the curved end of the nail.
Repeat Steps 2 - 5 to create a second earring.
Copyright Permissions
The pieces featured in the Gallery of Designs are copyrighted designs and are provided for inspiration only. We encourage you to substitute different colors, products and techniques to make the design your own.
All works of authorship (articles, videos, tutorials and other creative works) are from the Fire Mountain Gems and Beads® Collection, and permission to copy is granted for non-commercial educational purposes only. All other reproduction requires written permission. For more information, please email copyrightpermission@firemtn.com.