Triple-Strand Necklace and Earring Set with Crystal Passions® Beads and Antique Silver-Finished "Pewter" Beads


Hover over to zoom.
Design Idea JA1A
-- Designer --
Rose, Jewelry Designer, Exclusively for Fire Mountain Gems and Beads®
To learn more about Rose Wingenbach, read her jewelry artist success story here.
: : : Materials : : :
Click here to view a full list of materials used in this design.
Please take the creative opportunity to select the products of your choice for this design, offered here at Fire Mountain Gems and Beads. Some materials may not be available or listed.
- Ear wire, silver-plated stainless steel, 21mm fishhook with flower and open loop, 21 gauge
- Wire protector, Accu-Guard™, silver-plated brass, 4mm tube, 0.5mm inside diameter
- Bead, antique silver-finished "pewter" (zinc-based alloy), 10mm double-sided flat round with snowflake design
- Clasp, magnetic barrel, silver-plated steel, 12x6mm round tube with 1mm inside diameter
- Bead, Crystal Passions®, crystal AB, 8x6mm faceted rondelle (5040)
- Bead, Crystal Passions®, crystal AB, 6x4mm faceted rondelle (5040)
- Bead, Crystal Passions®, Capri blue, 4mm bicone (5328)
- Crimp, sterling silver, 2mm cut tube, 1.4mm inside diameter
- Eye pin, silver-plated brass, 1 inch, 21 gauge
- Head pin, silver-plated brass, 2 inches, 21 gauge
- Head pin, silver-plated brass, 1 inch, 21 gauge
- Bead, Crystal Passions®, crystal AB, 4x3mm faceted rondelle (5040)
- Bead, Crystal Passions®, crystal AB, 4x3mm faceted rondelle (5040)
- Beading wire, Accu-Flex®, nylon and stainless steel, Crater Lake blue, 49 strand, 0.024-inch diameter
- Jump ring, silver-plated brass, 4mm round, 2.4mm inside diameter, 20 gauge
- Bead, Crystal Passions®, Capri blue, 3mm bicone (5328)
Instructions
Necklace Instructions
Step 1
Cut one 20-inch, one 22-inch and one 24-inch length of Accu-Flex® professional-quality beading wire.
First Strand
Step 2
String onto the 20-inch length of beading wire: one crimp and one Accu-Guard™ wire protector. Pass the beading wire back through the crimp. Pull the beading wire so the crimp rests snug against the Accu-Guard leaving approximately 1/4 inch of beading wire on the end. Crimp, then trim the excess from the short end of the beading wire.
Step 3
String one crimp onto the beading wire then crimp it approximately 2 inches from the previous crimp.
String onto the beading wire:
- One Capri blue 3mm bicone
- One crystal AB 4x3mm rondelle
- One Capri blue 3mm bicone
- One crimp
Slide the beads close to the previous crimp then crimp the last crimp.
Repeat to create two more sets of beads approximately 1/2 inches from the previous set.
Step 4
Repeat to secure the following sets of beads at 1/2 inch intervals with a crimp on each side:
- Two sets of: one Capri blue 4mm bicone, one crystal AB 6x4mm rondelle, one Capri blue 4mm bicone and one crimp
- One Capri blue 4mm bicone, one crystal AB 8x6mm rondelle, one Capri blue 4mm bicone and one crimp
Step 5
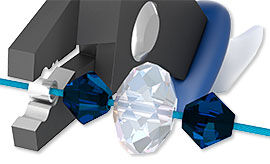
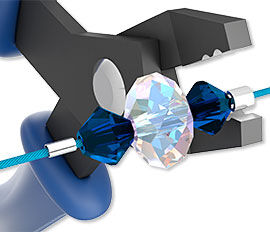
Continue to secure one set of: one crystal AB 4x3mm rondelle, one 10mm double-sided flat round, one crystal AB 4x3mm rondelle and one crimp. Secure the crimp then Repeat Steps 3 and 4 in the opposite direction to string the second half of the necklace.
Leave approximately 2 inches of beading wire then repeat Step 2 to secure the strand.
Second Strand
Step 6
Repeat Step 2 to begin the second strand then secure the following sets of beads along the strand with a crimp on each side, beginning approximately 2 inches from the previous crimp:
- Three sets of: one Capri blue 3mm bicone, one crystal AB 4x3mm rondelle and one Capri blue 3mm bicone
- Two sets of: one Capri blue 4mm bicone, one crystal AB 6x4mm rondelle and one Capri blue 4mm bicone
- One Capri blue 4mm bicone, one crystal AB 8x6mm rondelle and one Capri blue 4mm bicone
- One crystal AB 4x3mm rondelle, one 10mm double-sided flat round and one crystal AB 4x3mm rondelle
Step 7
Continue to secure one set of: Capri blue 4mm bicone, one crystal AB 8x6mm rondelle, one Capri blue 4mm bicone with a crimp on each side. Repeat Steps 6 in the opposite direction to string the second half of the necklace.
Leave approximately 2 inches of beading wire then repeat Step 2 to secure the strand.
Third Strand
Step 8
Repeat Step 2 to begin the third strand then secure the following sets of beads along the strand with a crimp on each side, beginning approximately 2 inches from the previous crimp:
- Three sets of: one Capri blue 3mm bicone, one crystal AB 4x3mm rondelle and one Capri blue 3mm bicone
- Two sets of: one Capri blue 4mm bicone, one crystal AB 6x4mm rondelle and one Capri blue 4mm bicone
- One Capri blue 4mm bicone, one crystal AB 8x6mm rondelle and one Capri blue 4mm bicone
- One crystal AB 4x3mm rondelle, one 10mm double-sided flat round and one crystal AB 4x3mm rondelle
- One Capri blue 4mm bicone, one crystal AB 8x6mm rondelle and one Capri blue 4mm bicone
Step 9
Continue to secure one set of: one crystal AB 4x3mm rondelle, one 10mm double-sided flat round and one crystal AB 4x3mm rondelle with a crimp on each side. Repeat Steps 8 in the opposite direction to string the second half of the necklace.
Leave approximately 2 inches of beading wire then repeat Step 2 to secure the strand.
Step 10
Insert one 2-inch head pin through the center of one portion of one barrel clasp, so the head sits inside the clasp. Form a wrapped loop on the straight end of the head pin. Repeat to create a loop on the second portion of the clasp.
Step 11
Pass one 4mm jump ring through the loop on one portion of the clasp and one Accu-Guard on each strand, then close.
Repeat to attach the second portion of the clasp to the opposite end of the strands.
Earring Instructions
Step 1
String onto one 1-inch head pin: one crystal AB 4x3mm rondelle, one 10mm double-sided flat round and one crystal AB 4x3mm rondelle, then form a simple loop. Repeat to create a flat round drop.
Step 2
String onto one 1-inch eye pin: one Capri blue 4mm bicone, one crystal AB 6x4mm rondelle and one Capri blue 4mm bicone, then form a simple loop. Repeat to create a second rondelle link.
Step 3
Connect one flat round drop, one rondelle link and one fishhook ear wire end to end. Repeat to create a second earring.
Have a question regarding this project? Email Customer Service.
Copyright Permissions
All works of authorship (articles, videos, tutorials and other creative works) are from the Fire Mountain Gems and Beads® Collection, and permission to copy is granted for non-commercial educational purposes only. All other reproduction requires written permission. For more information, please email copyrightpermission@firemtn.com.