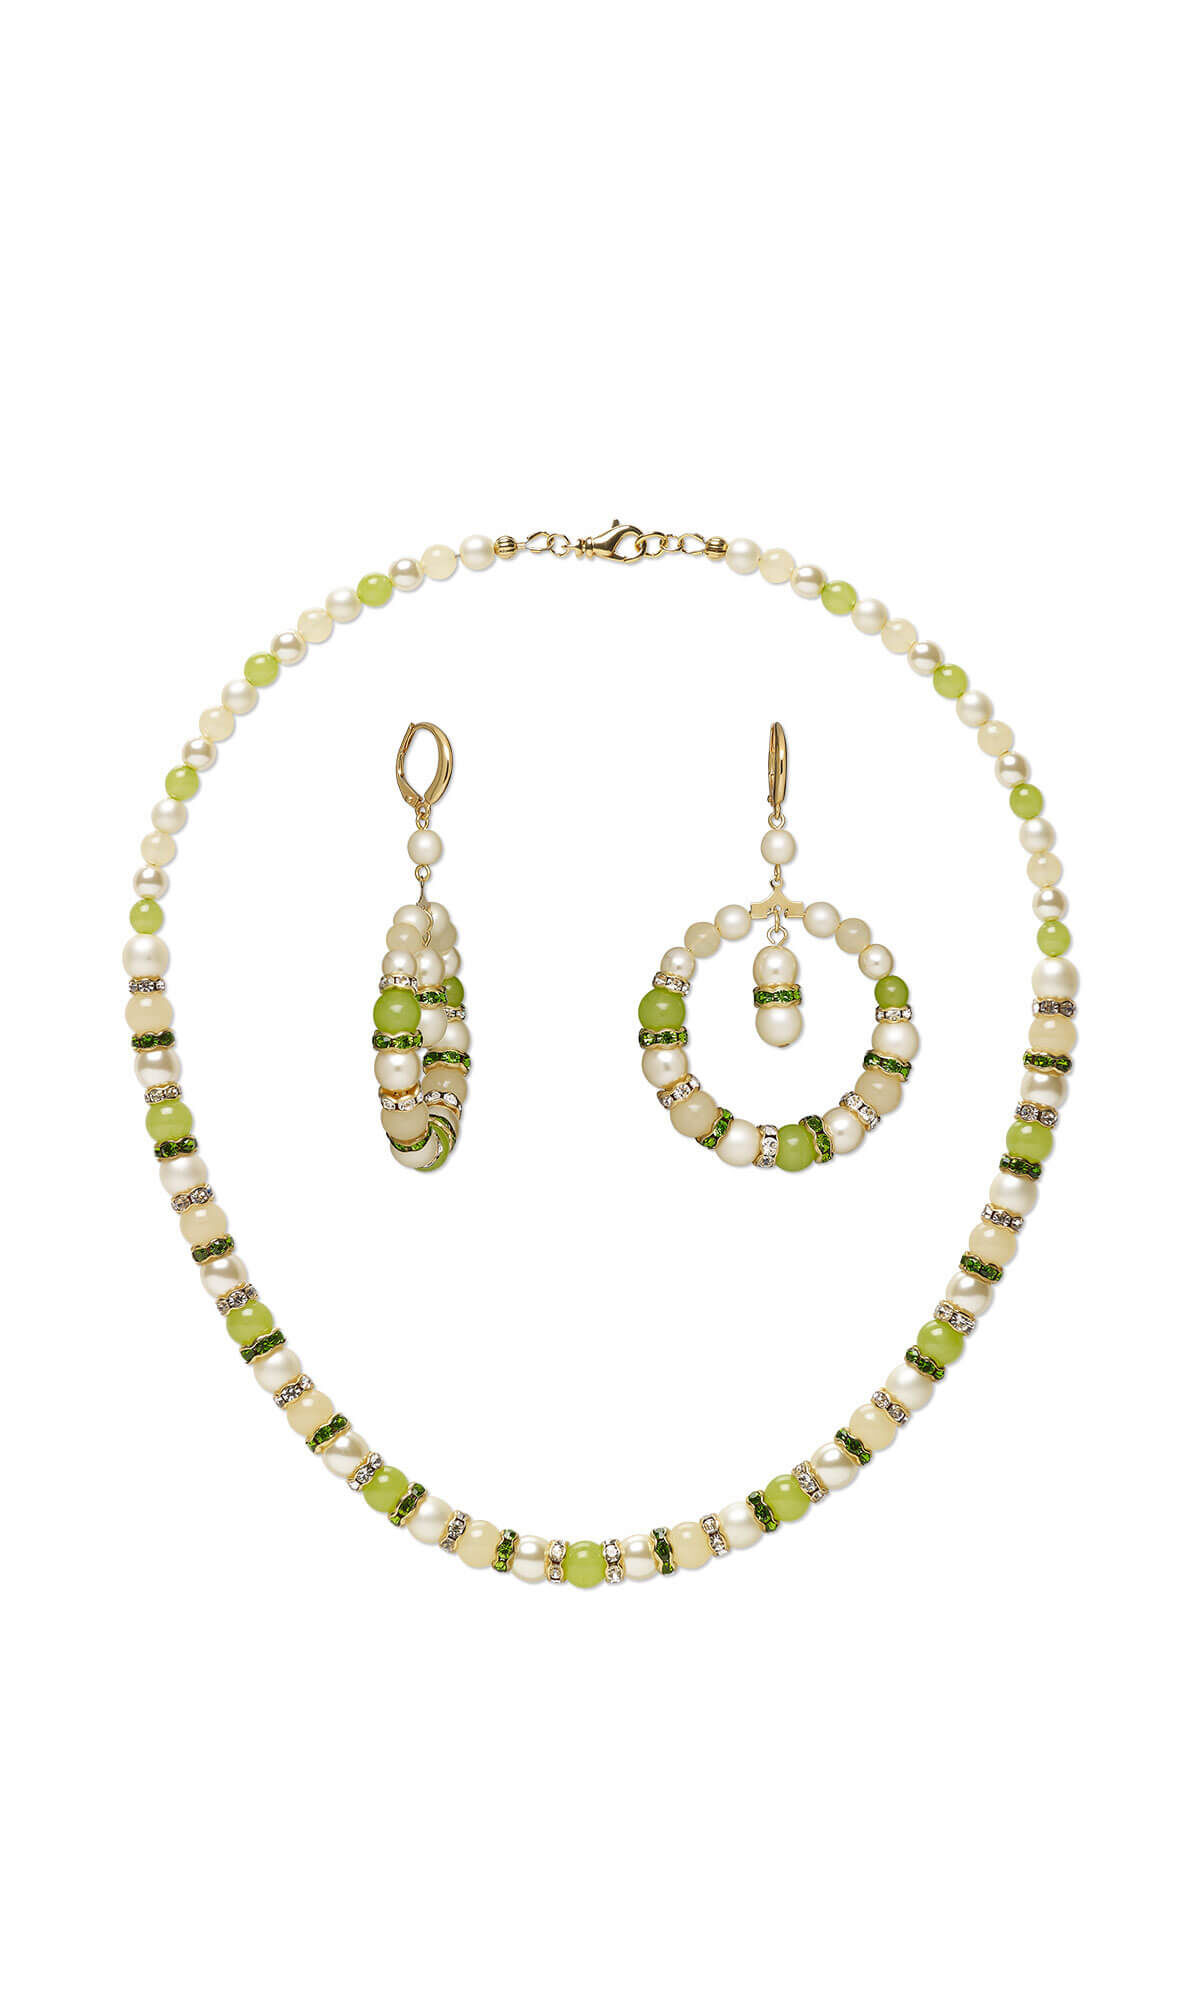
Single-Strand Necklace and Earring Set with Czech Glass Beads and Gold-Finished Brass and Rhinestone Rondelles


Design Idea J33J
-- Designer --
Esther, Jewelry Designer, Exclusively for Fire Mountain Gems and Beads®
To learn more about Esther Pollock, read her jewelry artist success story here.
: : : Materials : : :
Click here to view a full list of materials used in this design.
Please take the creative opportunity to select the products of your choice for this design, offered here at Fire Mountain Gems and Beads. Some materials may not be available or listed.
- Ear wire, gold-plated brass, 16mm leverback with closed loop
- Wire protector, Accu-Guard™, gold-plated brass, 4mm tube, 0.5mm inside diameter
- Crimp cover, gold-plated brass, 4mm corrugated round
- Clasp, lobster claw, gold-plated brass, 12x7mm with swivel
- Bead, Czech dipped décor glass druk, mint, 8mm round
- Bead, Czech dipped décor glass druk, cream, 8mm round
- Bead, Czech dipped décor glass druk, mint, 6mm round
- Bead, Czech dipped décor glass druk, cream, 6mm round
- Jump ring, gold-plated brass, 4.5mm round, 2.9mm inside diameter, 20 gauge
- Bead, Czech pearl-coated glass druk, opaque matte cream, 8mm round
- Bead, Czech pearl-coated glass druk, opaque cream, 8mm round
- Bead, Czech pearl-coated glass druk, opaque matte cream, 6mm round
- Bead, Czech pearl-coated glass druk, opaque cream, 6mm round
- Beading hoop, gold-plated brass, 40mm round with loop
- Bead, glass rhinestone and gold-finished brass, peridot green, 8x4mm rondelle
- Crimp, 12Kt gold-filled, 2mm smooth tube, 1.1mm inside diameter
- Eye pin, gold-plated brass, 1 inch, 21 gauge
- Head pin, gold-plated brass, 1 inch, 21 gauge
- Beading wire, Accu-Flex®, nylon and stainless steel, clear, 49 strand, 0.019-inch diameter
- Bead, glass rhinestone and gold-finished brass, clear, 7x3mm rondelle
- Bead, gold-finished brass and rhinestones, clear, 6x3mm rondelle
- Jump ring, gold-plated brass, 6mm round, 4.2mm inside diameter, 18 gauge
Instructions
Necklace Instructions
Cut a 22-inch length of Accu-Flex® professional-quality beading wire.
String onto the length of beading wire: one crimp and one Accu-Guard™ wire protector. Pass the beading wire back through the crimp. Pull the beading wire so the crimp rests snug against the Accu-Guard leaving approximately 1/4 inch of beading wire on the end. Crimp, then trim the excess from the short end of the beading wire. Finish with a crimp cover.
String the following onto the beading wire four times:
- One 6mm matte cream round
- One 6mm dipped décor cream round
- One 6mm cream round
- One 6mm dipped décor mint round
String the following onto the beading wire three times:
- One 8mm matte cream round
- One 7x3mm clear rondelle
- One 8mm dipped décor cream round
- One 7x3mm peridot rondelle
- One 8mm cream round
- One clear rondelle
- One 8mm dipped décor mint round
- One peridot rondelle
String the following onto the beading wire:
- One 8mm matte cream round
- One clear rondelle
- One 8mm dipped décor cream round
- One peridot rondelle
- One 8mm cream round
- One clear rondelle
- One 8mm dipped décor mind round
- One clear rondelle
String the following onto the beading wire three times:
- One 8mm cream round
- One peridot rondelle
- One 8mm dipped décor cream round
- One clear rondelle
- One 8mm matte cream round
- One peridot rondelle
- One dipped décor mint round
- One clear rondelle
String the following onto the beading wire:
- One 8mm cream round
- One peridot rondelle
- One 8mm dipped décor cream round
- One clear rondelle
- One 8mm matte cream round
Repeat Steps 2 - 3 in reverse to complete the strand.
Use a 4.5mm jumpring to attach a lobster claw clasp to one end of the beaded strand.
Repeat to attach a 6mm jumpring to the opposite end of the strand.
Earring Instructions
String one 8mm matte cream round, one 7x3mm peridot rondelle and one 8mm cream round onto a 1-inch headpin then create a simple loop.
Repeat to create a second drop.
String a 6mm matte cream round onto a 1-inch eyepin then create a simple loop.
Repeat to create a second link.
String the following onto a 40mm beading hoop:
- One 6mm matte cream round
- One 6mm dipped décor cream round
- One 6mm cream round
- One 8mm dipped décor mint round
- One 6x3mm clear rondelle
- One 7x3mm peridot rondelle
- One 8mm cream round
- One 7x3mm clear rondelle
- One 8mm dipped décor cream round
- One 7x3mm peridot rondelle
- One 8mm matte cream round
- One 7x3mm clear rondelle
- One 8mm dipped décor mint round
- One 7x3mm peridot rondelle
- One 8mm cream round
- One 7x3mm clear rondelle
- One 8mm dipped décor cream round
- One 7x3mm rondelle
- One 8mm matte round
- One 6x3mm clear rondelle
- One 6mm dipped décor mint round
- One 6mm cream round
- One 6mm dipped décor cream round
- One 6mm matte cream round
Insert the end of the beading hoop wire into the hole at the top, then crimp with chain nose pliers to secure.
Repeat to bead a second beading hoop.
Tip: For additional security apply a small amount of adhesive to inside of the hole.
Pass the loop of a drop created in Step 1 through the loop on the inside of the beading wire, then close.
Repeat to add the second drop to the second beading hoop.
Pass a loop of a beaded link created in Step 2 through the top loop of a beading hoop then close. Pass the opposite loop of the bead link through the loop of a leverback earwire, then close.
Repeat to complete the second earring.
Have a question regarding this project? Email Customer Service.
Copyright Permissions
All works of authorship (articles, videos, tutorials and other creative works) are from the Fire Mountain Gems and Beads® Collection, and permission to copy is granted for non-commercial educational purposes only. All other reproduction requires written permission. For more information, please email copyrightpermission@firemtn.com.