Ring with Seed Beads
Instructions

Start with 3 feet of beading wire. String 3 beads to the center of the wire.

Thread the other end of the wire through the beads so the ends point in opposite directions.

Pull both ends of wire gently to tighten and center the wire, but don't pull so tight that the row of beads curves.
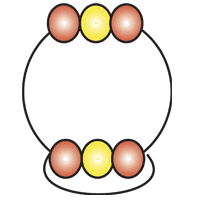
String 3 more beads on one end and pass the other end through the beads. Pull both ends to tighten.
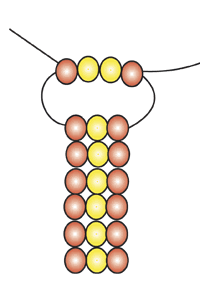
Continuing the same way, make seven rows of 3 beads, one row of 4 beads, one row of 5 beads, one row of 6 beads, one row of 7 beads, one row of 8 beads, and two rows of 9 beads, following the pattern in figures 5 and 6 or the blue and clear ring. Keep the bead rows as straight as possible.
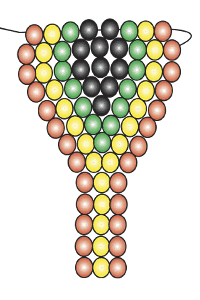
Now repeat the pattern in reverse, starting with the row of 8 beads. It's probably easiest to tighten each row as you make it, but you might prefer to string the rows loosely and tighten the entire piece later.
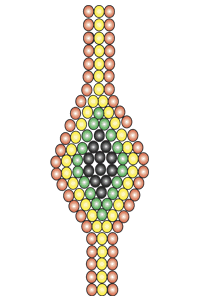
After tapering the pattern back to 3 beads, make as many rows as you need until the ring is long enough to fit around the intended finger.
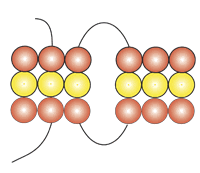
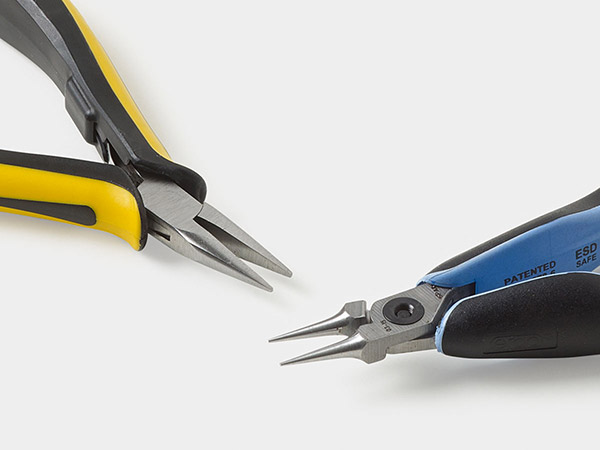
Join the ends by running the wire tails back and forth through several rows on the starting end. A small pair of chain-nose pliers helps to pull the wires tight in this step.
Shop for Your Materials Here:
Have a question regarding this project? Email Customer Service.
Copyright Permissions
All works of authorship (articles, videos, tutorials and other creative works) are from the Fire Mountain Gems and Beads® Collection, and permission to copy is granted for non-commercial educational purposes only. All other reproduction requires written permission. For more information, please email copyrightpermission@firemtn.com.
