Single-Strand Necklace, Bracelet and Earrings Set with Cultured Freshwater Pearls and Crystal Passions® Beads
Create personalized wedding jewelry that reflects your style! This video shows you how to design a custom bridal set—necklace, earrings and bracelet—using 2-3 simple techniques. Learn to incorporate meaningful colors and elements while keeping the process quick and fun. We’ll also share tips for bridesmaids' jewelry and matching designs to wedding dress styles.


Hover over to zoom.
Design Idea E30B
-- Designer --
Rose, Jewelry Designer, Exclusively for Fire Mountain Gems and Beads®
To learn more about Rose Wingenbach, read her jewelry artist success story here.
: : : Materials : : :
Click here to view a full list of materials used in this design.
Please take the creative opportunity to select the products of your choice for this design, offered here at Fire Mountain Gems and Beads.
- Pearl, White Lotus™, cultured freshwater, peach, 8mm half-drilled button, B grade, Mohs hardness 2-1/2 to 4
- Pearl, Preciosa Czech crystal, lavender, 8mm round
- Pearl, Crystal Passions®, peach, 8mm round (5810)
- Jump ring, silver-plated brass, 4mm round, 2.4mm inside diameter, 20 gauge
- Earstud, glue-in sterling silver, 6mm cup with peg and open loop, fits 6-8mm half-drilled bead
- Crimp, sterling silver, 2mm cut tube, 1.4mm inside diameter
- Crimp cover, gold-plated brass, 4mm stardust round
- Clasp, hook-and-eye, silver-plated brass, 28x4mm with glue-in cord ends, 1mm inside diameter
- Chain, Gossamer™, sterling silver, 0.6mm beading
- Beading wire, Accu-Flex®, nylon and silver-plated stainless steel, clear, 49 strand, 0.024-inch diameter
- Bead, glass rhinestone and silver-plated brass, clear, 7x3mm rondelle
- Adhesive, 5 Minute® Epoxy, 2-part epoxy (14250), clear.
Instructions
Necklace Instructions
Step 1
Cut one 20-inch length of 0.024-inch 49-strand silver plate Accu-Flex®.
Step 2
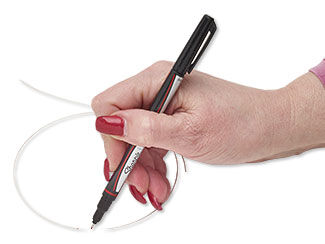
Find the center of the Accu-Flex using a ruler and mark it with a permanent marker.
Step 3
Measure the total length of the beads in each floating grouping. In this necklace, it’s 8mm plus 2mm plus 8mm, which equals 18mm of bead space. Divide that number in half to get 9mm.
Step 4
Mark the Accu-Flex 9mm from center. Slide a 2x2mm crimp bead over the second mark.
Step 5
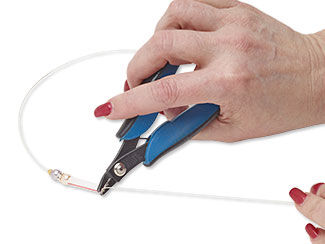
Make sure the crimp bead is centered on the mark on the Accu-Flex, then crimp down hard with a crimp tool. Rotate the crimp tool 45 degrees (1/4 turn). Use the outside groove of the tool to close the crimp. For extra security, use the very outside edge to tighten the crimp a bit more. For instructions on using a crimp tool, watch the "Secrets to Crimping with Crimp Tubes" video or read the instructions. Then add a crimp cover.
Step 6
Using a ruler, neatly cut a precise 1-inch length of a drinking straw. Set aside.
Step 7
Thread one 8mm lavender pearl, one silver plate rondelle and one 8mm peach pearl onto the Accu-Flex.
Step 8

Thread a crimp bead onto the Accu-Flex next to the 8mm peach pearl, leaving 1mm space. Crimp. Add a crimp cover.
Step 9
Slide the 1-inch straw onto the Accu-Flex so it goes over the crimp cover and rests against the 8mm peach pearl.
Step 10
Thread a crimp bead onto the Accu-Flex next to the straw, leaving 1mm space. Crimp. Add a crimp cover.
Step 11
Keep going with your pattern on both sides of the center of the Accu-Flex until you’ve filled in your necklace to the length you want. Be sure to leave a little free Accu-Flex for the clasp on the ends.
Step 12
Center your necklace on a ruler. Trim the ends of the Accu-Flex about 9 inches from the center on both sides for a total length of 18 inches. The clasp will add an additional half inch, making the total length 18-1/2 inches.
Step 13
Mix a drop of Devcon® 5 Minute® Epoxy, then cut a 2-inch piece of Accu-Flex. You’ll use the Accu-Flex to fill the clasp end with epoxy. Have a cotton swab and rubbing alcohol ready to clean up any excess.
Step 14
Place the clasp on your work surface (on a silicone mat if you have one) and use the 2-inch piece of Accu-Flex to fill one end of the clasp with epoxy.
Step 15
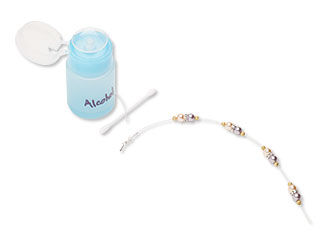
Immediately clean the edges and any other spillage with alcohol and a cotton swab. Then lay the necklace on the work surface so one end is near the clasp. Slide the end of the necklace in until it hits the top of the cone. Let it dry 5 minutes, then repeat for the other side of the clasp.
Bracelet Instructions
Step 1
Cut one 9-inch length of 0.024-inch 49-strand silver plate Accu-Flex.
Step 2
Find the center of the Accu-Flex using a ruler and mark it with a permanent marker.
Step 3
Measure the total length of the beads in each floating grouping. For this bracelet, it’s 8mm plus 2mm plus 8mm, which is 18mm of bead space. Cut that number in half to get 9mm.
Step 4
Mark the Accu-Flex 9mm from center. Slide a 2x2mm crimp bead over the second mark.
Step 5
Make sure the crimp bead is centered on the mark on the Accu-Flex, then crimp down hard with a crimp tool. Rotate the crimp tool 45 degrees (1/4 turn). Use the outside groove of the tool to close the crimp. For extra security, use the very outside edge to tighten the crimp a bit more. Then add a crimp cover.
Step 6
Using a ruler, neatly cut a precise 0.5-inch length of a drinking straw. Set aside.
Step 7
Thread one 8mm lavender pearl, one silver plate rondelle and one 8mm peach pearl onto the Accu-Flex.
Step 8
Thread a crimp bead onto the Accu-Flex next to the 8mm peach pearl, leaving 1mm space. Crimp. Add a crimp cover.
Step 9
Slide the 0.5-inch straw onto the Accu-Flex so it goes over the crimp cover and rests against the 8mm peach pearl.
Step 10
Thread a crimp bead onto the Accu-Flex next to the straw, leaving 1mm space. Crimp. Add a crimp cover.
Step 11
Keep going with your pattern on both sides of the center of the Accu-Flex until you’ve filled in your bracelet to the length you want. Be sure to leave a little free Accu-Flex for the clasp on the ends.
Step 12
Trim the ends of the Accu-Flex neatly so there is an even amount free at either end. The Accu-Flex should now measure 7 inches. (The added clasp will make the overall length about 7-1/4 inches.)
Step 13
Mix a drop of Devcon 5 Minute Epoxy, then cut a 2-inch piece of Accu-Flex. You’ll use the Accu-Flex to fill the clasp end with epoxy. Have a cotton swab and rubbing alcohol ready to clean up any excess.
Step 14
Place the clasp on your work surface (on a silicone mat if you have one) and use the 2-inch piece of Accu-Flex to fill one end of the clasp with epoxy.
Step 15
Immediately clean the edges and any other spillage with alcohol and a cotton swab. Then lay the bracelet on the work surface so one end is near the clasp. Slide the end of the bracelet in until it hits the top of the cone. Let it dry 5 minutes, then repeat for the other side of the clasp.
Earring Instructions
Step 1
Cut one 2.8-inch length of 0.6mm beading chain.
Step 2
Pick up a 2x2mm sterling silver crimp bead with a pair of crimping pliers.
Step 3
Thread the beading chain through the crimp bead and crimp firmly a couple millimeters from one end.
Step 4
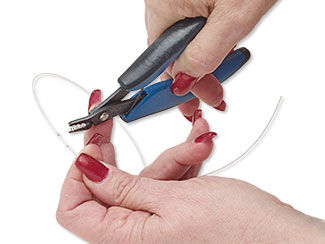
Use a flush cutter to cut the excess (short end) beading chain off flush with the crimp bead.
Step 5
Apply a crimp cover.
Step 6
Thread on one 8mm lavender pearl, one silver plate rondelle and one 8mm peach pearl.
Step 7
Apply a crimp bead and crimp cover just above the 8mm peach pearl.
Step 8
Use pliers to open and remove the hook portion of a glue-in clasp. The glue-in clasp ends will attach the earrings to the post.
Step 9
Lay one of the glue-in clasp ends on your work surface. Set the second one aside.
Step 10
Mix a drop of Devcon 5 minute Epoxy. Use a scrap piece of Accu-Flex to fil the clasp end with epoxy.
Step 11
Lay the end of the chain next to the clasp end. With chain-nose pliers, grasp the chain about 1/2 inch from the free end. Slide the end of the chain into the clasp end until it is fully seated.
Step 12
Immediately use a cotton swab and some rubbing alcohol to clean away any epoxy that is visible. Let it dry for 5 minutes.
Pro Tip: When using a crimp bead as a stopper on beading chain, crimp a couple millimeters from the bottom, then cut the chain off flush so there’s a clean end.
Step 13
Set a cup-and-peg earstud into a piece of scrap polymer clay so that the cup is level and peg pointing upward.
Step 14
Mix a drop of Devcon 5 Minute Epoxy and apply a small amount to the peg and inside the rim of the cup.
Step 15
Apply an 8mm half-drilled peach button pearl to the peg so the pearl is completely seated.
Step 16
Immediately use a cotton swab and some rubbing alcohol to clean away any epoxy that is visible. Let it dry for 5 minutes.
Step 17
Add the dangle to the loop on the earstud with a 4mm 20-gauge jump ring.
Step 18
Repeat steps for the second earring.
Have a question regarding this design idea? Email Customer Service.
Copyright Permissions
The pieces featured in the Gallery of Designs are copyrighted designs and are provided for inspiration only. We encourage you to substitute different colors, products and techniques to make the design your own.
All works of authorship (articles, videos, tutorials and other creative works) are from the Fire Mountain Gems and Beads® Collection, and permission to copy is granted for non-commercial educational purposes only. All other reproduction requires written permission. For more information, please email copyrightpermission@firemtn.com.