Wubbers® Pliers Serious Jewelry Tools with a Sassy Name

Patti Bullard, PhD, Inventor of Wubbers Pliers
Do you remember the saying, "Build a better mousetrap and the world will beat a path to your door"?
With Wubbers, Patti Bullard has invented a better set of pliers that jewelry makers are beating a path to…well, not her door, but to Fire Mountain Gems and Beads to buy her line of Wubbers pliers.
Click the links below to jump to illustrated step-by-step instructions and how-to videos on using Wubbers pliers.
Why Were Wubbers Invented?
For Patti Bullard, the moment was an epiphany, an experience of sudden and striking realization. It was that moment when her interests and passions, along with her profession as a psychologist, converged to put her on a new path. Like other jewelry designers, Patti had become frustrated trying to use regular pliers to fashion her findings and components. They were uncomfortable for her hand and sometimes damaged the materials she was working with. As a psychologist, she was trained to identify feelings and deal with them in a constructive way. As a jewelry-making teacher, she wanted to help others. She realized she could channel her interest in geometric shapes used in design to create a tool specifically for jewelry-making. That moment was the inspiration for Wubbers pliers.
The Name
Wubbers—yes, it's a funny-sounding name, yet they are serious tools. Here's the explanation of the name from the Wubbers website:
The unusual name of Wubbers was chosen to portray the uniqueness of the tools. Serious tools with a sassy name. "Wubbers" represents the playful, creative spirit that is part of the business philosophy of the company.
Wubbers is a terrific name, like SONY, because it is a made-up name that doesn't mean anything else; it only means the jewelry-making pliers that Patti invented. Search for "wubbers" on the Internet and you'll see. The only results you'll get—whether you select "shopping," "images," or "videos"—will be Wubbers pliers. So when you hear the name Wubbers, you know exactly what's being talked about.

What Makes Wubbers Pliers Better?
Wubbers pliers are better than standard pliers because they are expressly designed for jewelry making with wire. Each pair of pliers in the Wubbers line is suited for a different task. For example, looping pliers feature grooved steel jaws that securely hold the wire, making it easy to wrap loops, beads and eye pins consistently without twists or uneven loops. Their smooth finish makes closed loops, jump rings and bracelet links without distorting or scratching the wire. Because of their ergonomic design, the comfortable rubber grips exert low, even pressure on the hand for extended use on designs using many components.
All Wubbers pliers are handcrafted and hand finished to ensure quality. So much so, they are guaranteed to increase your productivity and the quality of your finished design. As Patti put it:
''I also develop tools because I love to teach and share; to help people with their jobs, hobbies and art so they are more fun and profitable for them.''


Wubbers Pliers FAQ
Q: What makes Wubbers different from regular jewelry pliers?
A: Made especially for jewelry making, Wubbers pliers are handcrafted and hand finished to ensure quality. They are even guaranteed to increase your productivity and the quality of your finished design.
Q: Can I use Wubbers pliers with all wire types?
A: Wubbers pliers can be used with all wire types!
Q: Are Wubbers good for beginners?
A: Wubbers pliers are great for all jewelry makers, from beginners to professionals!
Q: What gauge wire works best with Wubbers?
A: The appropriate gauge of wire will vary based on which pliers you are using and the project you are creating.
Q: Do Wubbers pliers come in sets?
A: Wubbers plier sets are available in three varieties: regular, Baby and ProLine.
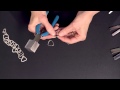
How To Use Wubbers Pliers
Now that you know how great Wubbers pliers are for jewelry making, you may be wondering, "How do I use these marvelous tools?"
Well, you're in luck! Below are several video tutorials on several types of pliers and how they work—hosted by Patti Bullard herself. It's like taking a class with the inventor as your teacher!
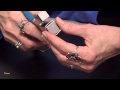
Looping Pliers
Looking for a way to make smooth, consistent loops every time? Looping pliers are just the ticket. Watch the video (or read the instructions) to learn how!
Wubbers creator Patti Bullard, PhD, shows you how to use the Wubbers looping pliers—specially engineered to create simple loops in a variety of wire gauges.
Instructions
Step 1
Place flush cut end of wire into the jaw of the pliers positioning it even with the edge of the jaw.
Step 2
Squeeze firmly and rotate the wire forming a curve. Release and repeat to form a circle/loop.
Step 3
Put the loop back on the round jaw of the pliers aligning the edge of the curved jaw where the wires meet. Squeeze jaws closed and gently pull wire straight down so the loop is centered in middle of the wire.
Triangular Mandrel Pliers
Patti shows how to use the triangular mandrel pliers to form consistent 3-sided jewelry components with wire, bezel strips or sheet metal.
Patti Bullard, PhD—creator of Wubbers pliers—shows you how to use her triangular mandrel pliers, ideal for forming 3-sided jewelry components in wire, bezel strips or sheet metal.
Instructions
Step 1
Place the end of the wire into the jaw of the Wubbers triangular mandrel pliers positioning the edge of the wire even with the edge of the jaw.
Step 2
Squeeze the pliers firmly securing the end of the wire and tightly press the wire around the jaw with your free hand, forming a triangle.
Step 3
Loosen the pliers, keeping the wire in position. Wrap the wire around the jaw once again, making sure to not rewrap over the previous wire.
Tip: Try rewrapping towards the handle to make the wire easier to take off the pliers.
Step 4
Repeat Steps 2 and 3 to create the desired amount of triangular links.
Step 5
Pull the wire from the mandrel. Using flush-cutters, cut through the middle of one side of the wire.
Tip: Often each length of triangular links may not be equal on all sides. To reshape the link, reposition it onto the smaller jaw of pliers and squeeze the pliers. Continue to reposition and turn the link until the desired shape is created.
Oval Mandrel Pliers
Learn to make consistent oval jewelry supplies from wire, bezel strips and sheet metal as you follow along with this oval mandrel pliers tutorial.

Learn to use Wubbers oval mandrel pliers to form consistent shapes from wire, bezel strips and sheet metal in this video with Wubbers inventor Patti Bullard, PhD.
Instructions
Large Oval Jump Rings
Step 1
Insert a length of wire inside the jaw of the large Wubbers® oval mandrel pliers, then close. Rotate the pliers to wrap the wire halfway around the jaw, creating a half-oval.
Pull the pliers out of the half-oval. Rotate the pliers back to starting position, then insert the jaw inside the half-oval and rotate again.
Repeat to create as many jump rings as desired.
Remove the wire from the jaw of the pliers.
Tip: Working from the coil prevents wasted wire and allows for no measuring!
Step 2
Firmly press the coil rings together then cut through all of the wire coils, separating the jump rings.
Small Oval Jump Rings
Step 1
Insert a length of wire inside the jaw of the small Wubbers oval mandrel pliers, then close. Rotate the pliers to wrap the wire half-way around the jaw, creating a half-oval.
Pull the pliers out of the half-oval. Rotate the pliers then insert the jaw inside the half-oval and rotate again.
Repeat to create as many jump rings as desired, leaving a small space between each jump ring.
Remove the wire from the jaw of the pliers.
Step 2
Set the one side of the last jump ring on the coil inside a pair of flush-cutters, then trim the excess wire. Flip the flush-cutters, set the end of the coil inside the "V" and then trim.
Repeat to trim each jump ring from the coil.
Step 3
Using a pair of chain-nose pliers or flat-nose pliers, form the perfect jump ring shape.
Square Mandrel Pliers
It's hip to be square when working with the Wubbers square mandrel pliers. Follow along with Patti as she shows you how to make crisp, consistent square and rectangular shapes in jewelry wire with her square mandrel pliers.
Wubbers creator Patti Bullard, PhD, shows you how to use the Wubbers square mandrel pliers—designed to help jewelry makers create crisp square and rectangular shapes in wire.
Instructions
Step 1
Insert a length of wire inside the Wubbers large jaw, then close. Wrap the wire around each side of the desired jaw, pressing the wire along each side to ensure the shape is straight and even.
Open and insert the wire inside the jaw, making sure the wire doesn't cross itself, then close. Continue to wrap the wire around each side of the jaw while pressing it with a thumb.
Repeat working toward the inside of the mandrel to create the desired number of square jump rings.
Tip: Working from the coil prevents wasted wire and allows for no measuring!
Step 2
Hold the square coil in place while removing the pliers.
Cut through one side of the coil to separate each square jump ring.
Note: There is a spring in the coils, which will deform the shape of the square jump rings if not held into place before cutting.
Shaping the Square Jump Ring
Step 3
Insert the square jump ring into the jaw of the pliers, making sure the opposite side of the opening is inside the jaw, then close. Open the jaw, then remove the square jump ring. Insert a side adjacent to the opening of square jump ring into the jaw then close. Repeat. Insert the side with the opening of the square jump ring then close.
Work each side of each square jump ring back and forth to shape.
Step 4
Repeat for all square jump rings to form each into perfect squares.
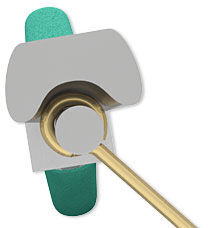
Round and Bail-Making Pliers
Patti shows you how to use her bail and round mandrel pliers to make your own jewelry components for handmade jewelry designs.
Learn to use Wubbers bail-making and round mandrel pliers to form consistent bails, wrapped loops, eye pins, jump rings—and more—in this video with Wubbers inventor Patti Bullard, PhD.
Instructions
Step 1
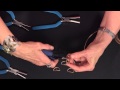
Cut both ends of one 2-inch piece of wire so they are flush. Insert the wire inside the larger jaw of the small bail-making pliers, with the edge of the wire snug against the edge of the jaw.
Close the jaw and twist the pliers to create a simple loop.
Step 2
Insert the wire inside the jaw of the large bail-making pliers with the simple loop on the opposite side, making sure the loop is facing upwards.
Close the jaw. Roll the wire around the smaller jaw until the wire is almost closed.
Remove the wire from the jaw of the pliers.
Step 3
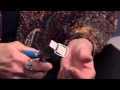
Insert the end of the wire so it is flush against the edge of the Baby Wubbers flat-nose pliers. Close the jaw. Gently bend the wire at the jaw of the pliers, creating a little crook.
Step 4
Repeat Steps 1 - 3 to create a second ear wire.
Sorrento Scroll Links Instructions
Step 1
Trim the end of a length of wire so it is flush.
Working from the coil, insert the length of wire into the jaw of the round mandrel pliers. Close the jaw. Roll a loop around the larger jaw by rotating your wrist while holding the pliers. Remove the wire from the jaws.
Tip: Working from the coil keeps from wasting wire and allows for no measuring!
Step 2
Moving past the loop, reposition the wire into the jaw of the pliers. Close the jaw. Roll a loop around the smaller jaw 1-1/4 times in the opposite direction. Pull the pliers out of the loop.
Step 3
Moving past the loop, reposition the wire into the jaw of the pliers. Close the jaw. Roll a loop around the larger jaw in the opposite direction until the wire crosses. Trim the excess wire.
Step 4
Using flat-nose pliers, reposition the end of the loop to close the loop.
Note: There are several different sizes of Wubbers Bail-Making and Round Mandrel Pliers.
Half-Round Mandrel Pliers
Need D-rings for purse and bag handles? Want a uniquely shaped jewelry component? Patti shows you how to make these and more with her Wubbers half-round mandrel pliers in this video.
Follow along with Patti Bullard, PhD, Inventor of Wubbers Pliers, to see how the half-round mandrel pliers make it easy to form consistent shapes with jewelry wire for creating complicated designs easily and quickly.
Instructions
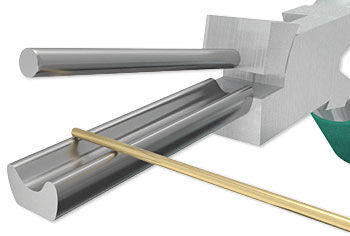
Step 1
Place the end of the wire into the jaw of the Wubbers half-round mandrel pliers, positioning the edge of the wire even with the edge of the jaw. Close the pliers.
Tip: Work directly off the wire spool to prevent waste.
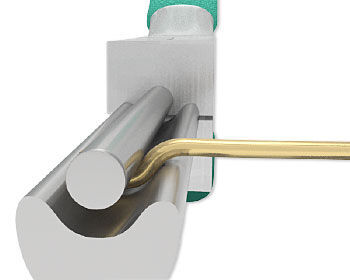
Step 2
Squeeze the pliers firmly, securing the end of the wire in place, then press the wire around the outside of the half-round mandrel.
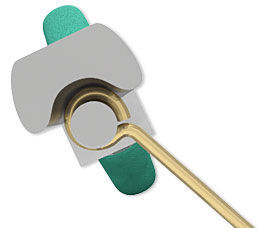
Step 3
Open the jaw of the pliers, keeping the wire in position, then place the wire between the jaw and press firmly closed. Wrap the wire around the jaw once more, making sure to not wrap over the previous wire.
Continue to wrap the desired number of half round rings, working toward the back of the pliers.
Step 4
Pull the wire from the mandrel, holding the wire tightly in place. Use flush-cutters to cut through the center of the flat side of the rings.
Tip:
- Use the resulting links to connect a handle to a handbag or purse or use as links in a jewelry design
- Use multiple sized mandrels without cutting between links to create nested shapes in the design
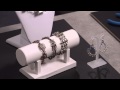
Jumbo Square Pendant Project
Patti walks you through the steps on how to create a pendant out of Argentium® silver wire with the square mandrel pliers, butane torch and texturing hammer.
Patti Bullard, PhD and inventor of Wubbers jewelry-making pliers, walks you through the steps on how to create a pendant out of Argentium silver wire with the square mandrel pliers, butane torch and texturing hammer.
Instructions
Step 1
Cut a length of 12-gauge Argentium dead-soft silver wire long enough to work around a pair of Wubbers jumbo square mandrel pliers.
Insert the wire between the jaws of the jumbo square mandrel pliers, lining up the edge of the wire with one edge of the larger jaw. Close and grip the pliers, then shape the wire around each side of the large jaw, forming a square. Finish by bringing the wire back through the jaws parallel to the first side. Close the pliers to press the parallel wires flat.
Use a pair of heavy-duty flush-cutters to cut each of the parallel wires flush in the middle, so the ends meet.
Tips:
- Larger gauges of dead-soft wire may be stiff to shape by hand. If needed, use a pair of flat- or bent-nose pliers to assist in wrapping the wire around the jaws of the square mandrel pliers.
- Work directly from the wire spool to reduce wire waste
- Save scraps of Argentium wire for recycling into other projects
Step 2
Align the ends of the wire, ensuring that a bit of pressure is present. Work the wire back and forth if needed.
Note: The wire may not be square. This is fine, as it is more important at this point that the two ends of wire meet uniformly with a bit of tension.
Fusing
Step 3
Set up a soldering station by first placing down a ceramic tile, then placing a charcoal block on top.
Note: The ceramic tile will provide protection for the work surface, and the charcoal block will help prevent discoloration from occurring during the fusing process.
Step 4
Place the formed Argentium silver wire square on the charcoal block. Then use a hand-held butane torch to evenly heat the wire. Although not necessary, heating the wire evenly will help reduce discoloration.
Continue to heat the wire evenly, carefully watching until the surface appears to shine or starts to glow. Once this occurs, focus the flame on and around the joint where the two ends meet. Continue to heat the joint until the metal begins to flow slightly and the joint disappears.
Tips:
- Ignite the torch with the flame size lever in a middle position.
- Use the locking feature to lock the flame on to make the torch easier to work with, then adjust the size of the flame as needed.
- When not in use, always ensure the safety lever is in the safe position.
Let the wire cool for approximately 30 seconds on the charcoal block. Then, using a pair of tweezers, move the wire onto the cooler ceramic tile. Continue to let cool for a few more seconds, then submerge the wire into water.
Note: Due to the composition of Argentium silver, it is important not to touch the wire while it is hot, as it may fracture.
Remove the wire from the water and dry. Check for a solid connection by applying slight pressure to the fused joint. Use a needle file or polishing sandpaper and file away any discoloration that may have occurred during the fusing process.
Shaping
Step 5
Insert the fused wire back into the large jaw of the jumbo square mandrel pliers with the fused edge between the jaws.
Note: Heating wire may cause slight shrinkage. If this occurs and the fused wire no longer fits onto the large jaw of the jumbo square mandrel pliers, it is fine to angle the wire off of the front.
Press the jaws of the jumbo square mandrel pliers closed to flatten. Repeat, starting with the opposite side of the fuse, to press each side of the wire together to square the corners and straighten any uneven sides.
To sharpen the corners, insert the wire onto the smaller jaw of the square mandrel pliers. Hold the wire snug against the small jaw and press down on the pliers. Rotate the wire and, on the same corner, press down again. Repeat on the other three corners.
Tip: If one side appears higher than another, insert the wire back into the large jaw of the jumbo square mandrel pliers and, while lifting up on the side that is high, press down on the pliers. Repeat as needed to work down any high sides to form a uniform square.
Step 6
Place the shaped wire onto a smooth steel block. Using a texturing hammer with interchangeable faces, attach a smooth domed face to one side and begin to tap along one side of the wire while holding the opposite side.
Tip: If finger safety is a concern, hold the wire approximately 1/2 off the steel block and hammer the side that is resting on the block.
Continue to flatten each side, including the corners, until the desired thickness is achieved. Use the edge of the smooth curved face of the hammer to smooth out the outside edge of the wire.
Note: To prevent distortion, hammer straight down from the top and keep a uniform width, starting from one side and working around to the last side. Multiple passes with the hammer may be required.
If desired, attach a textured head to the hammer then gently hammer around each side to add texture to the wire.
Step 7
Pass a 16-gauge or heavier jump ring through the square pendant and close, working it back and forth until a slight tension is achieved.
Note: Smaller gauges of jump rings may require fusing or soldering to secure the pendant.
Step 8
Use a brass brush to even out and smooth any rough areas on the pendant. Optionally, insert the pendant into a tumble polisher.
Wrap a Sunshine® polishing cloth around a nail file and, while bracing the pendant against the steel block, polish the face (textured side) of the pendant.


These are just a few of the many styles of pliers available from the Wubbers line. Explore other mandrel shapes, standard pliers like flat-nose, chain-nose and round-nose, specialty tools like hole-punching pliers—and more!
Go forth and get creative, comfortably, with Wubbers!
Shop for Your Materials Here:


Have a question regarding this project? Email Customer Service.
Copyright Permissions
All works of authorship (articles, videos, tutorials and other creative works) are from the Fire Mountain Gems and Beads® Collection, and permission to copy is granted for non-commercial educational purposes only. All other reproduction requires written permission. For more information, please email copyrightpermission@firemtn.com.