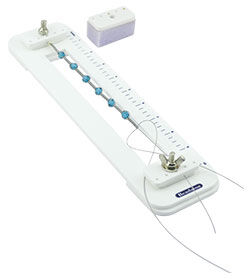
How to Use the Beadalon® Tying Station

Courtesy of Beadalon®

- Holds your design in place for two-handed tying and beadwork
- Extend your design using the foam pad plate included
- Ruler guide for sizing your design and for laying out patterns
Instructions
Step 1
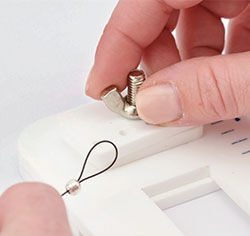
Unscrew the wing nut at the upper part of the tying station. Make a loop with your wire/cord and tie or crimp it.
Step 2
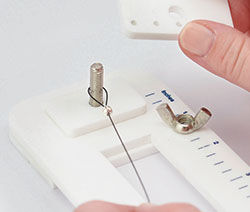
Remove the plate and place the looped wire/cord around the post. Replace the plate.
Step 3
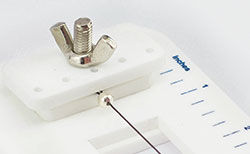
Tighten the wing nut.
Step 4

Loosen wing nut at the base of the Tying Station. Slide cord between acrylic plates. Tighten as needed to keep cord secure.
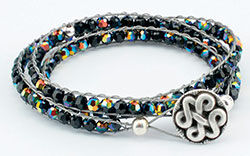
Step 5

Enjoy the convenience of having both hands available to design intricate jewelry, such as Shamballa style and wrap bracelets.

Step 6
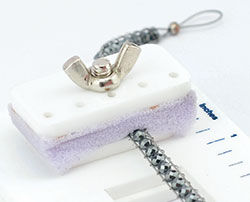
Tip: If your design is longer than the tying station, simply remove the upper plate and add the foam pad. Pull your design through and gently tighten the wing nut to continue working on your jewelry piece.
Shop for Your Materials Here:


Have a question regarding this project? Email Customer Service.
Copyright Permissions
All works of authorship (articles, videos, tutorials and other creative works) are from the Fire Mountain Gems and Beads® Collection, and permission to copy is granted for non-commercial educational purposes only. All other reproduction requires written permission. For more information, please email copyrightpermission@firemtn.com.
The Beadalon tying station was specifically designed so you can keep both hands free, making it easier to create Shamballa-style macramé and wrap bracelets with wire, leather, waxed cord or other stringing material.