Warping a Mirrix Loom for Beadwork with the Shedding Device

Instructions
To figure out what warp coil to use, put about two inches worth of beads on a needle and count the number in an inch. The coil should have approximately that number of dents. Numbers do not have to match perfectly. For example, you can use either an eighteen or sixteen dent coil with size 11/0 Delicas.
Note: This method is the same for warping an 8-inch Lani Loom with the shedding device.
Loom Setup
Step 1
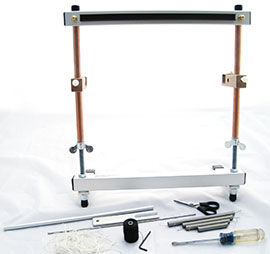
Line up the wooden clips 2 to 3 inches from the bottom of the top beam.
Note: If your loom has the plastic black clips, you will need to attach them to the back of the loom with the indentations for the warping bar facing the inside.)
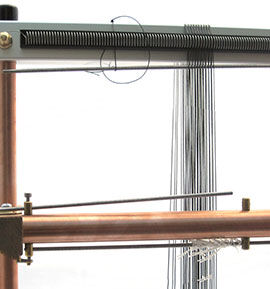
Warping
Step 2
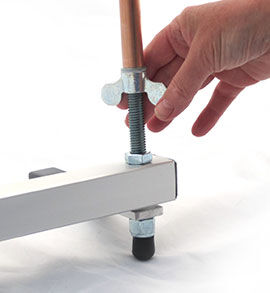
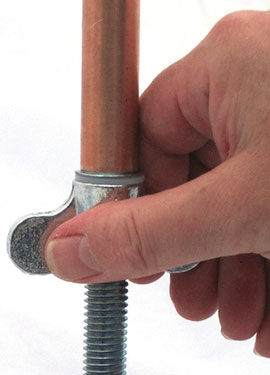
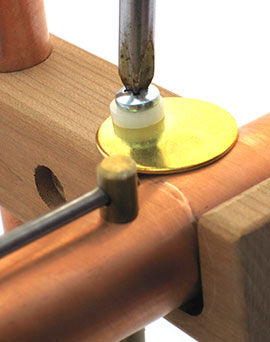
Adjust height of loom to accommodate the length of weaving you plan to make. Do this by rotating the wing nuts (clockwise to shorten the loom and counter clockwise to lengthen the loom.) Make sure you have at least an inch of threaded rod exposed at the bottom in order to be able to adjust your loom for rotating the warp to the back.
You can extend your loom to the point where the copper covers at least three inches of the threaded rod. Going beyond that point will potentially make your loom unstable. Make sure the loom is even on both sides.
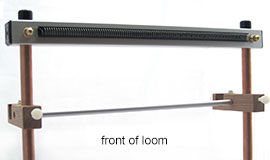
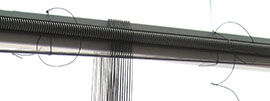
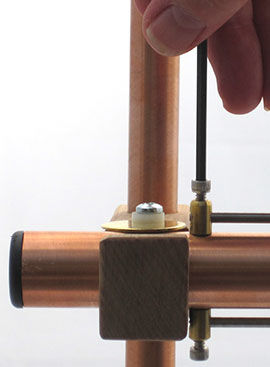
Step 3

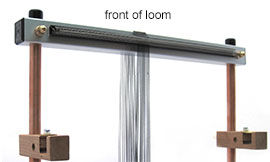
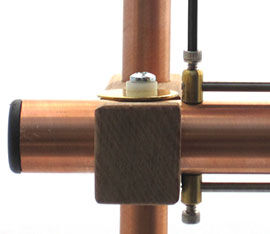
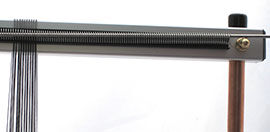
Attach the spring to top of the loom by hooking both ends around the brass nuts, making sure the spring lies flat in the black plastic tray.
Step 4
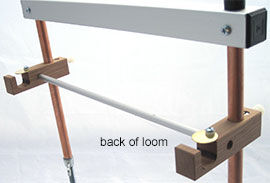
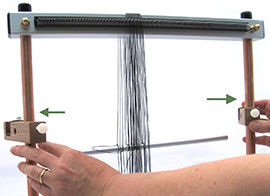
Place warping bar inside clips. Clips will be slightly off parallel in order to hold the bar. Push clips toward the bar until it is firmly held in place.
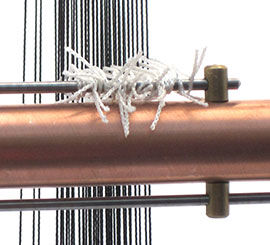
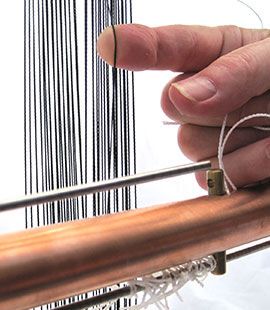
Step 5
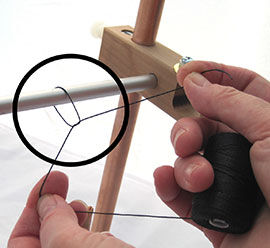
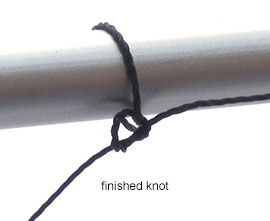
Use a square knot to tie your warping thread to the warping bar. Make sure you have enough room to accommodate the width of your piece. While warping the loom, you want to keep an even tension on your thread. You will adjust the loom when you are done warping to put a stronger tension on.
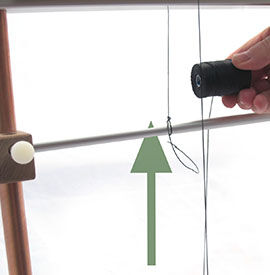
Step 6
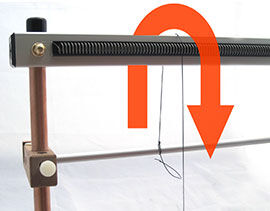
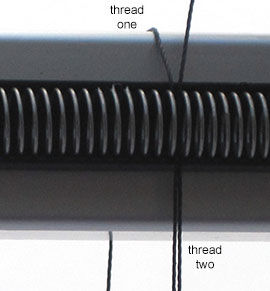
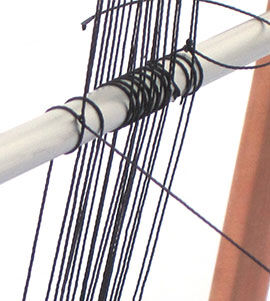
Take the thread up behind the loom and down through one dent (a dent is a space between each coil in the warp coil spring).
Step 7

Take the thread down the front of the loom and around the bottom beam.
Step 8
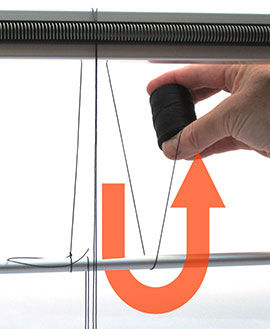
Continue up the back of the loom until you reach the warping bar.
Step 9
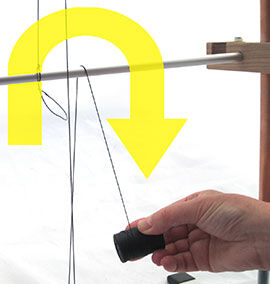
Do a u-turn around the bar.
Step 10
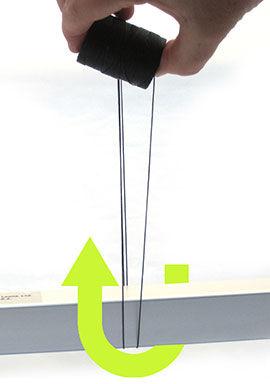
Head back down the back of the loom and go under the bottom beam from the back.
Step 11
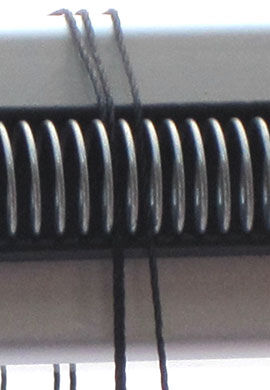
Bring threads up the front of the loom to the warping coil (spring) and into SAME dent you just placed your threads in. (You will have two threads in each dent.)
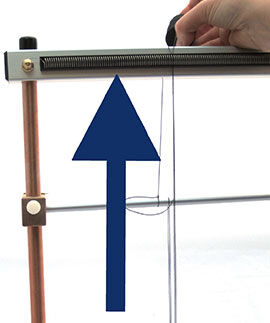
Step 12

Go around the top beam and head down the back of the loom.
Step 13
When you reach the warping bar, do another u-turn and head up the back of the loom to the top beam.
Step 14
When you reach the warp coil (spring), place your warp in the next dent over.
Step 15
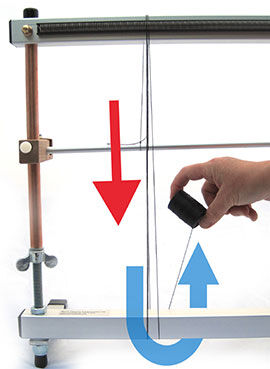
Bring your thread down the front of the loom and around the bottom beam.
Step 16
Repeat steps 8 to 15 until you have reached the desired number of warps for your piece.
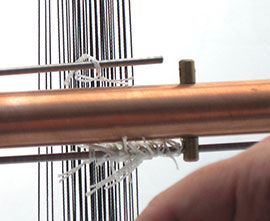
Note: If you run out of warp, DO NOT WORRY! Simply tie off to the bar using a square knot and tie on your new thread next to it. Continue as if it was the same thread.
Step 17
Tie off with a square knot, making sure to keep the appropriate tension on that last string.
Step 18
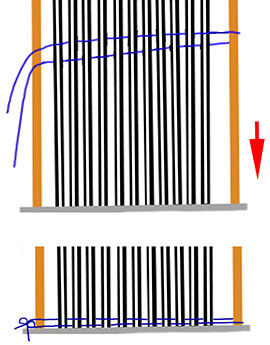
Release tension on loom so you are able to lower the warping bar. (Do this evenly on both sides.) It might only require one clockwise turn of the wing nuts.
Step 19
Swing clips out to release warping bar.
Step 20
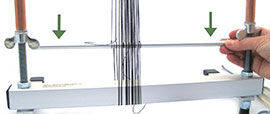
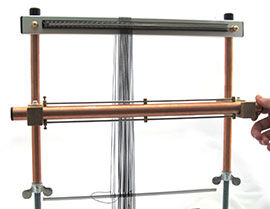
Pull down warping bar until it is about two inches above the top of the bottom beam.
Then, put tension on warp by rotating wing nuts counter clockwise. Put enough tension on the warp so none of the threads are baggy or loose.
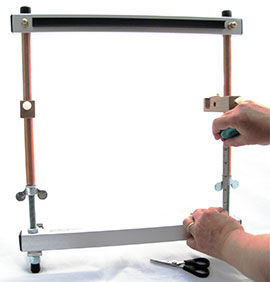
Step 21
If you do not have a bottom spring kit, you may want to separate your pairs of warp threads (the two warp threads in each dent in your warp coil) to make weaving your first row easier. To do this, take a thread about two and a half times the width of your loom and weave through each pair of warp threads. You should do this near the top of the loom so finding the pairs is easier. Then, loop around the side bar and weave back through. Once you’ve done this, slide the thread down to the bottom of the loom and tie it around the other bar.
Step 22
Swing clips around to front of loom.
Step 23

Loosen screws in brass plates on clips.
Step 24

Move brass plates out of the way.
Step 25
Place shedding device into clips.
Step 26
Swing brass plates over bar on both sides and tighten.
Note: If you have black clips please refer to the instructions that came with your loom.
Step 27
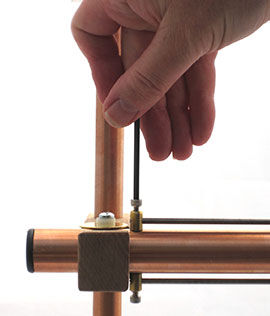
Loosen screw that holds in top heddle bar (the heddle bars are the two bars on the top and bottom of the shedding device that will eventually hold the heddles to create different sheds).
Step 28
Push the heddle bar partway out and tighten screw slightly.
Step 29
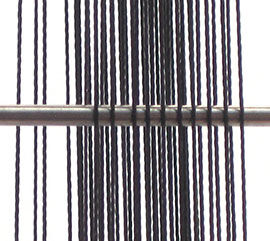
Weave the spring bar between the warps, separating the two warps in each dent. Tie the bar to the top of the loom to keep it loosely in place.
Step 30

Place a heddle around one of the threads in the first dent. It doesn’t matter which thread you choose at this point. Loop onto heddle bar. Continue doing this with one thread from each dent.
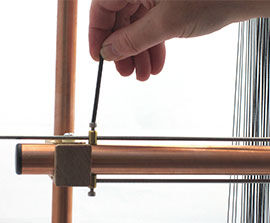
Step 31
Release screw and reinsert bar. Tighten screws using allen wrench. Make sure bar is flush with side of clip.
Step 32
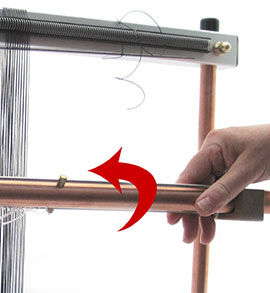
Rotate shedding device.
Step 33
Loosen other heddle bar (which should now be on the top of the shedding device) with the allen wrench.
Step 34
Remove heddle bar partway and tighten slightly.
Step 35
Insert heddle around first warp that does not already have a heddle on it. (Bring the warp without a heddle on it to the right of the warp with a heddle on it in each dent) Continue doing this with every other warp, making sure there is only one heddle on each warp. Checking the spring bar will help you locate which warps already have heddles on them.
Step 36
Put bar back and tighten screw.
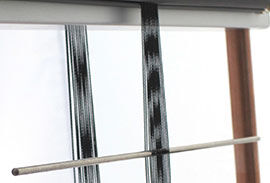
Step 37
Untie and take out spring bar and insert in warp coil (spring) over warp to keep it from slipping out of the warp coil (spring).
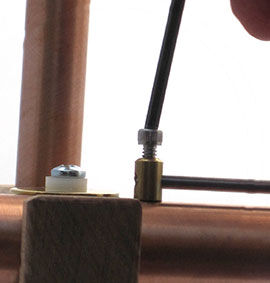
Step 38
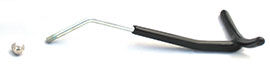
Remove acorn nut from handle.
Step 39
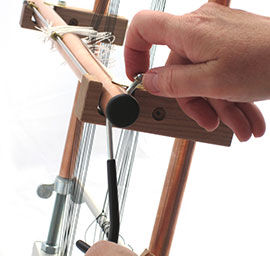
Stick handle in shedding device and put nut back on.
Step 40
Begin weaving!
Have a question regarding this project? Email Customer Service.
Copyright Permissions
All works of authorship (articles, videos, tutorials and other creative works) are from the Fire Mountain Gems and Beads® Collection, and permission to copy is granted for non-commercial educational purposes only. All other reproduction requires written permission. For more information, please email copyrightpermission@firemtn.com.