Artistic Wire® Teardrop Connector Jig

Courtesy of Beadalon®
Instructions
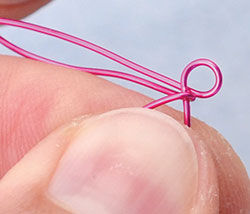
Step 1
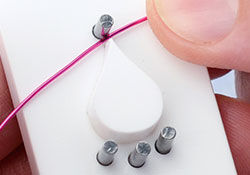
Place the end of wire (20-24 gauge) 6'' (15cm) in length across findings form as shown, tail should only be a few millimeters off the form.
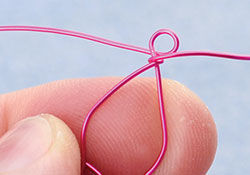
Step 2
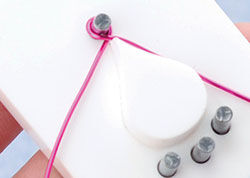
Wrap the wire (counterclockwise) around the single peg at the top, while holding the tale with your non-dominant hand, then on to the next peg.
Step 3
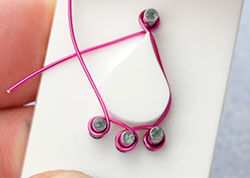
Continue to take a single revolution with the wire around each of the pegs (counterclockwise). Then cross between the top peg and the acrylic form, but do not wrap onto the peg.
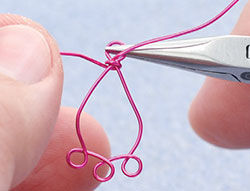
Step 4
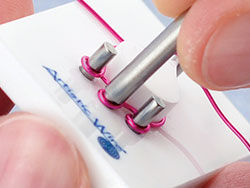
Use the included pusher tool to push the design all the way down to the surface of the finding form.
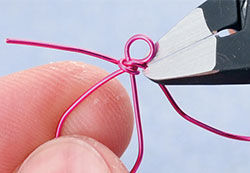
Step 5
Hold the center of the connector as shown and wrap the left wire around the other wire.
Step 6
Wrap the left wire a full revolution around the right wire.
Step 7
Hold the top ring with chain-nose pliers as shown and wrap the other wire around the intersection until the component is secure.
Step 8
Carefully cut each of the ends with a flush-cutter and tuck them in as much as possible with chain nose pliers.
Have a question regarding this tutorial? Email Customer Service.
Copyright Permissions
All works of authorship (articles, videos, tutorials and other creative works) are from the Fire Mountain Gems and Beads® Collection, and permission to copy is granted for non-commercial educational purposes only. All other reproduction requires written permission. For more information, please email copyrightpermission@firemtn.com.