Artistic Wire® Toggle Jig

Always use safety glasses when working with wire and wire tools. Intended for adult use only.
Instructions
Step 1
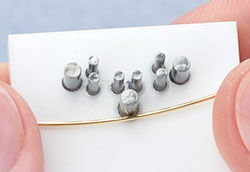
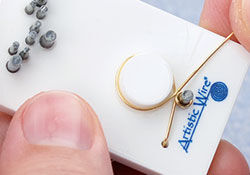
Use a piece of wire (20-24 gauge) 7-inch (17.8cm) in length, center the wire on the lower center peg of the toggle form (top group of pegs).
Step 2
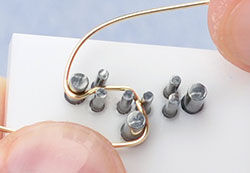
Wrap the right wire half way around the lower center peg (counterclockwise) and up through the two pegs directly above it. Continue by moving the wire to the left and around the left peg.
Step 3
Continue by moving the wire back across to the right and down between the two pegs as shown.
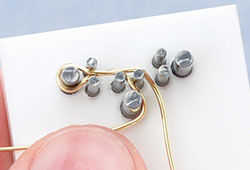
Step 4
With the left wire, curve it half way around the center peg, through the two pegs directly above it and right across to the end peg and around it (counterclockwise).
Step 5
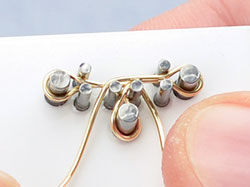
Continue with the same wire back across the form and bend the wire down between the two pegs as shown.
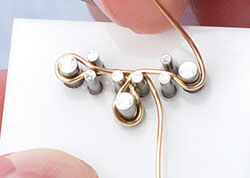
Step 6
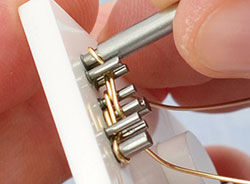
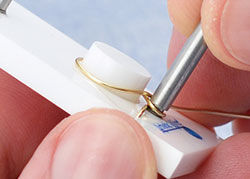
Use the pusher tool to flatten all the wire intersections and loops down onto the surface of the findings form.
Step 7
Hold one end of the toggle bar and begin to wrap the opposite end with the wire on that side.
Step 8
Continue to wrap this side until the wrap is at the loop on the end, make sure your wraps are tight next to one another.
Step 9
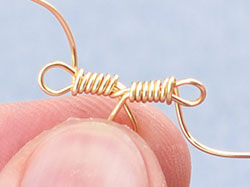
Make the same wraps on the other side of the toggle bar.
Step 10
Twist the center ring 1/2 rotation. (This step is optional.)
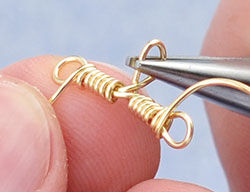
Step 11

Carefully cut the "tail" of the wire on one side of the toggle bar, make sure not to scar the loop. Do the same on the other side of the toggle bar. Tuck the ends into the center of the wires.
Step 12
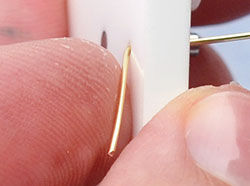
Insert the end of wire (20-24 gauge) 7-inch in length into the hold in the findings form, then bend the end down as shown.
Step 13
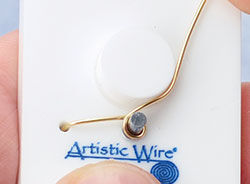
Move the wire across the findings form onto the peg, wrap (clockwise) one revolution, then up onto the acrylic form (counterclockwise).
Step 14
Make one full revolution on the acrylic form.
Step 15
Use the pusher tool to flatten the wires around the peg.
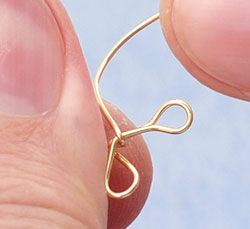
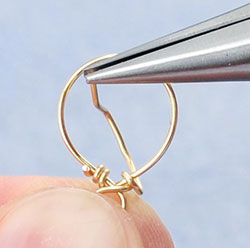
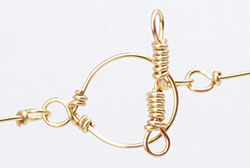
Step 16
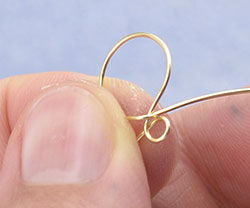
Unbend the wire and remove the toggle ring from the findings form. Hold the toggle ring as shown.
Step 17
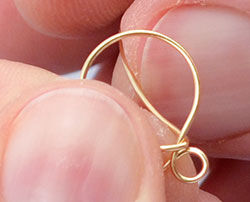
Bend the right-facing wire as shown around the right wire just above the intersection of the wires.
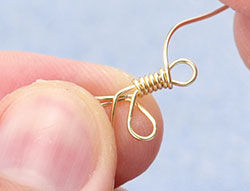
Step 18
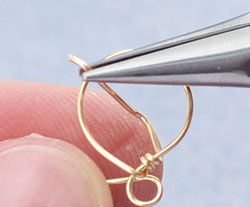
Bend the wire so that the end of the wire will go through the circle easily, wrap using the pliers tightly around the right side of the toggle ring. Be careful not to deform the large circle or the small circle.
Step 19
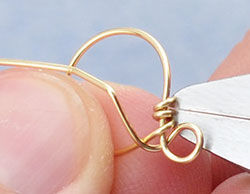
Carefully cut the "tail" of the wrapping wire flush, make sure not to damage the large ring wire.
Step 20
Using the same technique wrap the other "tail" wire onto the opposite side of the large ring. Wrap tightly and make the wraps look like a mirror image.
Step 21
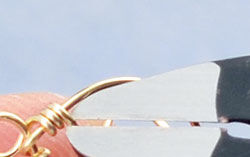
Use the flush-cutter once again to remove the end of the wire.
The toggle is now ready to be used on your jewelry design.
Note: Some people prefer to turn the findings form instead of wrapping the wire around the pegs.
Have a question regarding this tutorial? Email Customer Service.
Copyright Permissions
All works of authorship (articles, videos, tutorials and other creative works) are from the Fire Mountain Gems and Beads® Collection, and permission to copy is granted for non-commercial educational purposes only. All other reproduction requires written permission. For more information, please email copyrightpermission@firemtn.com.