How to Set and Remove Faceted Gems Using Gem Setting Pliers and Prong Lifter and Prong Pusher Tools
Do you need to update a jewelry design? Want to switch out the gemstone for a preferable one? Or maybe you want to reuse a gemstone from a jewelry design you no longer need. Learn how to set and remove faceted gems in this video resource. Discover the correct use of gem setting pliers as well as how to use prong lifter and prong pusher tools to modify your gemstone settings to create secure settings without damaging the stones.
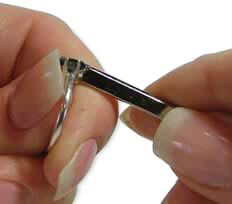
Instructions
Proper use of gem setting pliers will make the job easier and reduce the risk of marring your stones and settings.
Step 1
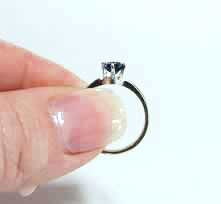
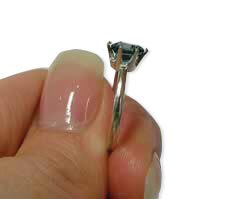
Set the stone into the setting.
Step 2
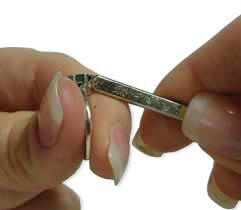
Adjust the wheel above the gem setting plier jaws, opening the jaws enough to bridge the distance between opposing prongs on the setting.
Step 3

Place the gem setting pliers so one jaw is resting along the side of one prong and the other jaw is resting on the top of the opposing prong.
Step 4
Squeeze the handle on the gem setting pliers so the jaws close, compressing the prong and capturing the stone.
Step 5

Turn the pliers around and rest one jaw along the side of the prong just closed, and the other on the tip of the opposing prong. Squeeze the handle on the pliers, compressing the prong, capturing the stone.
Step 6
Repeat all the way around the setting until all prongs have been tightened around the stone.
Using a Prong Lifter and Prong Pusher
Instructions
Instructions
Gem setting pliers are best for the delicate finishing work of perfectly setting a stone in a setting. To remove a gemstone from a setting, use a prong lifter, a notched metal tool with groves capable of bending prongs away from gems without damaging them. A prong pusher, on the other hand, is best for the initial stone setting. It has a small, grooved tip capable of guiding prongs to nestle gently around the gemstone being set. Finish with gemstone setting pliers, which have the dexterity to do the delicate work of perfecting the jewelry design.
Step 1

Match a notch on the prong lifter to a prong on your setting.
Step 2
Once you have the right fit, press the correct notch against the top of one prong. Push outward, lifting the prong slightly.
Step 3
Repeat on the prong on the other side of the setting.
Step 4
Continue around the setting until you're able to make the necessary adjustment.
Step 5
To close the setting back up, place the prong pusher along one side of an open prong. Gently press on the tool, working in an upwards motion, maintaining the original angle of the prong. Continue pressing and gently rolling the tool along the prong. Work until the tip of the prong is pressing against the stone. Repeat on the prong on the opposite side of the setting.
Step 6
Repeat all the way around the setting until all prongs are closed evenly. If necessary, go around the setting again until the prongs are closed around the stone securely.
Shop for Your Materials Here:


Have a question regarding this resource? Email Customer Service.
Copyright Permissions
All works of authorship (articles, videos, tutorials and other creative works) are from the Fire Mountain Gems and Beads® Collection, and permission to copy is granted for non-commercial educational purposes only. All other reproduction requires written permission. For more information, please email copyrightpermission@firemtn.com.